
Supplier Risk Microsoft Sentinel Integration
The Censys Supplier Risk Microsoft Sentinel integration sends risk events to your Log Analytics workspace for correlation and use in incident workflows. It also adds a workbook dashboard with visualizations you can use to filter and review your supply chain risks.

Use this integration to centralize data in Sentinel so your team can effectively understand and take action to remediate risks in your supply chain.
Prerequisites
-
A Log Analytics workspace with Microsoft Sentinel enabled.
- The workspace name, resource group, and location (for example,
eastus)for your workspace. Obtain this information from the Overview page for your Log Analytics workspace. - The resource ID for your workspace. It is located under Overview > Settings > Properties and uses the following format.
/subscriptions/<subscription-id>/resourceGroups/<resource-group>
/providers/Microsoft.OperationalInsights/workspaces/<workspace-name>
- The workspace name, resource group, and location (for example,
-
An Azure subscription with contributor access to the resource group of your Microsoft Sentinel workspace.
-
An Azure user with Owner or User Access Administrator on your resource group to handle role assignment access.
-
Permission to register an app in Microsoft Entra ID.
-
The deployment template file (
mainTemplate.json). Obtain this from Censys. -
Your Censys Platform organization ID.
- To obtain your organization ID:
-
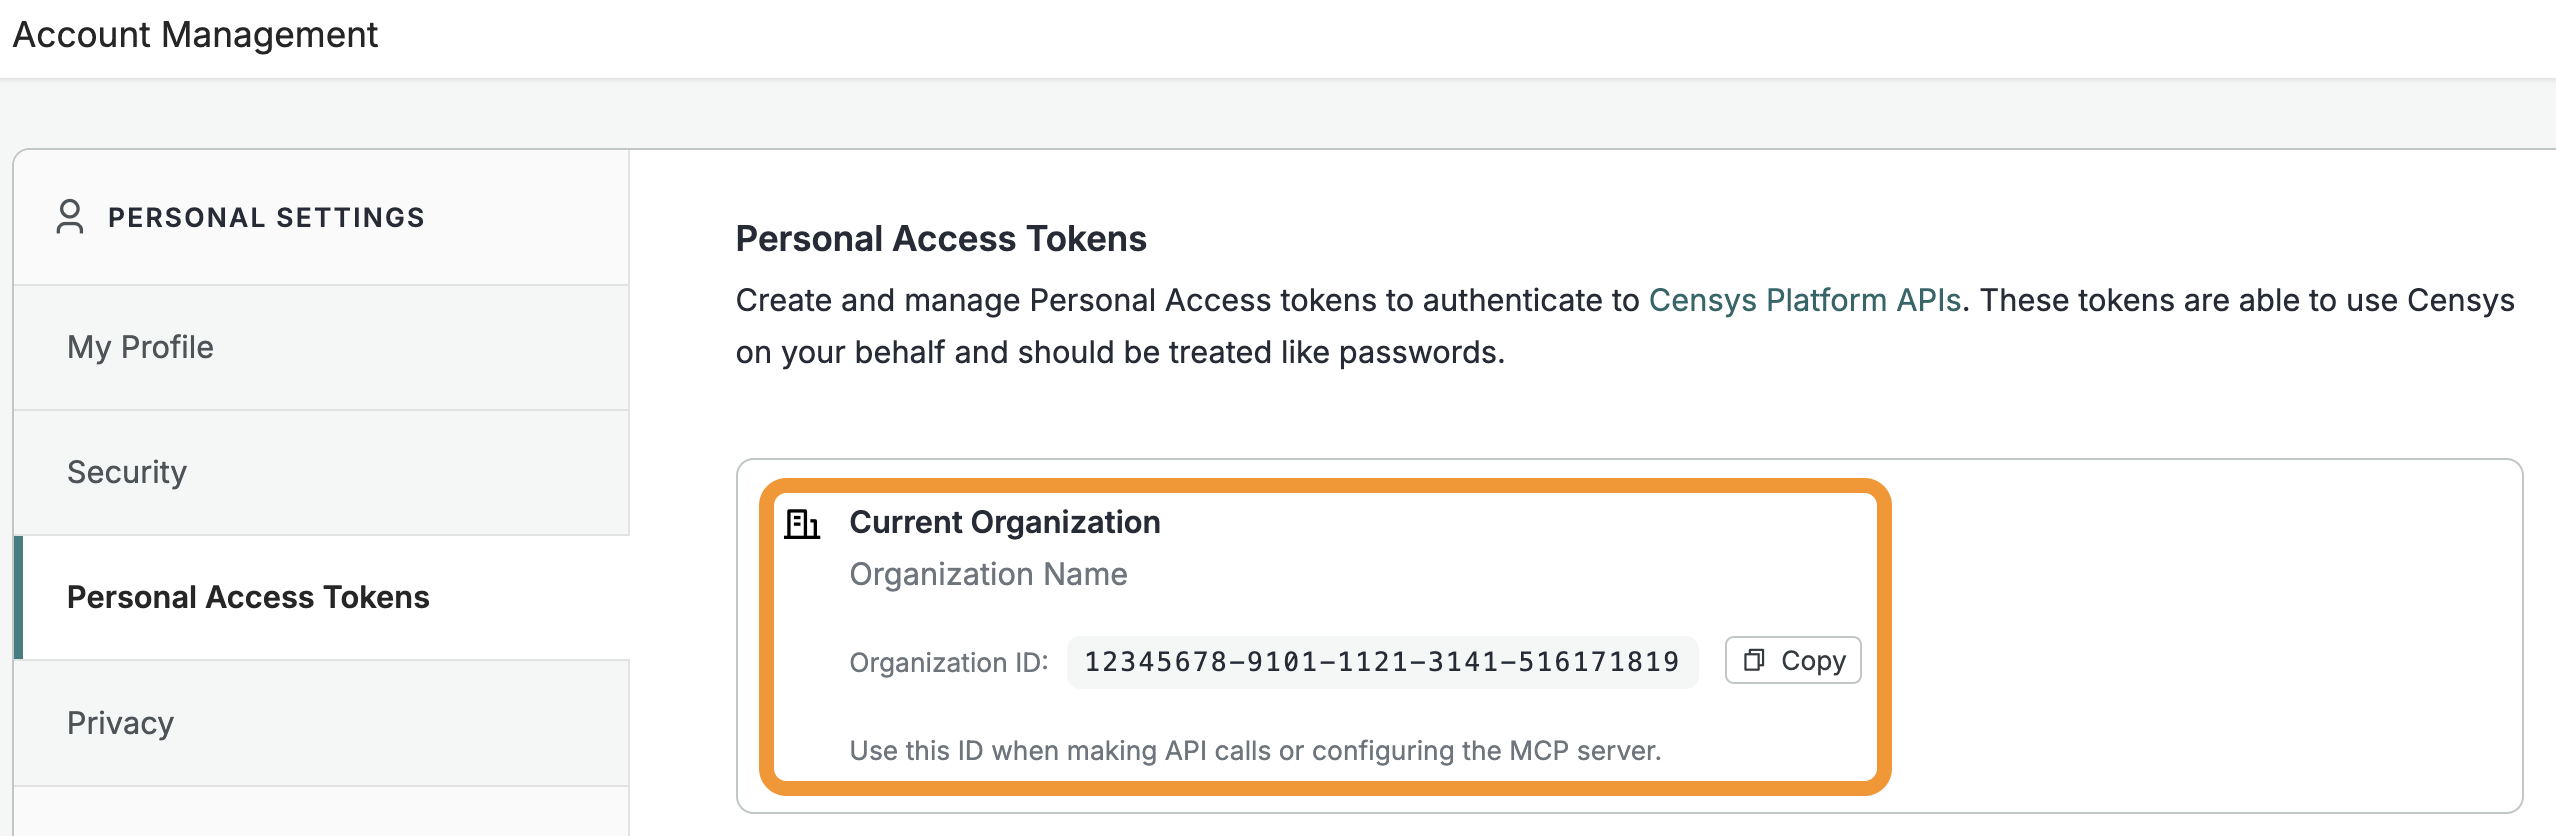
Open the Platform web console and ensure that your organization account is selected. Go to Settings > Account Management > Personal Access Tokens.
-
The ID for your organization is shown in the "Current Organization" box. Click Copy to copy it to your clipboard.
-
- To obtain your organization ID:
-
A Censys Platform Personal Access Token (PAT). Instructions on how to create and manage PATs are available in the API documentation.
- The user associated with the PAT must have access to the Supplier Risk module.
1. Install the Supplier Risk template in Azure
First, deploy the integration in Azure using the template file provided by Censys.
- Sign in to the Azure portal.
- In the search box, type "Deploy a custom template" and select it.
- Select Build your own template in the editor.
- Select Load file, choose
mainTemplate.json, and select Save. - On the next page, set the following values.
Field Value Subscription The subscription of your workspace. Resource group The resource group of your workspace. Region The region of the resource group. Workspace The name of your Log Analytics workspace. Workspace-location The location of your workspace, for example eastus.Workbook1-name Leave the default Censys Supplier Riskvalue.Location Leave the default value. - Select Review + create, then select Create.
- Wait until the page shows "your deployment is complete."
Check your installation
- Open Microsoft Sentinel and select your workspace.
- Go to Content management > Content hub.
- Filter by Status: Installed and search for "Censys Supplier Risk."
- Confirm that the integration is listed.
2. Register the Supplier Risk Entra ID application
- In the Azure portal, open Microsoft Entra ID.
- Go to App registrations > New registration.
- Enter a name, for example "Censys Supplier Risk," and select Register.
- On the Overview page, copy and save the Application (client) ID and the Directory (tenant) ID.
- Go to Certificates & secrets > Client secrets > New client secret.
- Enter a description, select an expiration, and select Add.
- Copy and save your new secret in a secure location. The value is shown only once.
- Go back to Microsoft Entra ID and select Enterprise applications.
- Search for your application by name and open it.
- On the Overview page, copy and save the Object ID.
3. Deploy the data connector in Azure
- Open Microsoft Sentinel and select your workspace.
- Select Configuration > Data connectors.
- Search for and select Censys Supplier Risk (using Azure Functions).
- Select Open connector page.
- Scroll to "Option 1 - Azure Resource Manager (ARM) Template."
- Select Deploy to Azure.
- On, the custom deployment page, select the Subscription and the Resource group of your workspace.
- Enter the following values from the following table.
Field Value Censys SR Function Name A name prefix of up to 10 characters. Default: CensysSR.Censys Api Key Your Censys Platform PAT. Censys Organization Id Your Censys Platform organization ID. Censys Start Date Time Optional. Start time in UTC, for example 2026-10-01T00:00:00Z. Leave empty to collect all available events. Censys Supplier Names Optional. Supplier names separated by *, for exampleCensys*ExampleCo. Leave empty for all suppliers.Censys Risk Names Optional. Risk names separated by *, for exampleExposed SMTP Service*Self-Signed Certificate. Leave empty for all risks.Censys Change Types Optional. Risk change status. Any of opened,resolved, andreopened, separated by commas. Leave empty for all.Censys Severity Optional. Risk severity. Any of LOW,MEDIUM,HIGH, andCRITICAL, separated by commas. Leave empty for all.Censys Rapid Response Optional. truefor Censys ARC Rapid Response risks only,falseto exclude them. Leave empty for both.Azure_Client_Id Your application (client) ID. Azure_Client_Secret Your client secret value. Azure_Tenant_Id Your directory (tenant) ID. Azure_Entra_Object_Id The object ID of your enterprise application. WorkspaceName The name of your workspace. Location The location of your workspace. Default: the location of the resource group. Censys Risk Events Table Name Leave the default CensysRiskEvents_CL.Censys Risk Events Collection Schedule Leave the default 0 */10 * * * *(every 10 minutes)Censys Supplier and Risk List Refresh Schedule Leave the default 0 */30 * * * *(every 30 minutes)AppInsightsWorkspaceResourceID The workspace Resource ID described in the prerequisites section of this document. Censys SR Function Log Level Leave the default INFO. - Select Review + create then select Create.
- Wait until the page shows "your deployment is complete."
4. Verify Supplier Risk data is present
Data appears about 10 to 15 minutes after deployment. A large organization may need several runs. Each run collects part of the data, and the next run continues from where the previous run stopped.
- Open Microsoft Sentinel and select Logs.
- Run the following query and confirm that it returns rows.
CensysRiskEvents | take 10 - Run the following query to see the number of events.
CensysRiskEvents | summarize Events = count(), LastEvent = max(IngestedAt) - Open Data connectors, select Censys Supplier Risk (using Azure Functions), and confirm that the status is "Connected."
Additionally, check the function app using the following process:
- In the Azure portal, open the resource group and select the Function App that was created.
- Select Functions and confirm that these two functions are listed:
- CensysSRRiskEvents
- CensysSRSuppliersAndRisks
- Select a function, then Invocations, and confirm that recent runs show "Success."
5. Create the analytic rule
- Open Microsoft Sentinel and go to Configuration > Analytics.
- Select the Rule templates tab.
- Search for and select Censys SR - Risk State Change.
- Select Create rule.
- On the "General" tab, keep the default values and ensure that "Status" is set to Enabled.
- On the "Set rule logic" tab, keep the default query and schedule. The rule runs every hour and looks back one day.
- On the "Incident settings" tab, keep "Create incidents from alerts triggered by this analytics rule" enabled. Keep "alert grouping" enabled with the grouping by "RiskInstanceId" and a lookback of 24 hours.
- Select Next: Automated response, then Next: Review + create.
- Select Save.
By default, the rule creates an alert for each event that is opened or reopened with CRITICAL or HIGH severity. Alerts of the same risk instance are grouped into one incident.
View the results:
- Wait until the rule has run. The rule runs every hour.
- Open Threat management > Incidents.
- Search for "Censys" to see incidents.
Change what the rule alerts on (optional)
The query of the rule contains lines that start with //. You can turn them on.
- Select Configuration > Analytics > Active rules.
- Select the rule Censys SR - Risk State Change then select Edit.
- On the "Set rule logic" tab, find the filter you want in the query.
- Remove the two
//at the start of the line. - Select Next: Incident settings, continue to Review + create, and select Save.
To follow the whole life of a risk, including resolved events and reopened events of every severity, follow the instructions in the comments at the top of the query. Additionally, set the query period and the incident grouping lookback to seven days.
6. Use the Censys Supplier Risk workbook dashboard
To save and open the workbook:
- Open Microsoft Sentinel and select Threat management > Workbooks.
- Select the Templates tab.
- Search for and select Censys Supplier Risk.
- Select Save, choose a location, and select OK.
- Select View saved workbook.
The workbook contains the following panels:
- Open Risk Count by Severity
- Risk Events by Category
- Opened vs. Closed Risks
- Top 10 Risks by Open Risk Count
- Supplier Risk Ranking
- Rapid Response Events
To see details, select a slice of a pie chart, a point of the line chart, or a row of a table. A table with the matching events opens below the panel.
7. Modify connector settings (optional)
You can modify the following connector settings.
| Setting | Accepted values |
|---|---|
SupplierNames | Supplier names separated by *. Empty means all suppliers. |
RiskNames | Risk names separated by *. Empty means all risks. |
ChangeTypes | opened, resolved, and reopened, separated by commas. Empty means all. |
Severity | LOW, MEDIUM, HIGH, and CRITICAL, separated by commas. Empty means all. |
RapidResponse | true or false. Empty means both Rapid Response and non-Rapid Response risks are collected. |
Schedule | Cron expression of the event collection. Default: 0 */10 * * * *. |
SuppliersAndRisksSchedule | Cron expression of the list refresh. Default: 0 */30 * * * *. |
LogLevel | DEBUG, INFO or ERROR. |
To modify a setting:
- In the Azure portal, open the Function App of the connector.
- Select Settings > Environment variables.
- Select the setting you want to change, enter the new value, and select Apply.
- Select Apply and confirm to save. The app restarts with the new values.
Read connector log messages
To read the log messages of the connector:
- In the Azure portal, open the Function App.
- Go to Monitoring > Logs and run the following query.
traces
| where message has "CensysSR"
| project timestamp, message
| order by timestamp desc
Updated 29 minutes ago