Webhook
Access Levels: Advanced | Enterprise
In Censys Attack Surface Management (ASM), you can configure a webhook integration to send risk events as a JSON payload to custom destinations.
Example JSON payload
This is an example of what an output looks like:
{
  "event": {
    "id": "9472333883494777",
    "specversion": "1.0",
    "type": "risk_instance_opened",
    "source": "censys",
    "time": "2024-04-17T20:39:09.278+00:00",
    "subject": "risk instance opened",
    "datacontenttype": "application/json; charset=utf-8",
    "data": {
      "workspace_id": "censys_workspace_id",
      "risk_event_id": 550,
      "risk_id": 10,
      "risk_name": "eol-openssl-software",
      "risk_description": "EOL OpenSSL Software",
      "last_seen_at": "2024-01-08T23:03:00.000+00:00",
      "first_seen_at": "2024-01-08T23:03:00.000+00:00",
      "risk_severity": "medium",
      "impacted_asset": "Host: 1.1.1.1",
      "categories": "[[\"Vulnerability\",\"Software Vulnerability\",\"EOL Software Vulnerability\"]]",
      "link": "https://app.censys.io/hosts/1.1.1.1/risks"
    }
  }
}
Configure the integration in Censys ASM
Use the following process to set up a webhook in ASM.
- Go to the Censys ASM web console and click Integrations.
- Locate Webhook Connection and click Set Up.
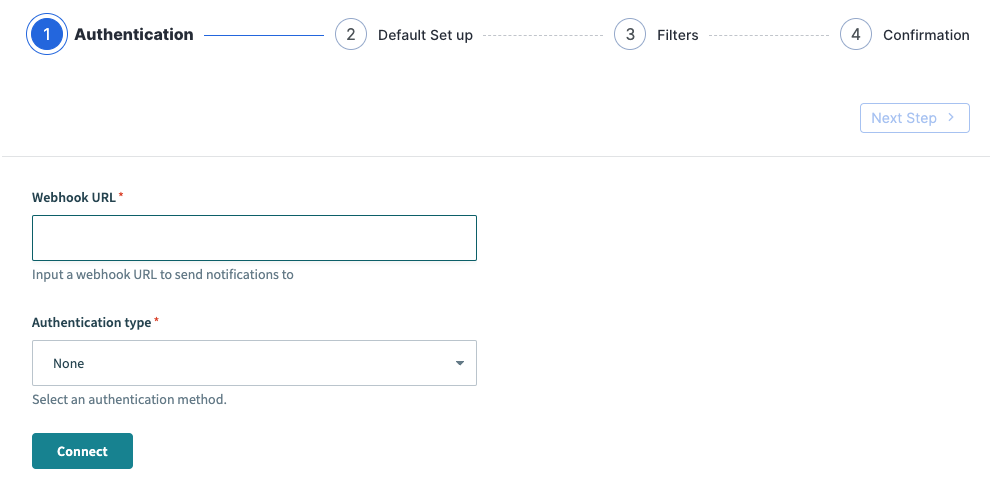
- On the Authentication page, configure the following:
-
Webhook URL: Enter the webhook URL you want to send notifications to.
-
Authentication type: Select the authentication type you wish to use for the webhook connection.
-
- Click Connect, then click Next Step.
- On the Default Set Up page, review your settings. Note that these fields cannot be edited.
- Click Next Step.
- On the Filters page, select the risk severities you want to send alerts for.
- Click Submit, then click Close.
NoteYou must configure your webhook destination to expect the
eventfield in the payload. If you do not, then the integration will not work.
Modify the integration
If you need to make changes to your integration settings:
- Go to the Censys ASM web console and click Integrations.
- Locate Webhook Connection and click Manage.
- Go through the setup wizard, as described in the section above, and make any necessary changes.
Updated 5 months ago
Did this page help you?