SAML Authentication
This document describes how to configure Security Assertion Markup Language (SAML) authentication for the Censys Platform. SAML for single sign-on (SSO) allows you to use an identity provider (IdP) to manage authentication for organization members.
You first configure SAML in the Censys Platform, then complete the configuration in your IdP using the Service Provider Information that Censys provides. The Configure SAML authentication in Censys steps apply to any SAML 2.0 IdP. For a step-by-step walkthrough of a specific IdP, see Identity provider setup.
NoteThis guide covers SAML SSO only. To additionally automate user provisioning and deprovisioning, see the SCIM configuration guide. SAML SSO works whether or not SCIM provisioning is enabled.
Prerequisites and notes
- Organizational Admins can create, edit, and delete SAML configurations.
- Organizations must be on an enterprise tier to use SAML.
- Administrative privileges in your IdP are required to complete the IdP-side configuration.
- Access to your authoritative DNS provider is required to add TXT records for domain verification.
- Organizations can have a maximum of 10 SAML configurations.
- Each configuration can have a maximum of 10 domains.
Supported features
The Censys SAML integration supports the following capabilities with any SAML 2.0 IdP:
- SAML 2.0 authentication: Supports both Identity Provider (IdP) initiated and Service Provider (SP) initiated SSO flows.
- Signed authentication requests (optional): Censys can digitally sign the SAML authentication request before sending it to the IdP.
- Just-in-Time (JIT) provisioning: A user who is assigned to Censys in your IdP and signs in through SAML SSO is automatically provisioned in Censys at login, even when SCIM is not configured.
Configure SAML authentication in Censys
These steps are the same regardless of which IdP you use.
-
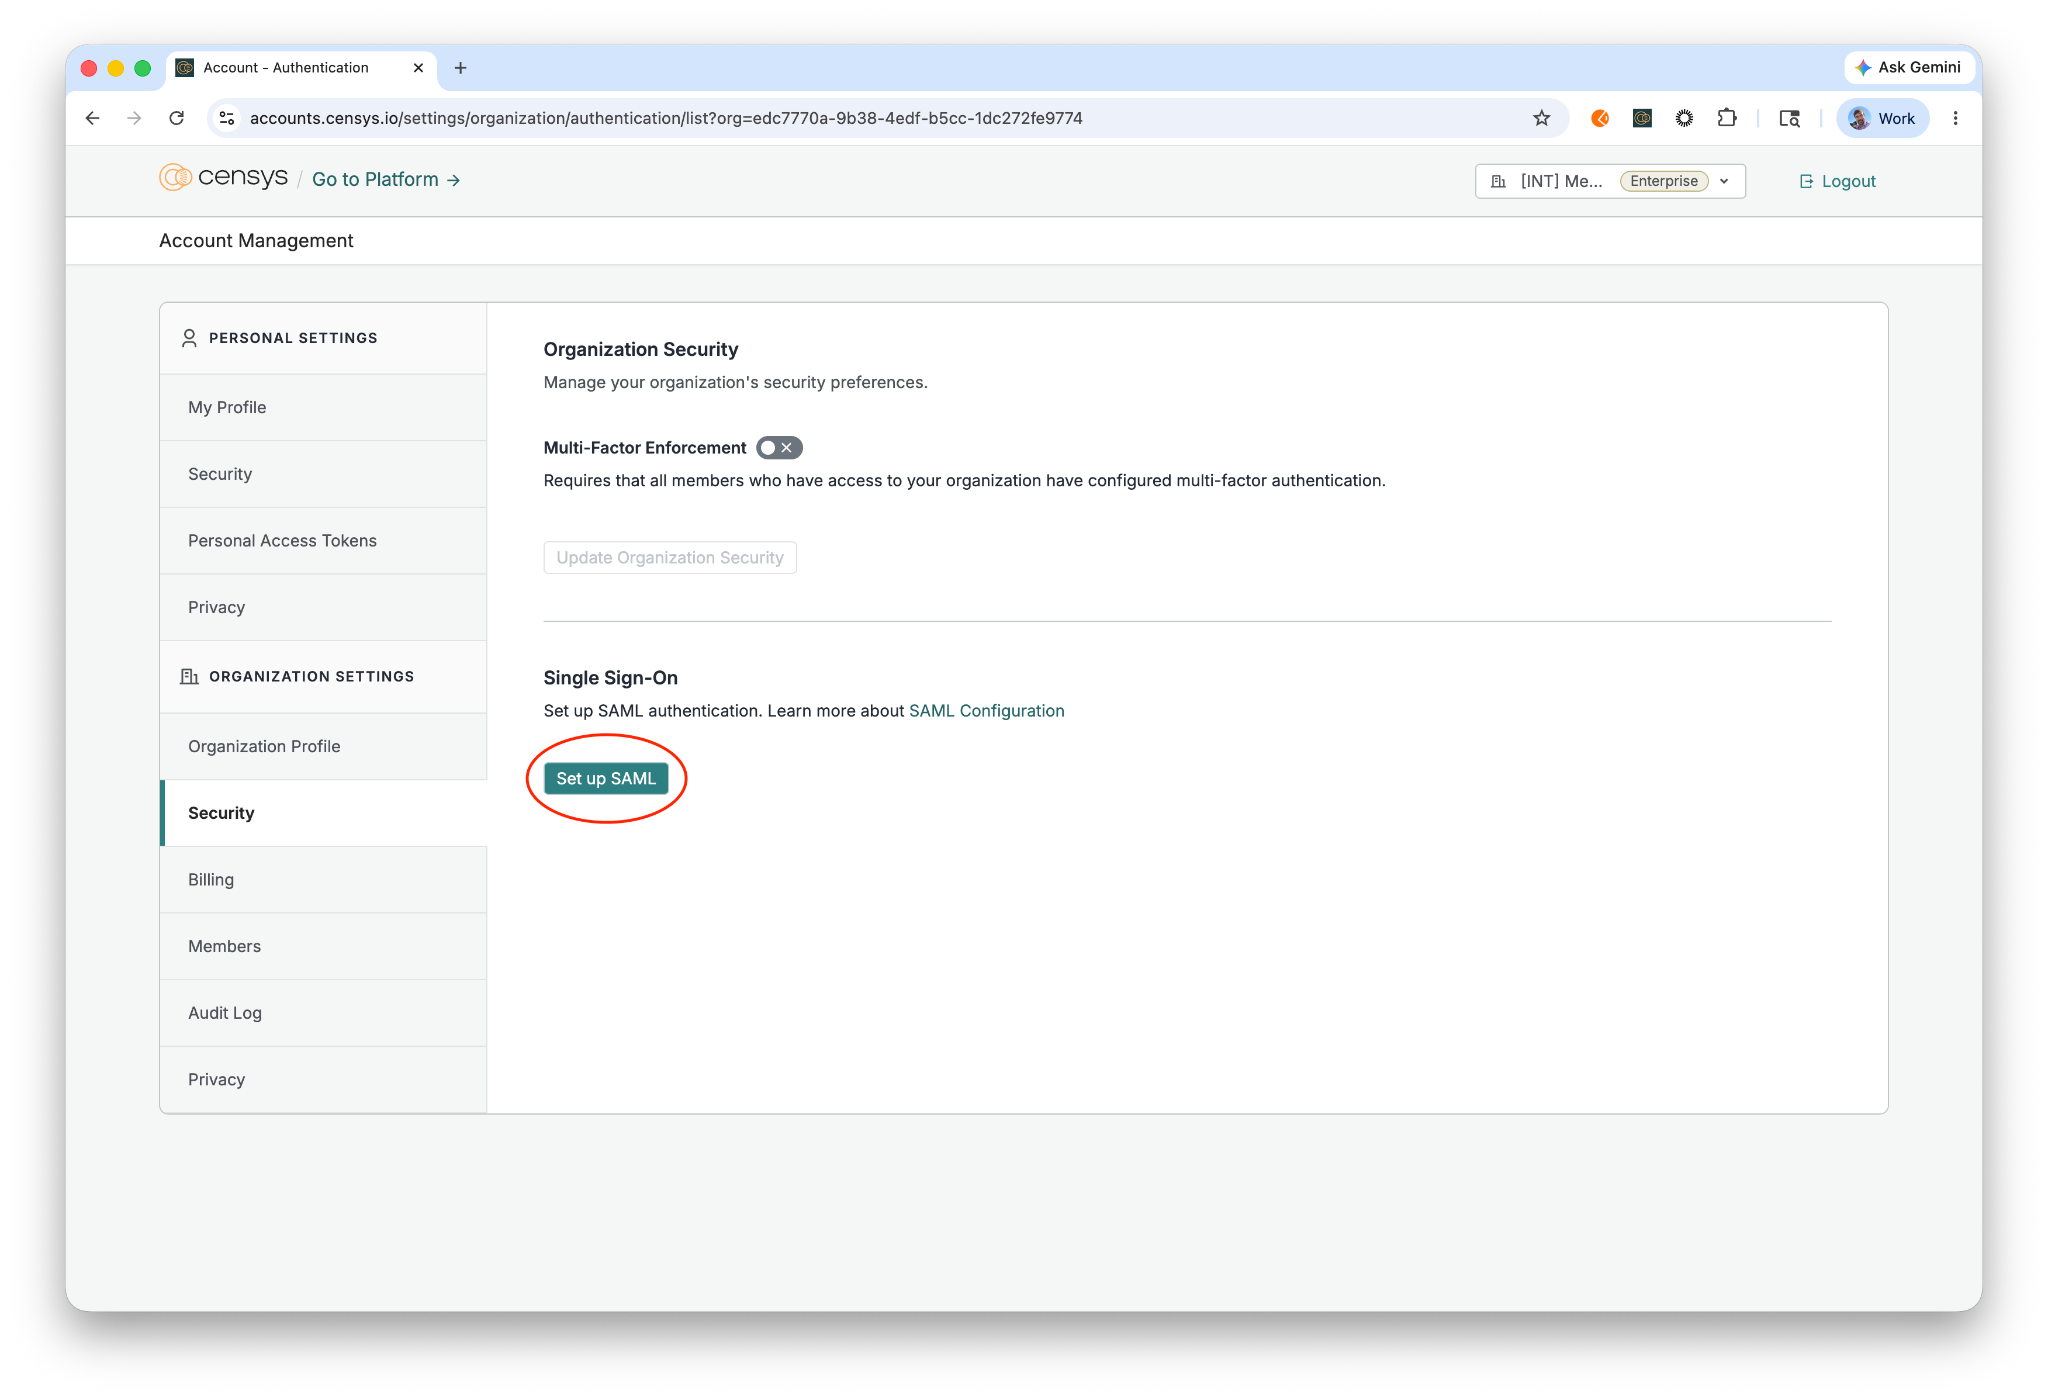
In the Censys Platform web console, hover your cursor over the organization icon in the left-side navigation panel and select Settings.
-
Click Security, then click Set up SAML.
-
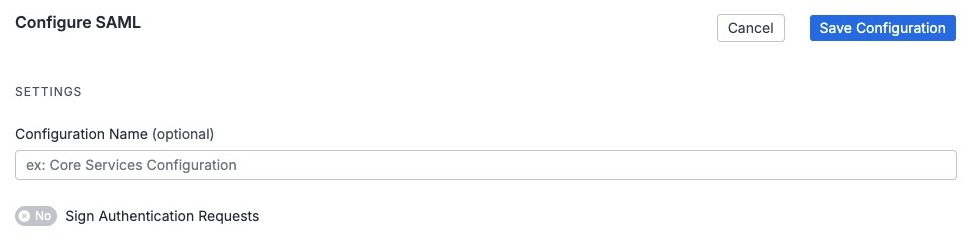
(Optional) Name your SAML configuration in the Configuration Name field.
-
(Optional) Enable Sign Authentication Requests. This setting defaults to disabled.
NoteSome IdPs require this - you can enable this to increase security. If enabled, Censys digitally signs the SAML authentication request before sending it to the IdP.
-
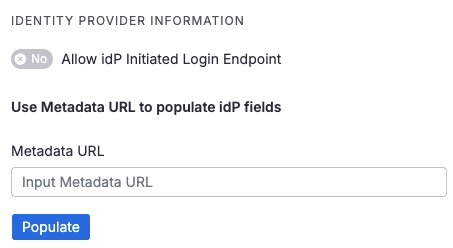
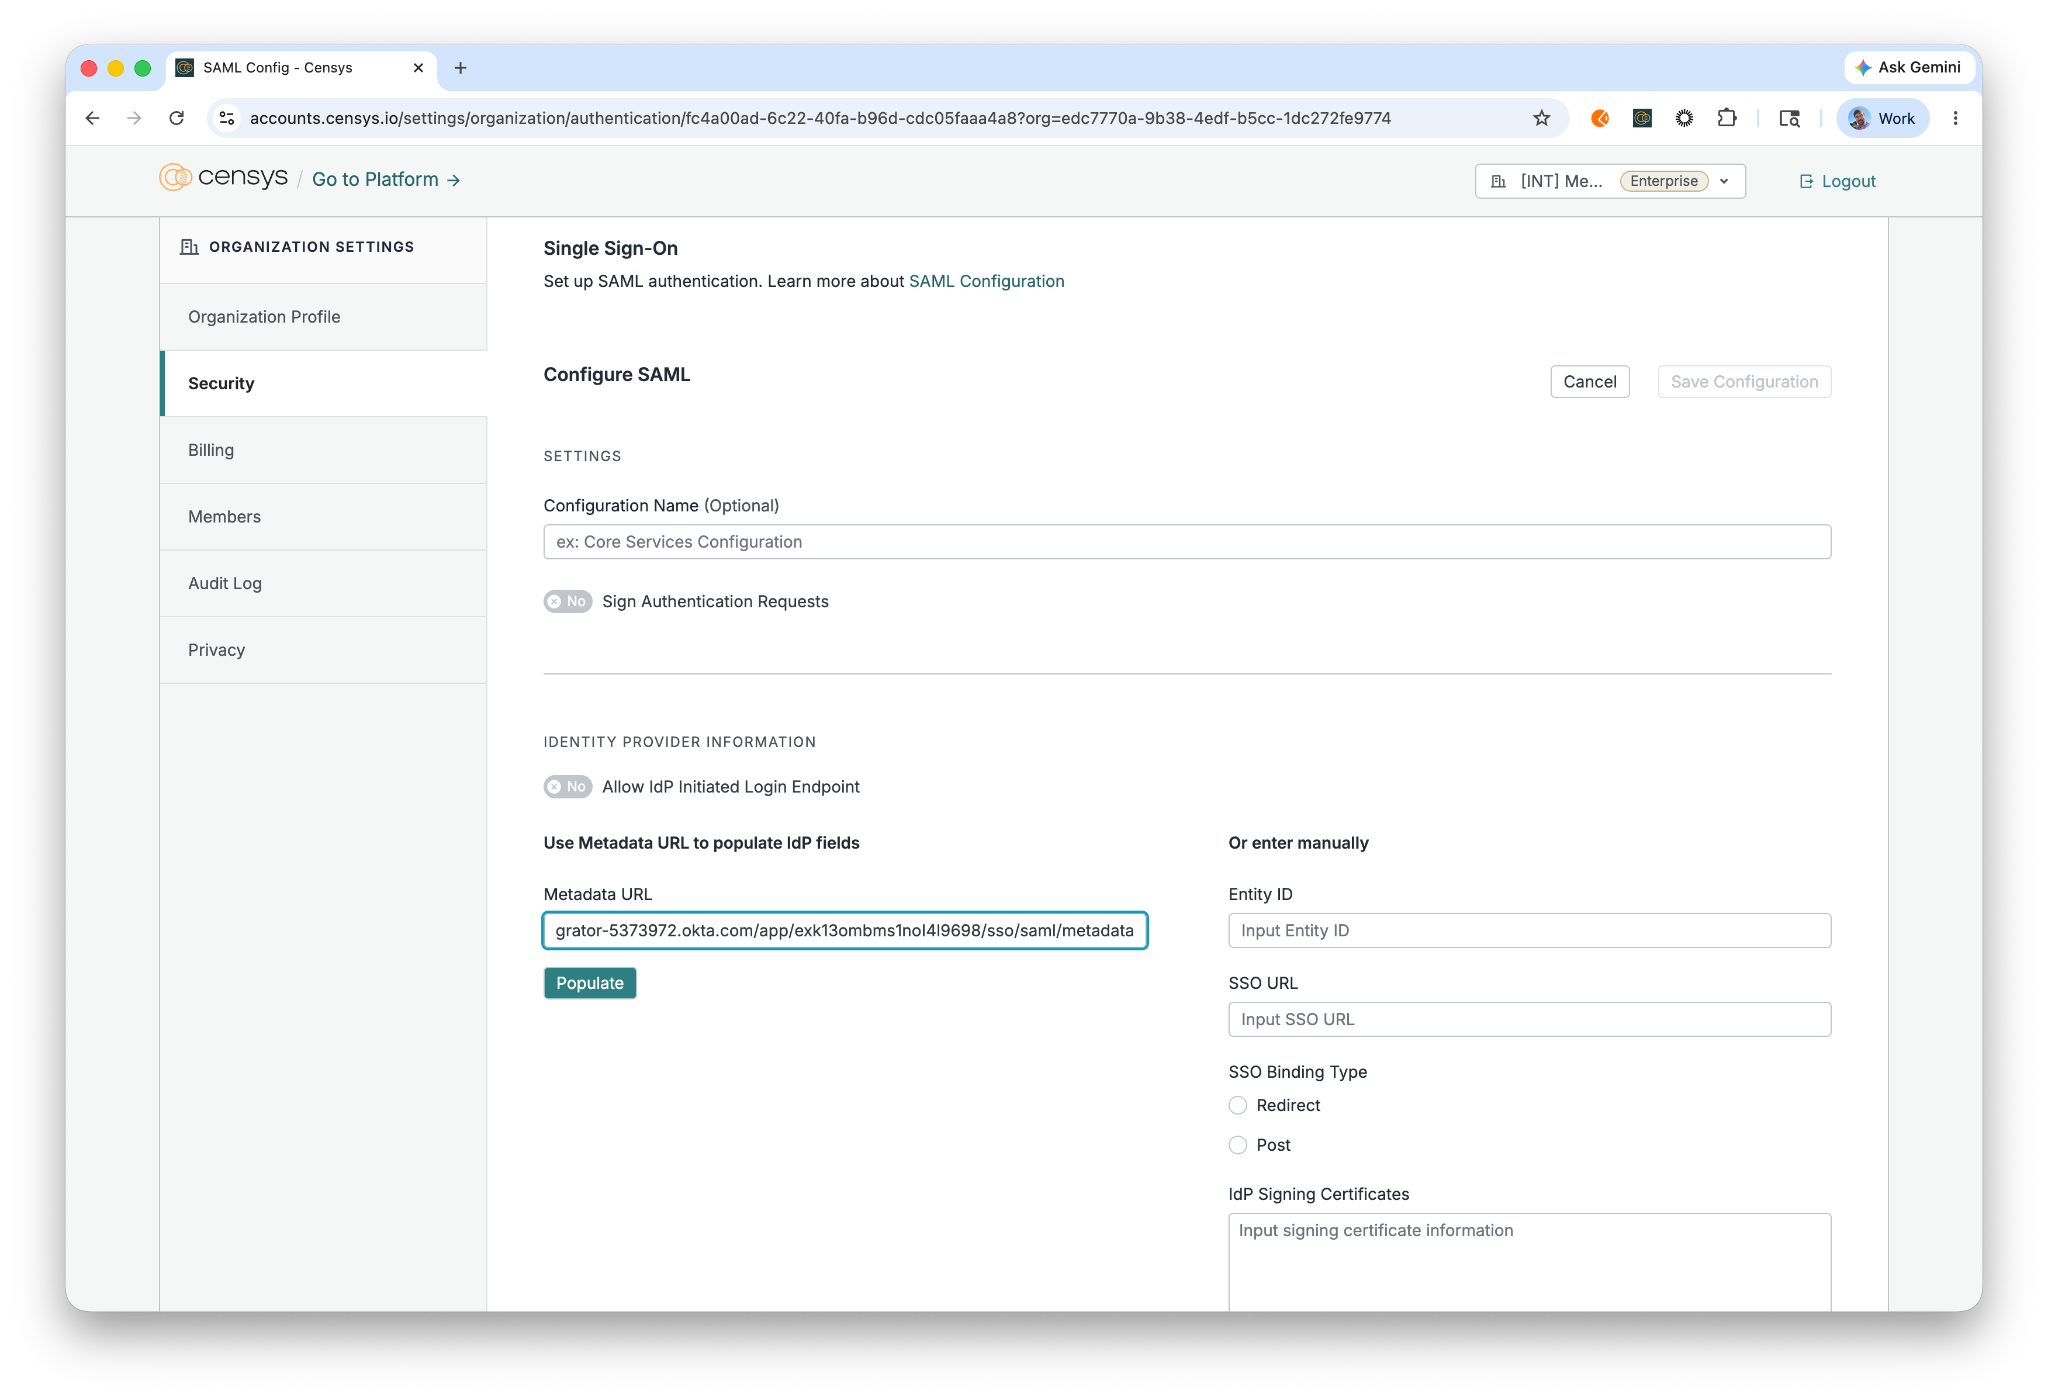
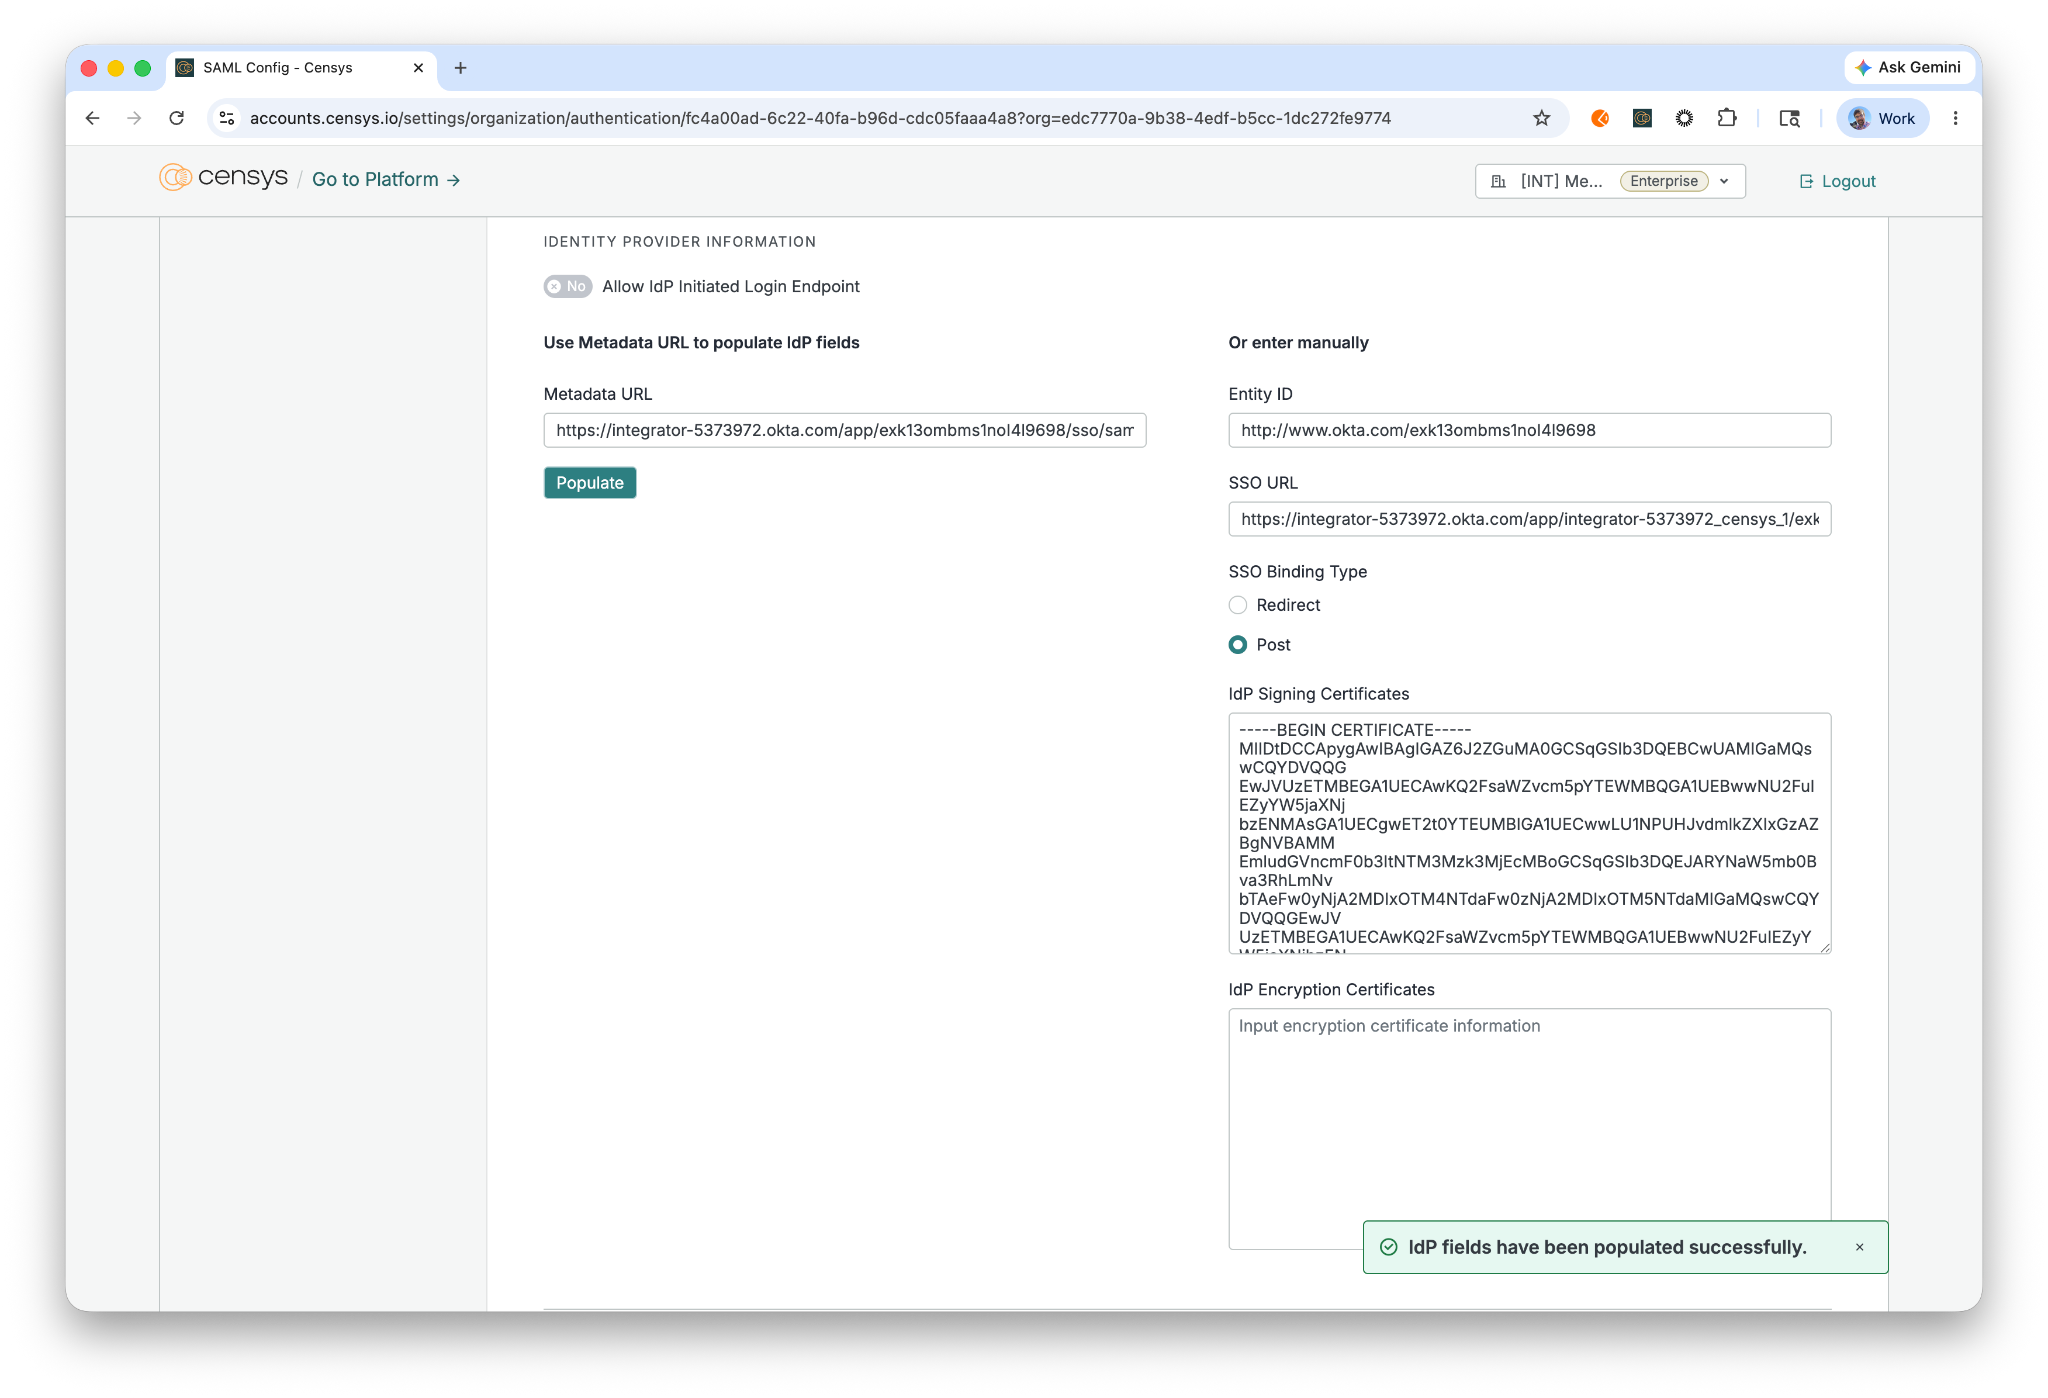
In the Identity Provider Information section, you can enter your IdP's Metadata URL and click Populate to automatically populate the required IdP information. You can manually enter this information to the right.
-
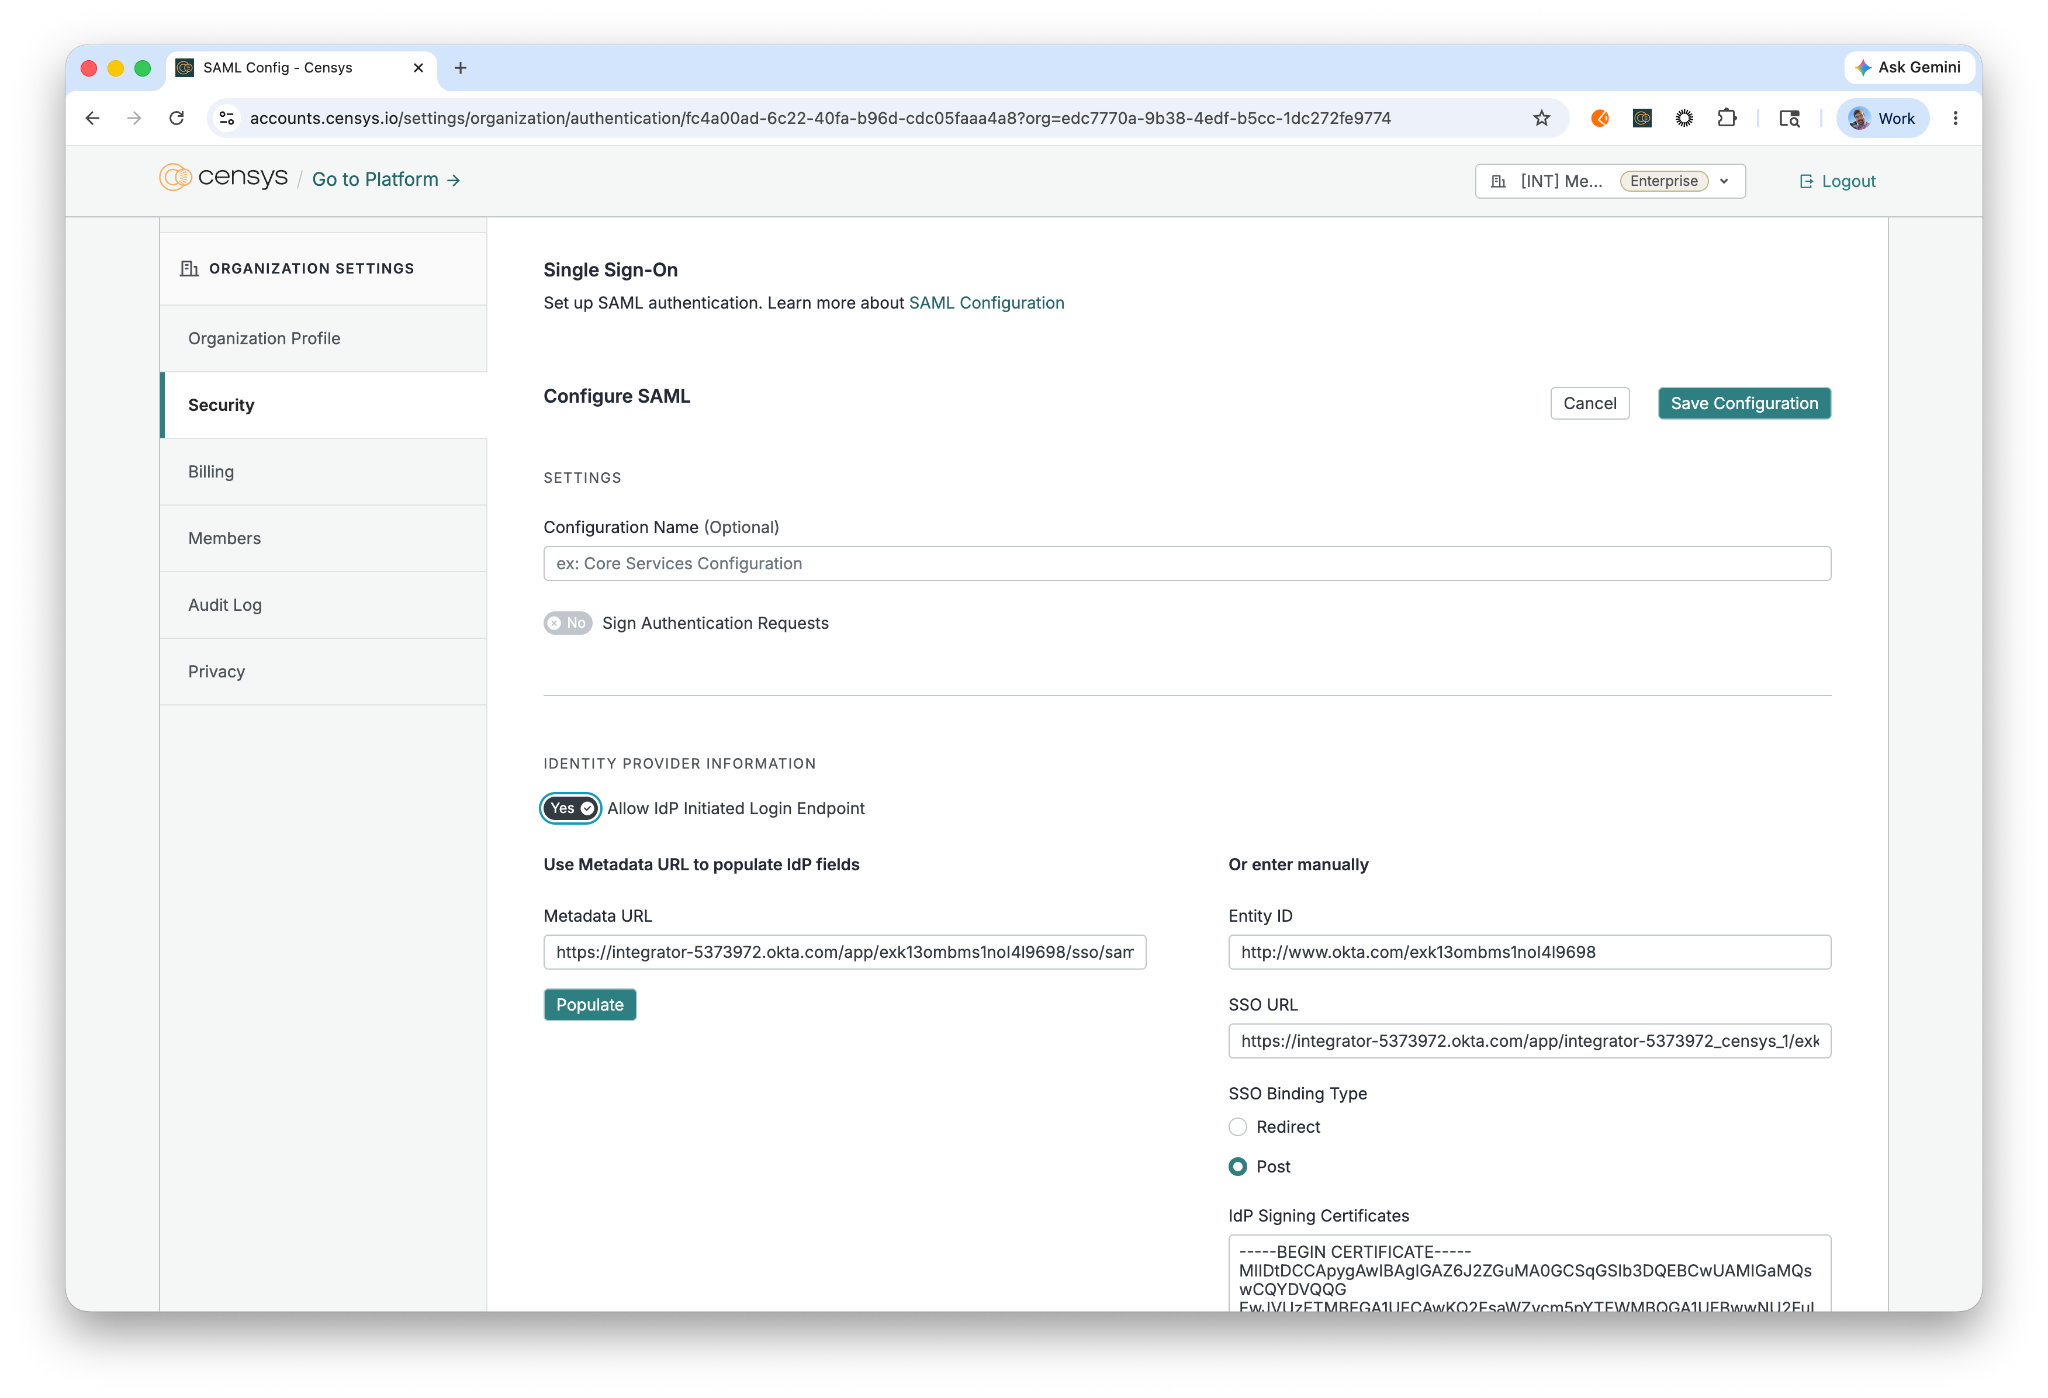
(Optional) Enable Allow IdP-Initiated Login Endpoint. This setting defaults to disabled. Enable this to allow users to log in directly from the IdP portal.
-
Click Save Configuration.
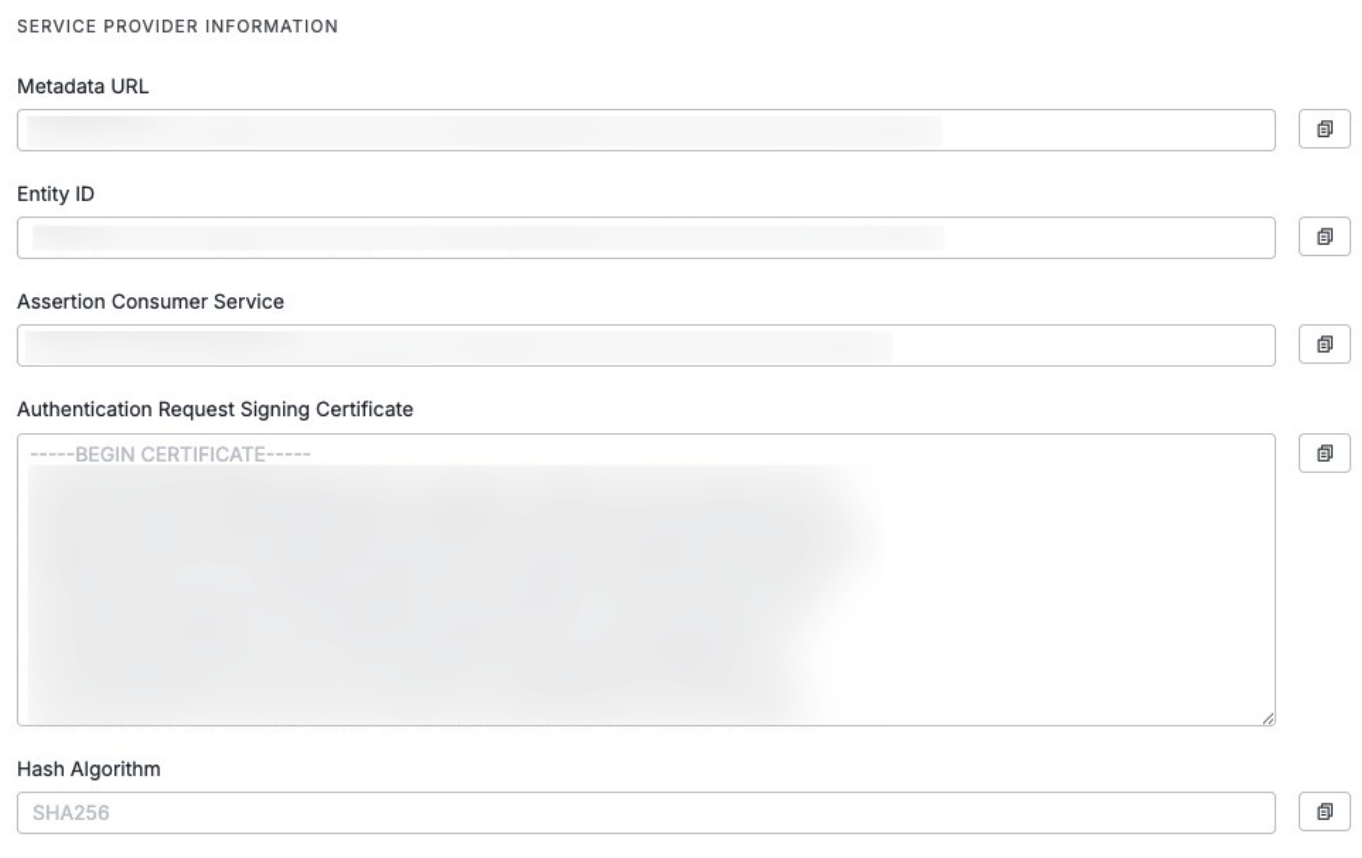
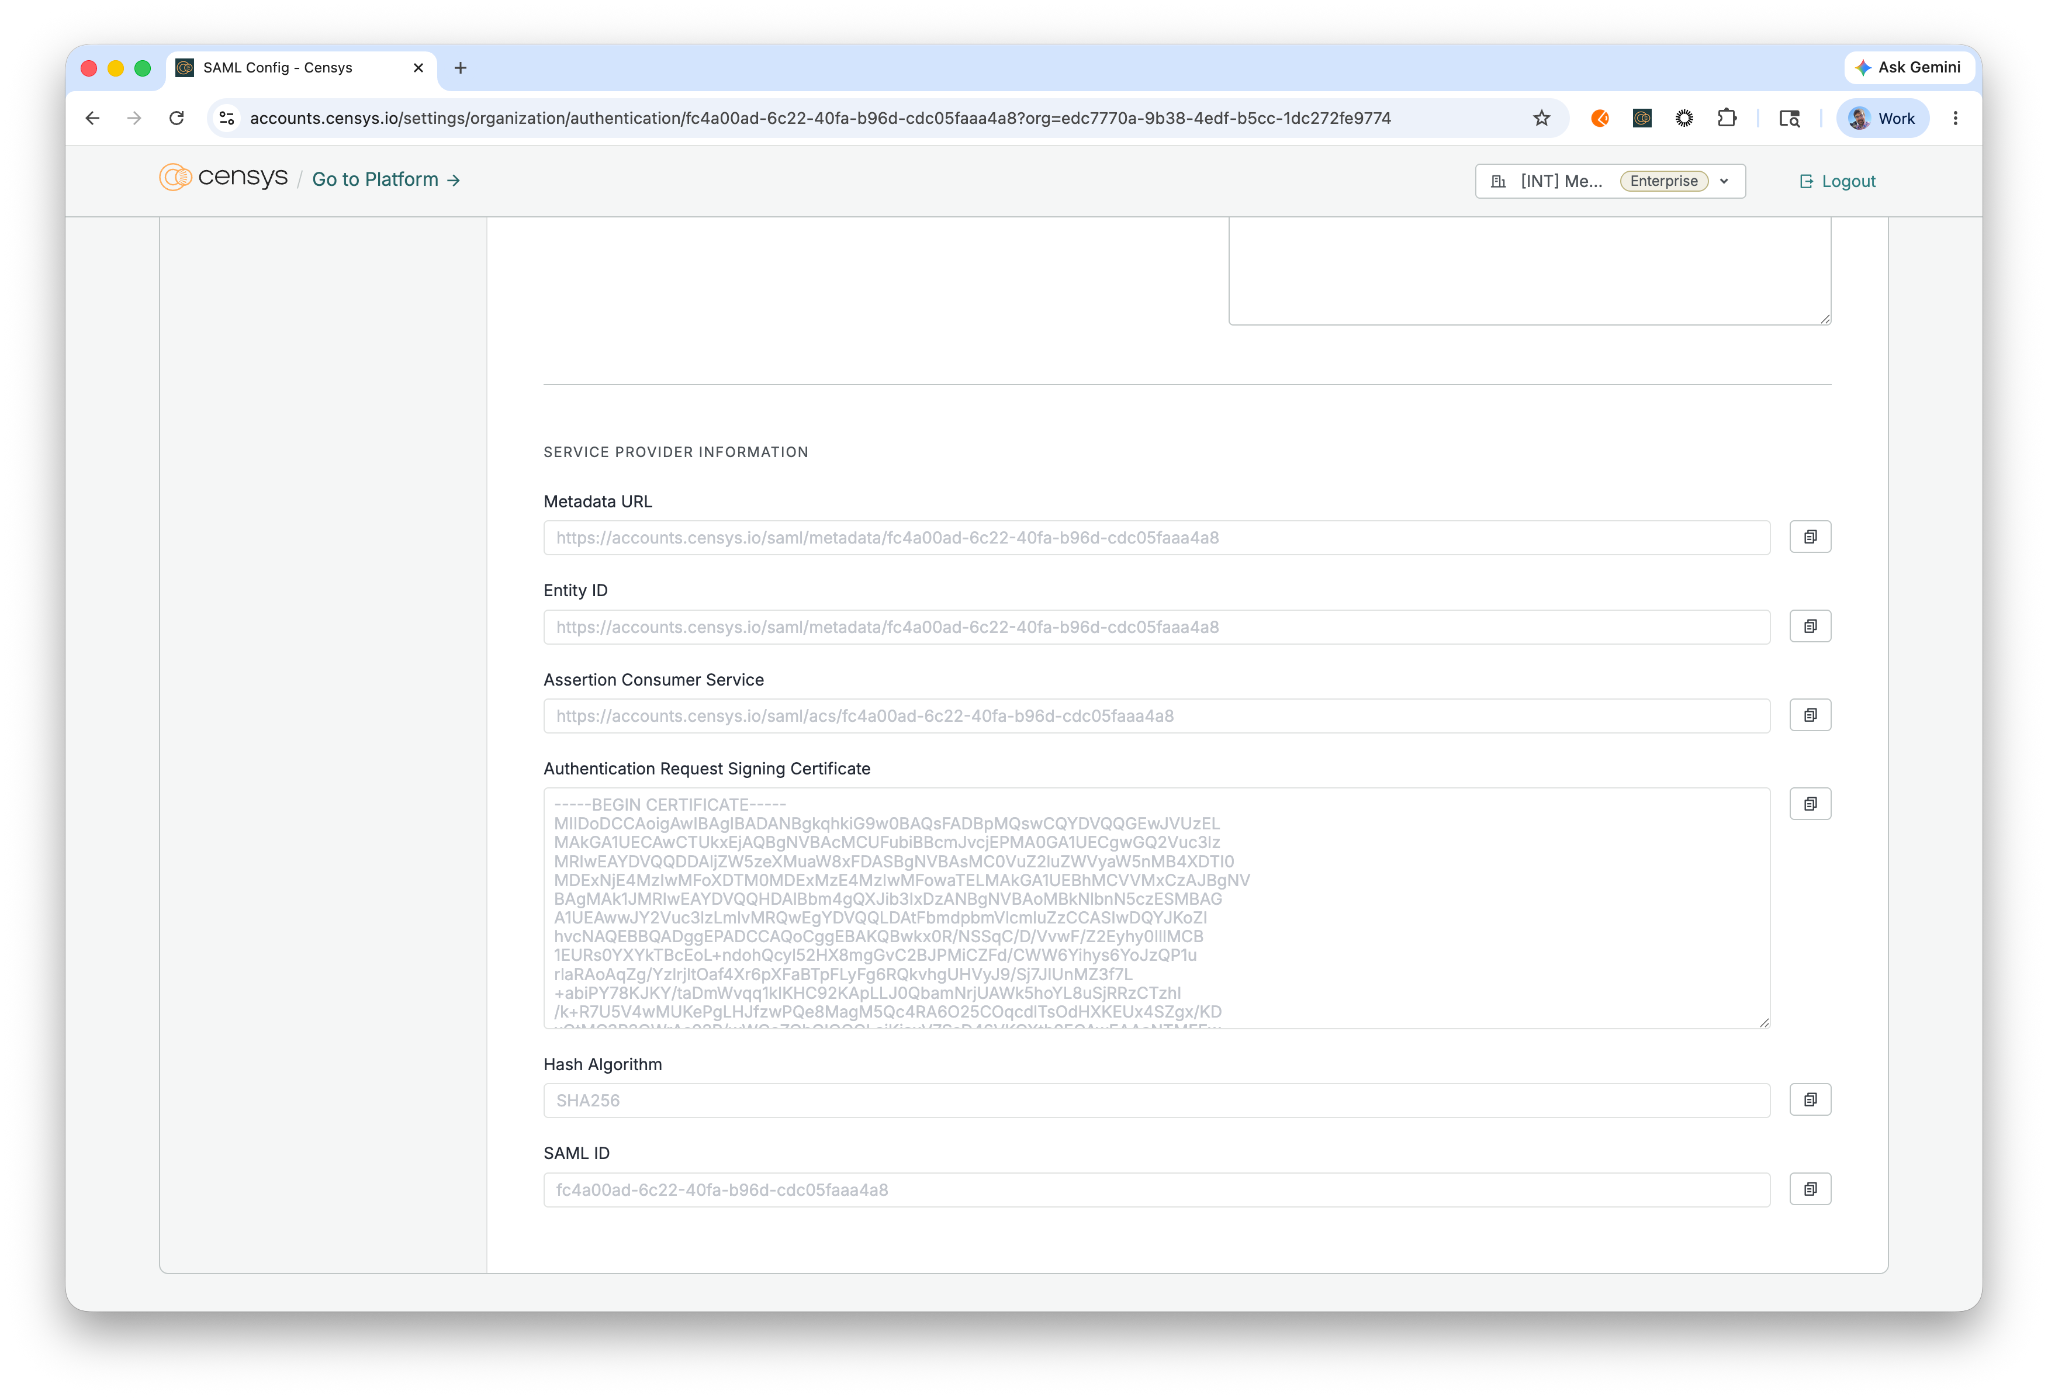
Service provider information
Service Provider Information contains the details your IdP needs to complete the SAML configuration. Click the icon to the right to copy the value.
Add domain
After you complete the SAML configuration for Censys, you now must add and verify your domain.
NoteCensys periodically verifies that the TXT record is still present in your domain’s DNS. This ensures that your organization maintains control of the domain.
-
Click Add Domain.
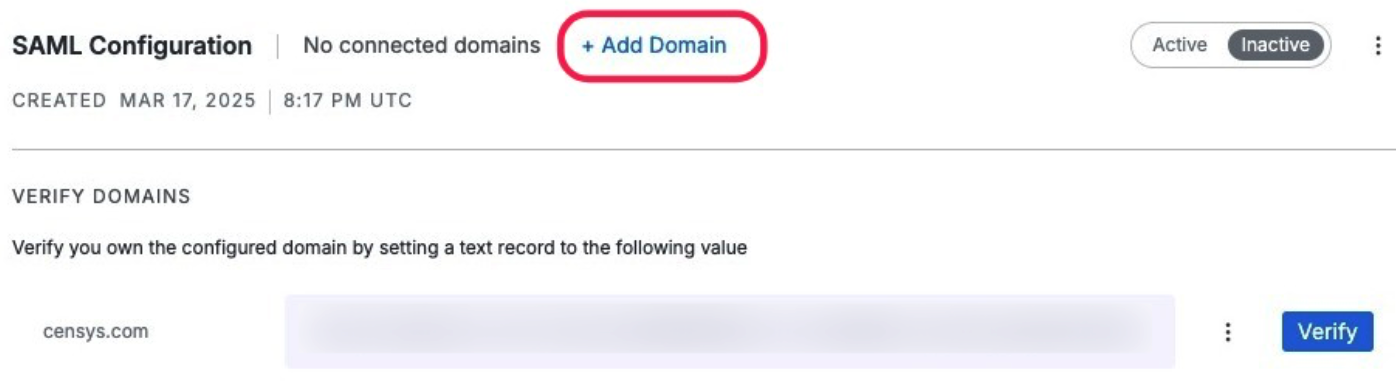
-
Enter your domain in the Domain Name field and click Input.
-
The field then populates with the Censys Domain Verification name.
-
Add the Censys Domain Verification as a TXT record in your domain’s DNS settings. This TXT record is used to verify that you control the domain.
-
Click Verify to the right of the value. If you submitted a valid domain, Verified is displayed.

TipIf you receive an error, verify that you entered the correct value into your DNS settings and try again.
Attributes
Censys expects the following attributes from the IdP. email, given or first name, and last name are required for login. user name is optional but recommended when SCIM is enabled so that just-in-time provisioning links the user to the same identity SCIM provisions. Attribute names are case insensitive.
| Censys User Profile Attributes | Accepted IdP Attributes |
|---|---|
email | |
| given or first name | given_name, givenname, first_name, firstname |
| last name | last_name, lastname, sur_name, surname, sn |
| organization (optional) | organization If unused, Censys uses the email domain. This is not the name of the Platform organization in Censys. |
| user name (optional) | username, user_name, preferred_username, upn, userPrincipalName. Recommended when SCIM provisioning is enabled so just-in-time provisioning links the user to the same identity SCIM provisions. |
Activate SAML
After you successfully configure SAML in your IdP, you can activate your SAML configurations in Censys. Organizations can have multiple active SAML configurations with multiple domains.
Follow the steps below to activate a SAML Configuration:
-
Go to My Account > Authentication.
-
Locate the SAML config you want to activate and toggle the Active/Inactive boolean.
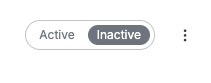
-
The SAML configuration is now Active.
Post-activation behavior
- When a user logs in, they use the SAML configuration that supports the domain they are logging in from.
- After SAML is activated, all users whose email addresses match a verified domain are redirected to the configured IdP during log in.
Logging in with SAML (SP-initiated)
Users can authenticate directly through the Censys platform by following these steps:
- Navigate to the Censys login page at https://accounts.censys.io.
- Select Log in with SSO.
- Enter your organization's email address.
- You will be redirected to your IdP for authentication. Upon success, you will be logged into Censys.
Identity provider setup
The Censys-side steps above apply to any SAML 2.0 IdP. The following section provides a complete, IdP-specific walkthrough that shows where to enter the Censys service provider details and where to retrieve the IdP information that Censys needs.
Okta
This section walks through connecting Censys to Okta using the Censys app from the Okta Integration Network (OIN). Complete the Censys-side configuration, domain verification, and activation steps in conjunction with the Okta steps below.
Prerequisite: Administrative privileges in your Okta organization.
1. Get the SAML ID from Censys
-
In the Censys Platform, begin a SAML configuration as described in Configure SAML authentication in Censys (Account Management > Organization Settings > Security > Single Sign-On > Set up SAML).
-
Copy the SAML ID from the bottom of the Edit/Configure SAML page. This ID is used in the Okta application configuration. Keep this page open to complete the configuration later.
2. Add the Censys app from the Okta catalog
-
Log in to your Okta Admin Console.
-
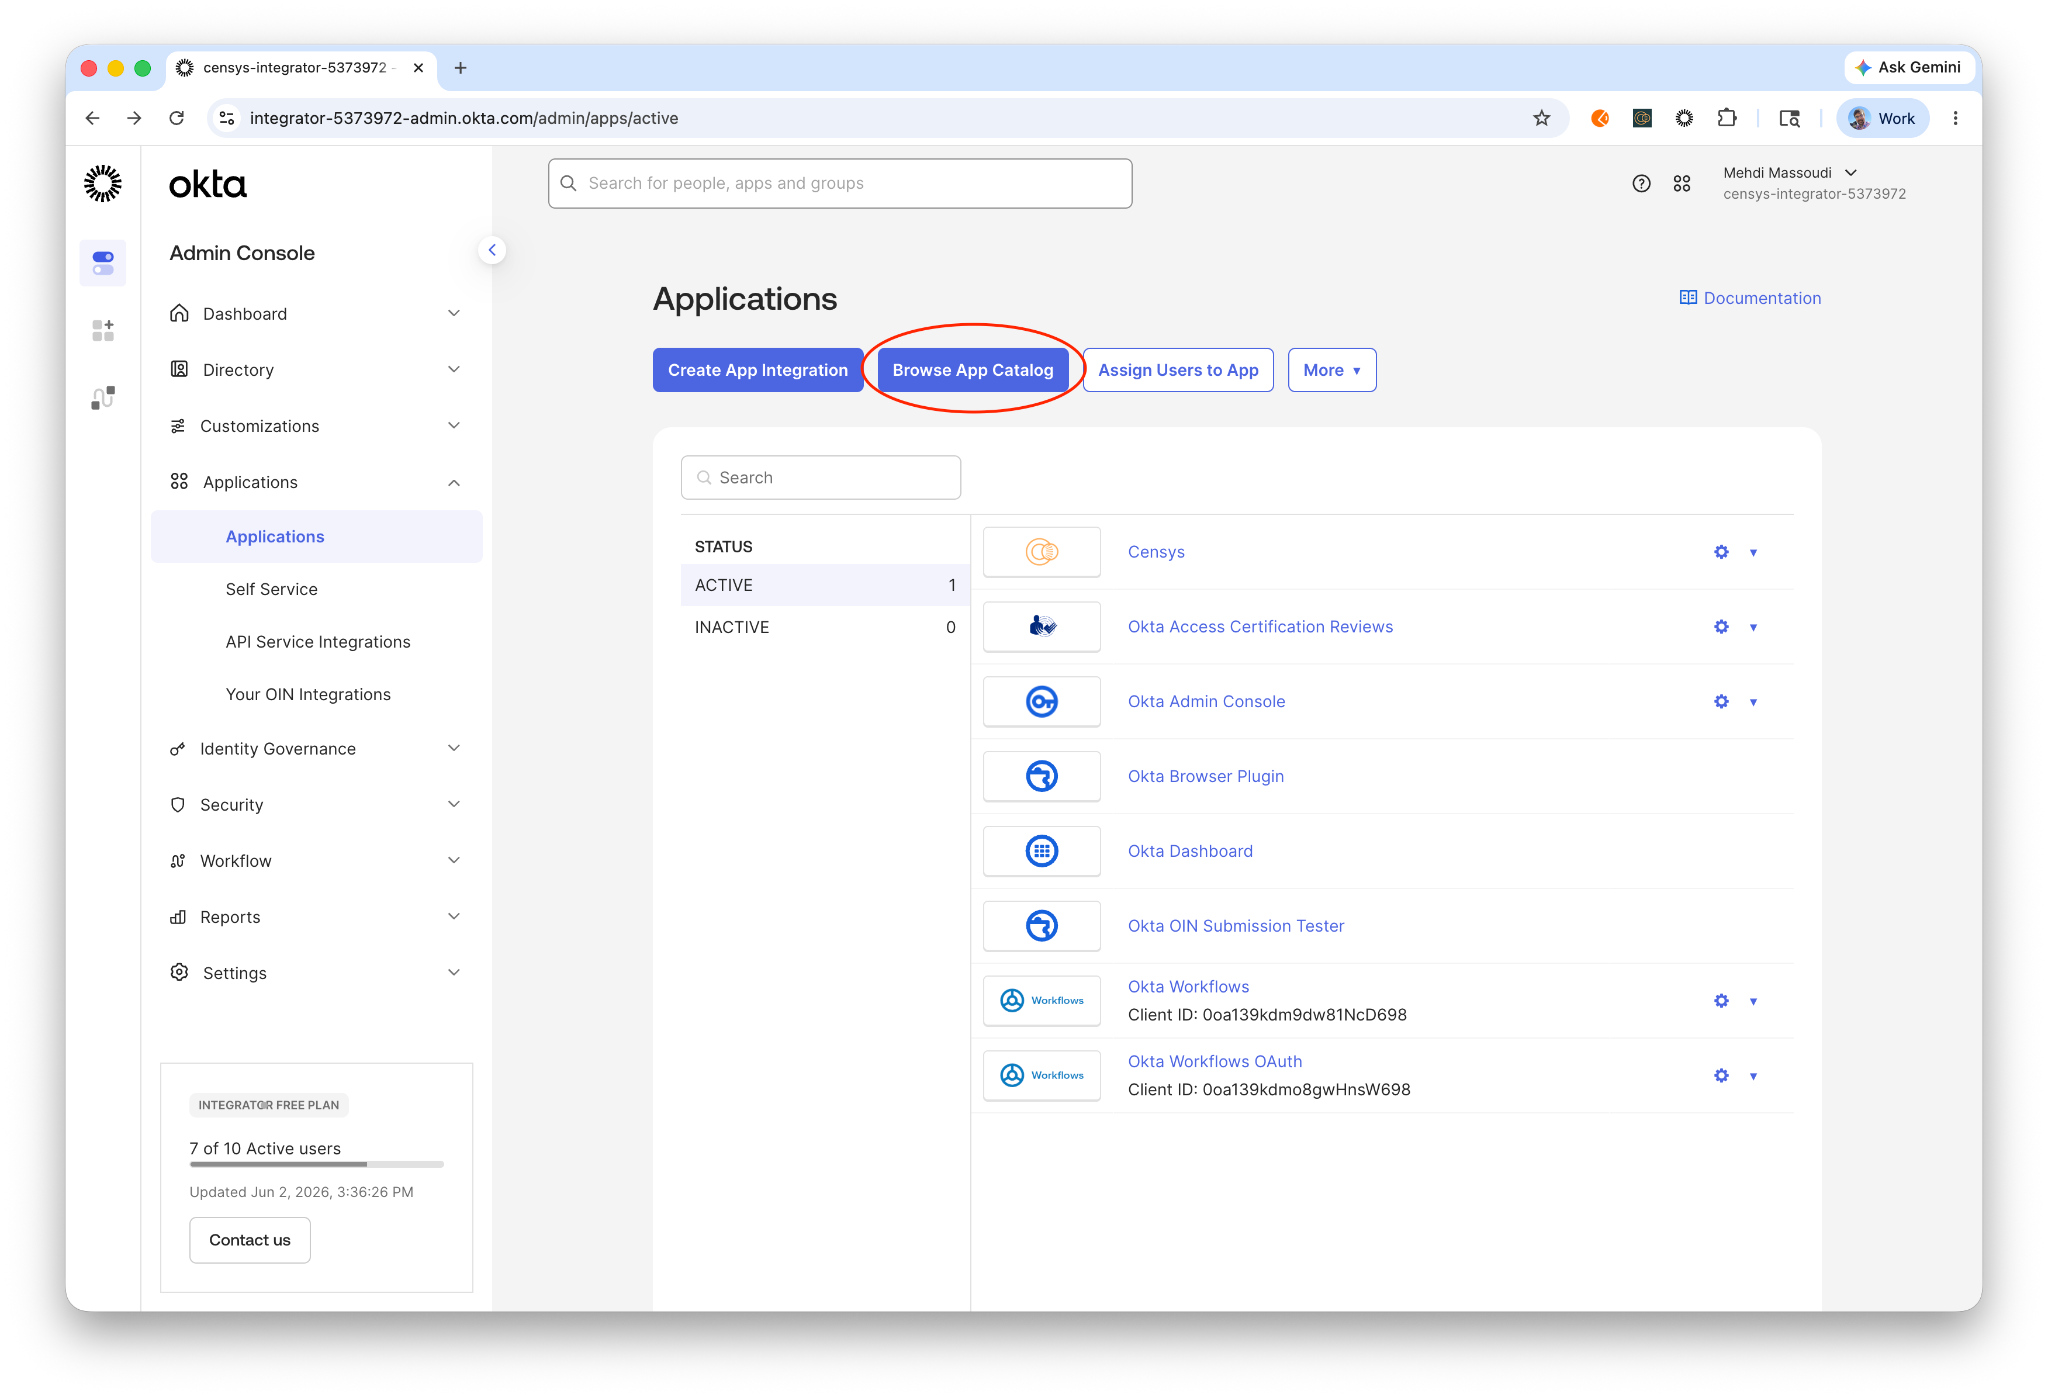
Navigate to Applications > Applications > Browse App Catalog.
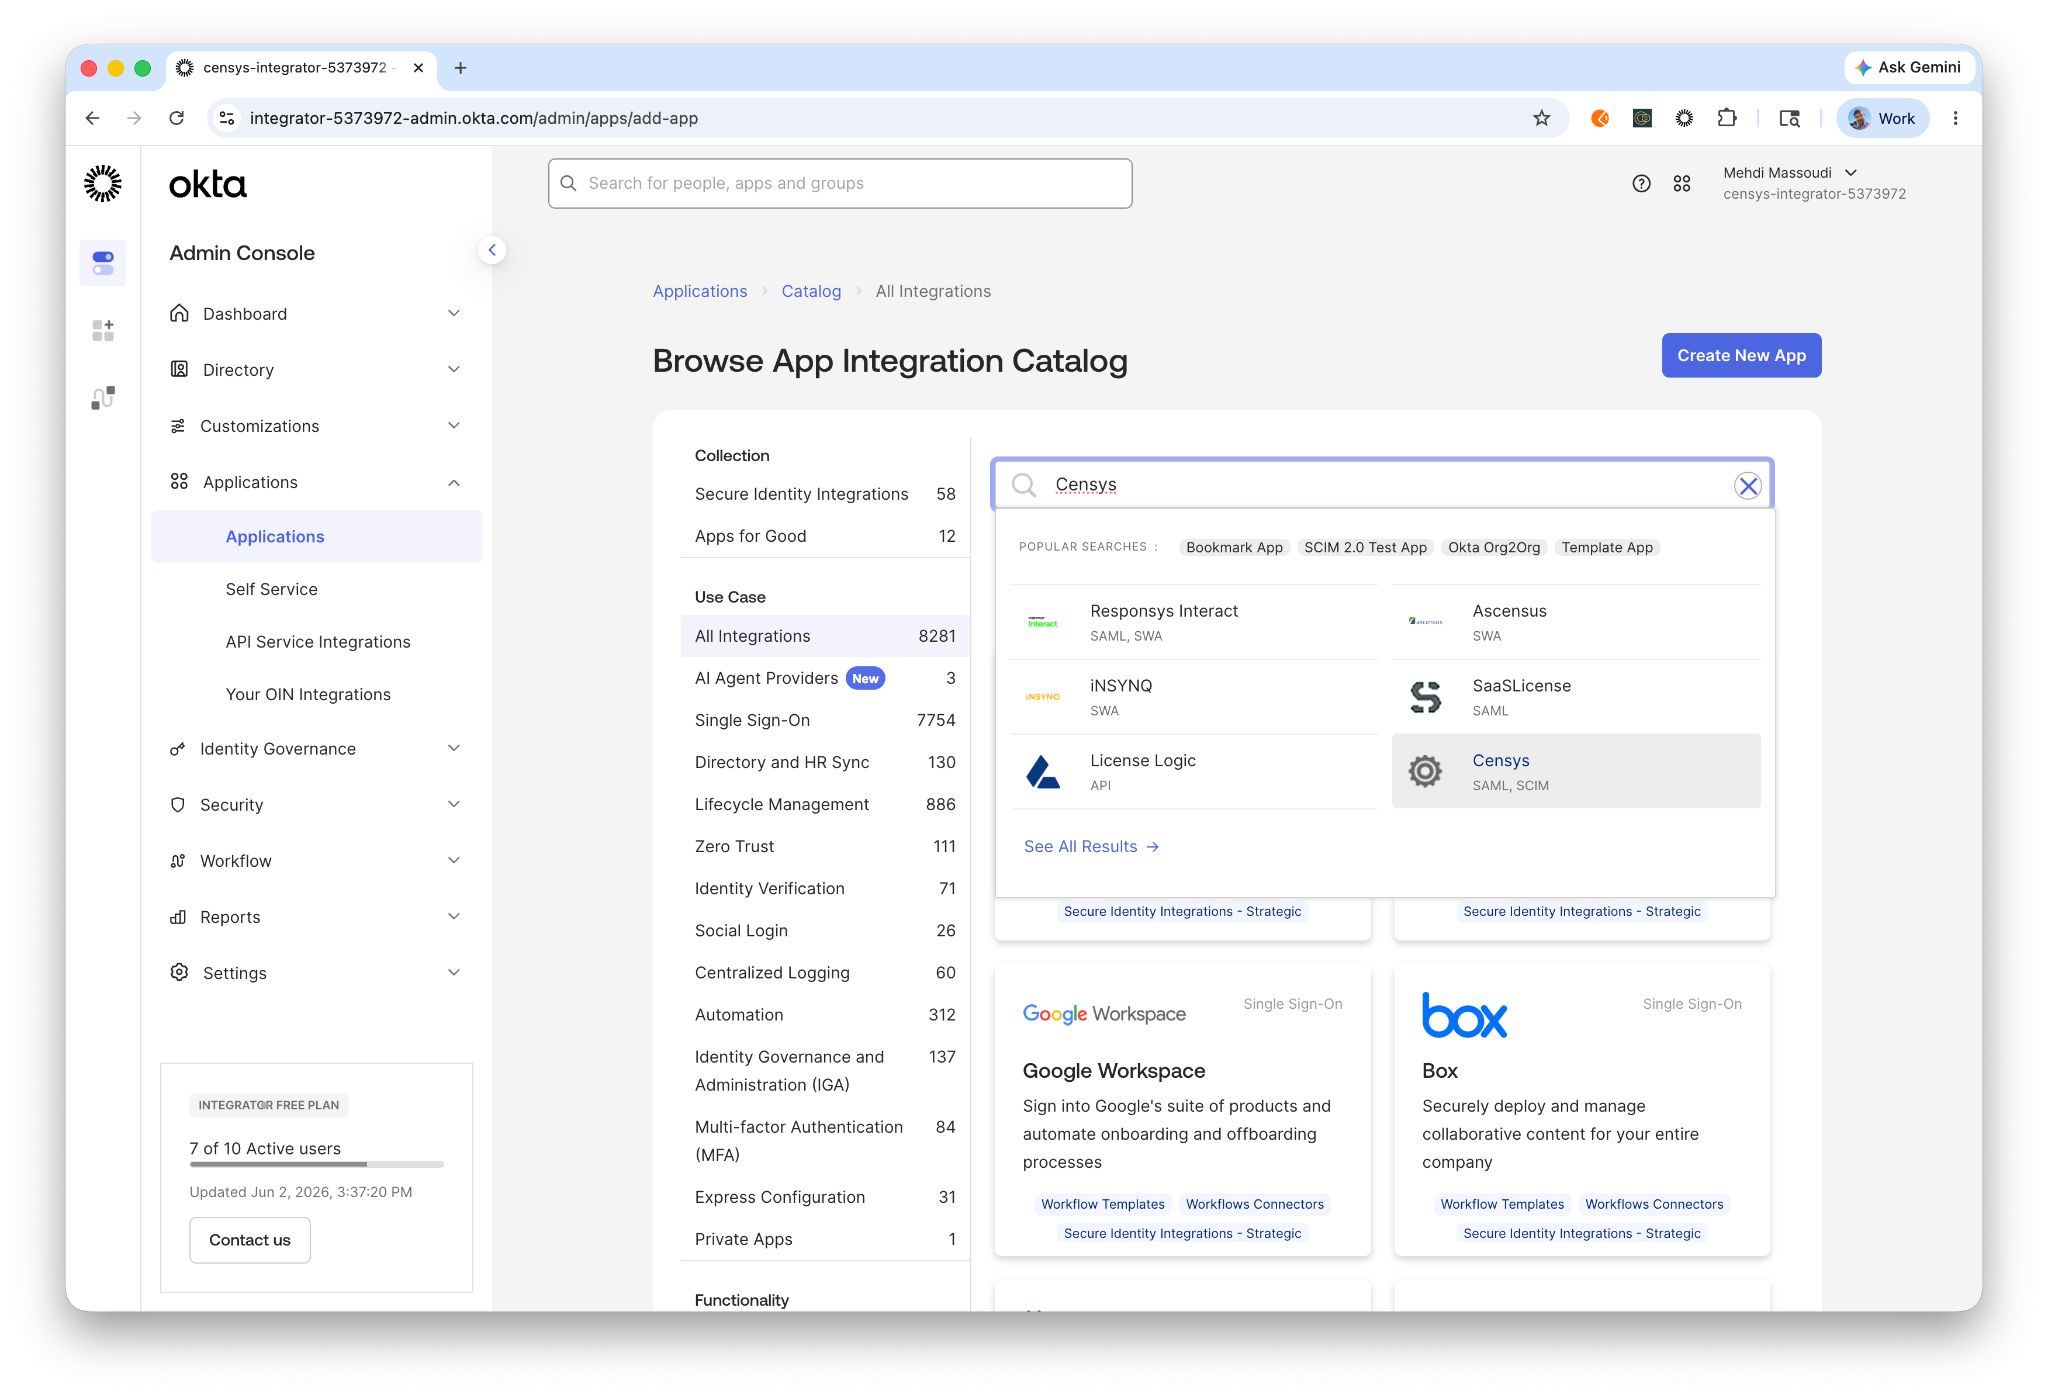
-
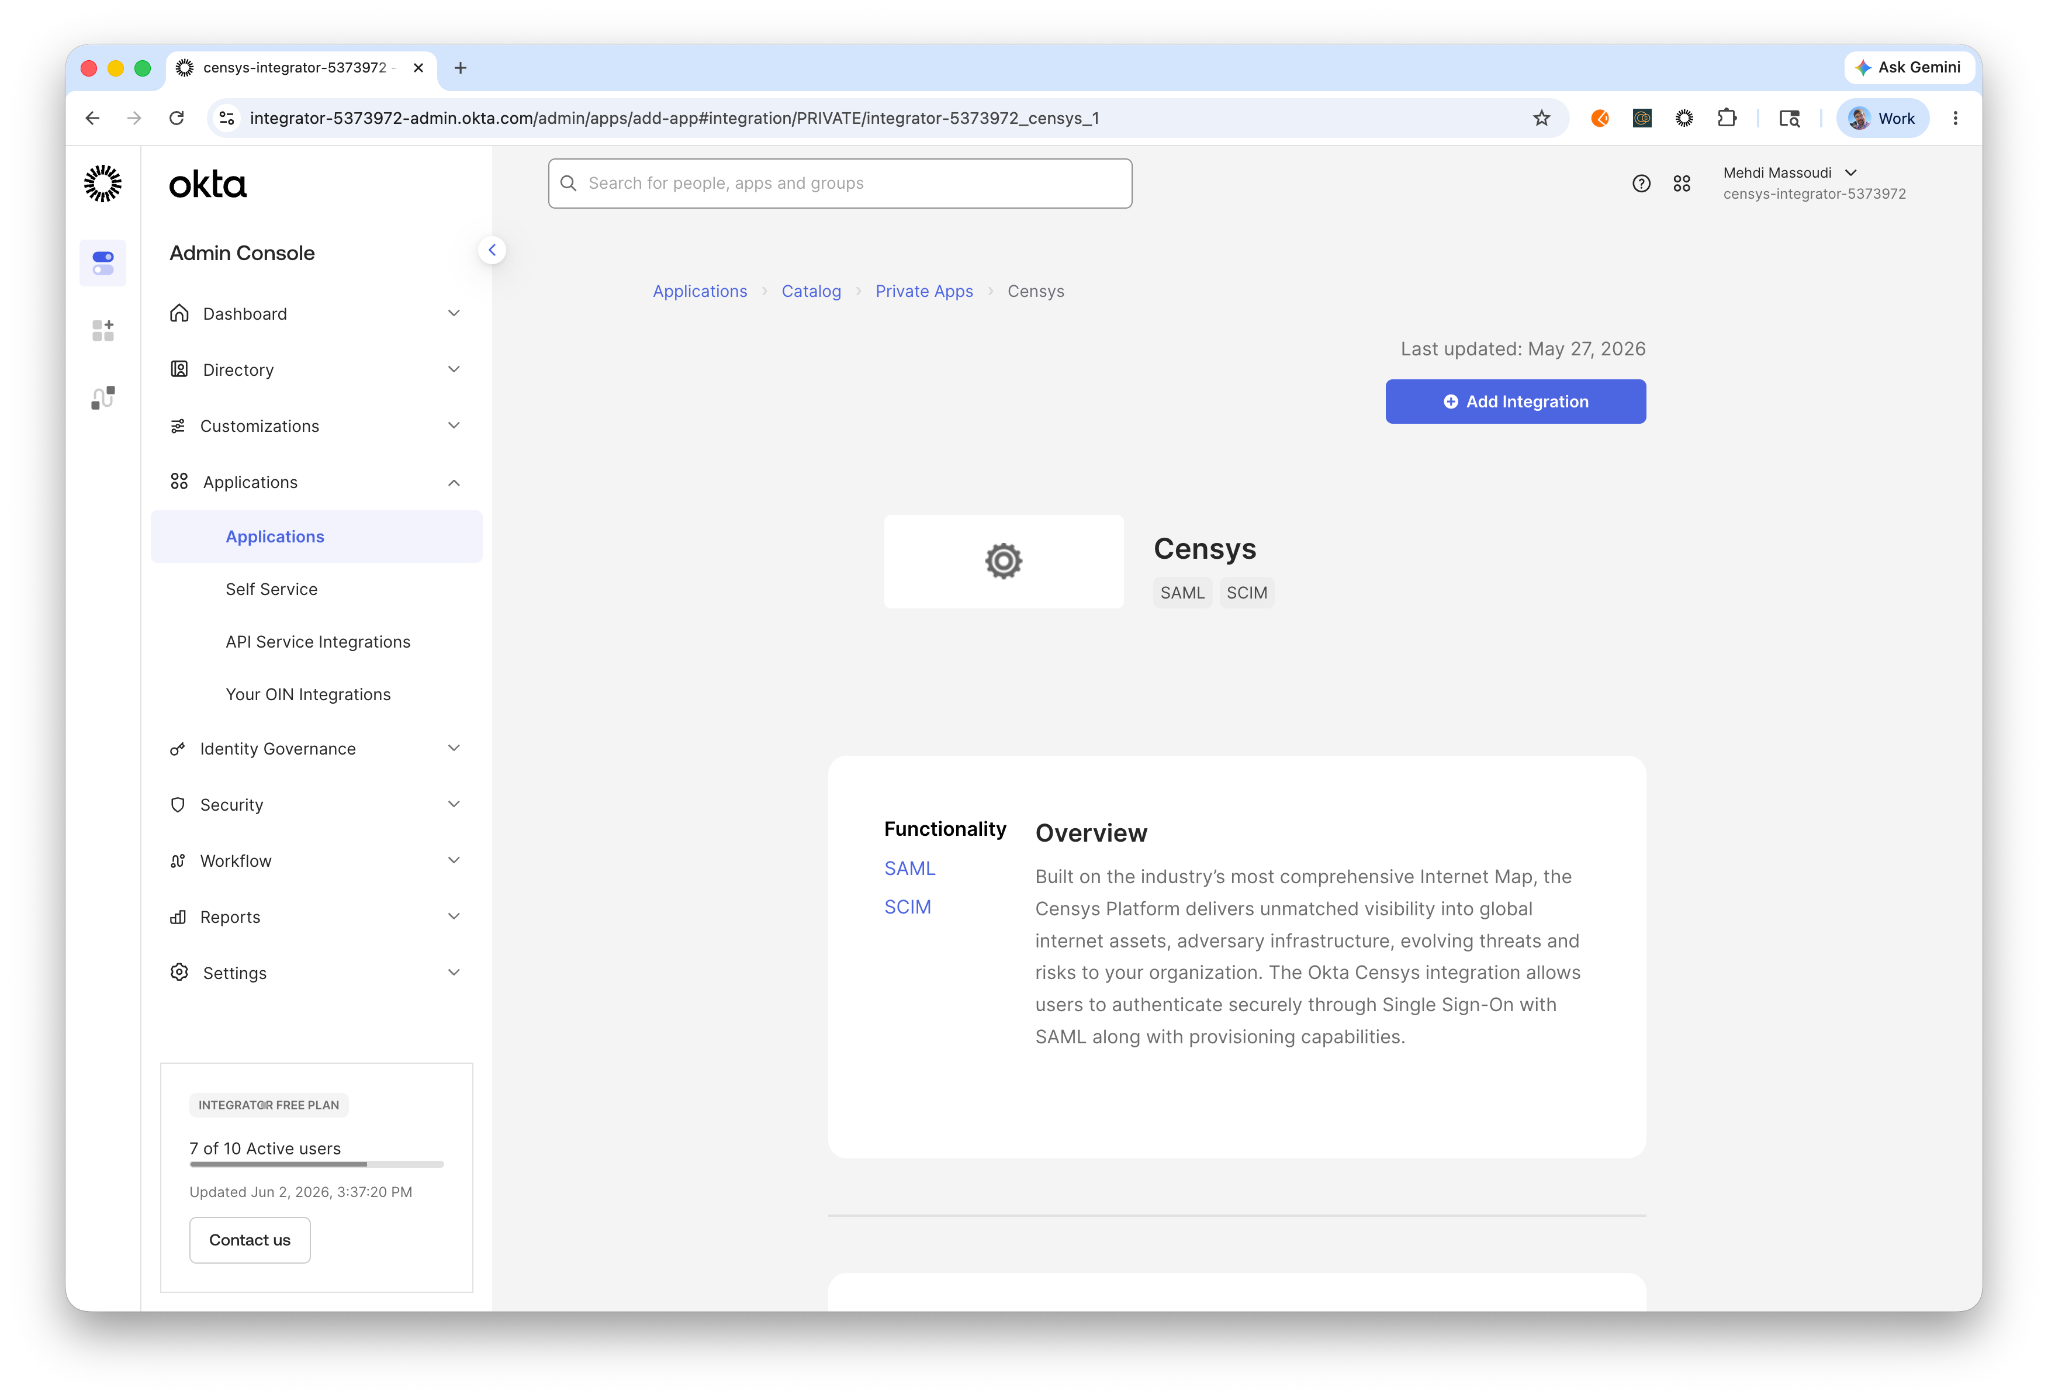
Search for "Censys" and select Add Integration.
-
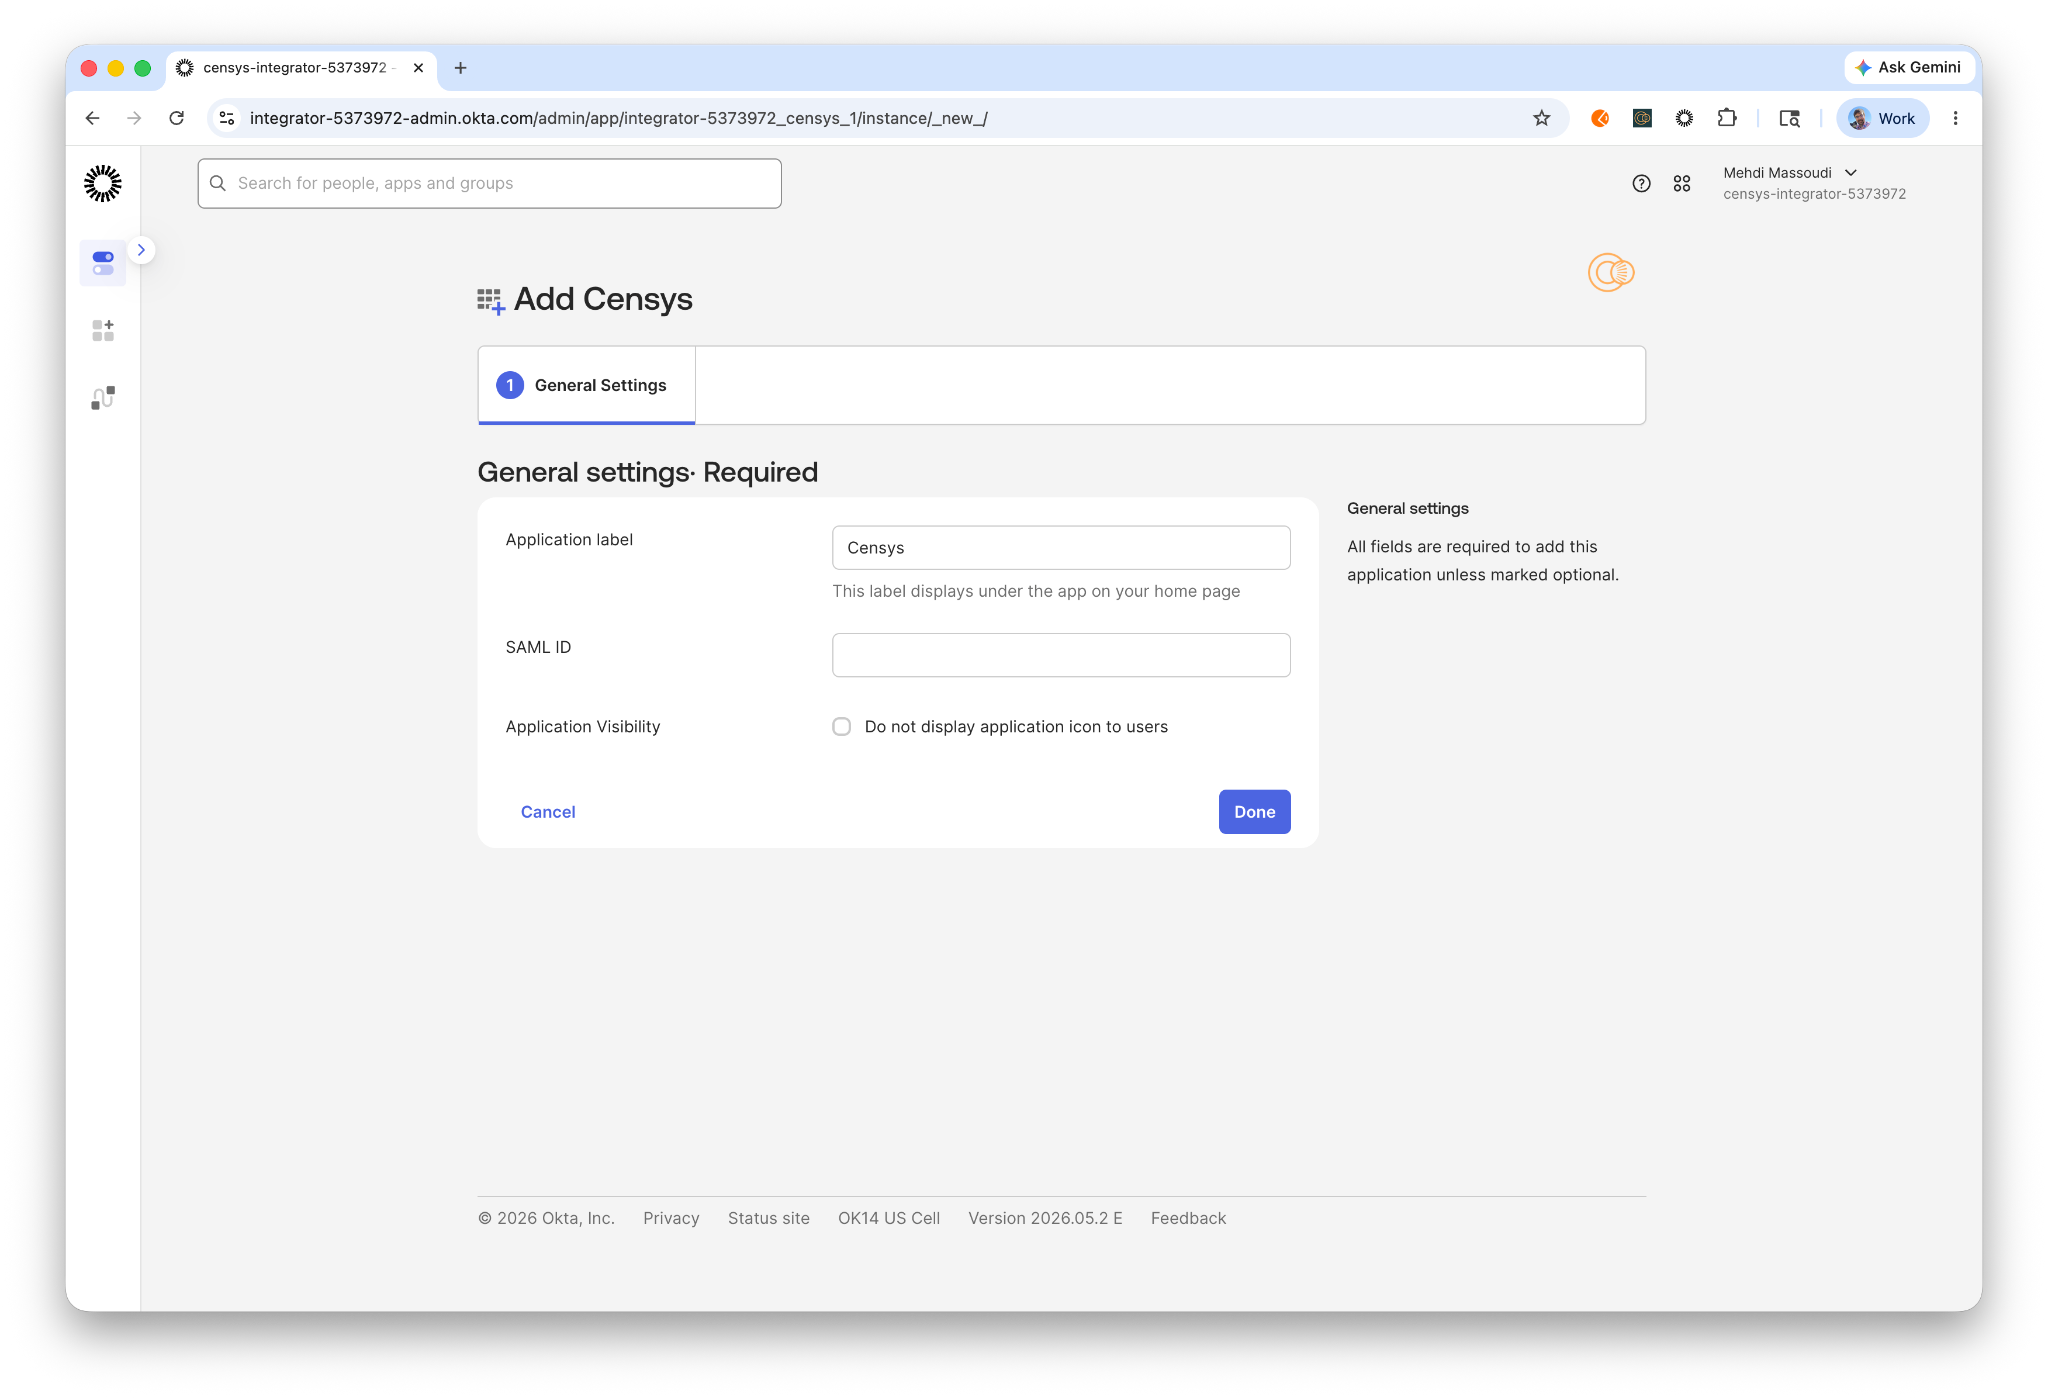
In General Settings, enter a label (e.g., "Censys"). Then, scroll to the SAML ID field and paste the SAML ID copied from the Censys platform. Click Done.
3. Copy the Okta metadata URL
In the Sign On tab of the Censys app in Okta, copy the Metadata URL.
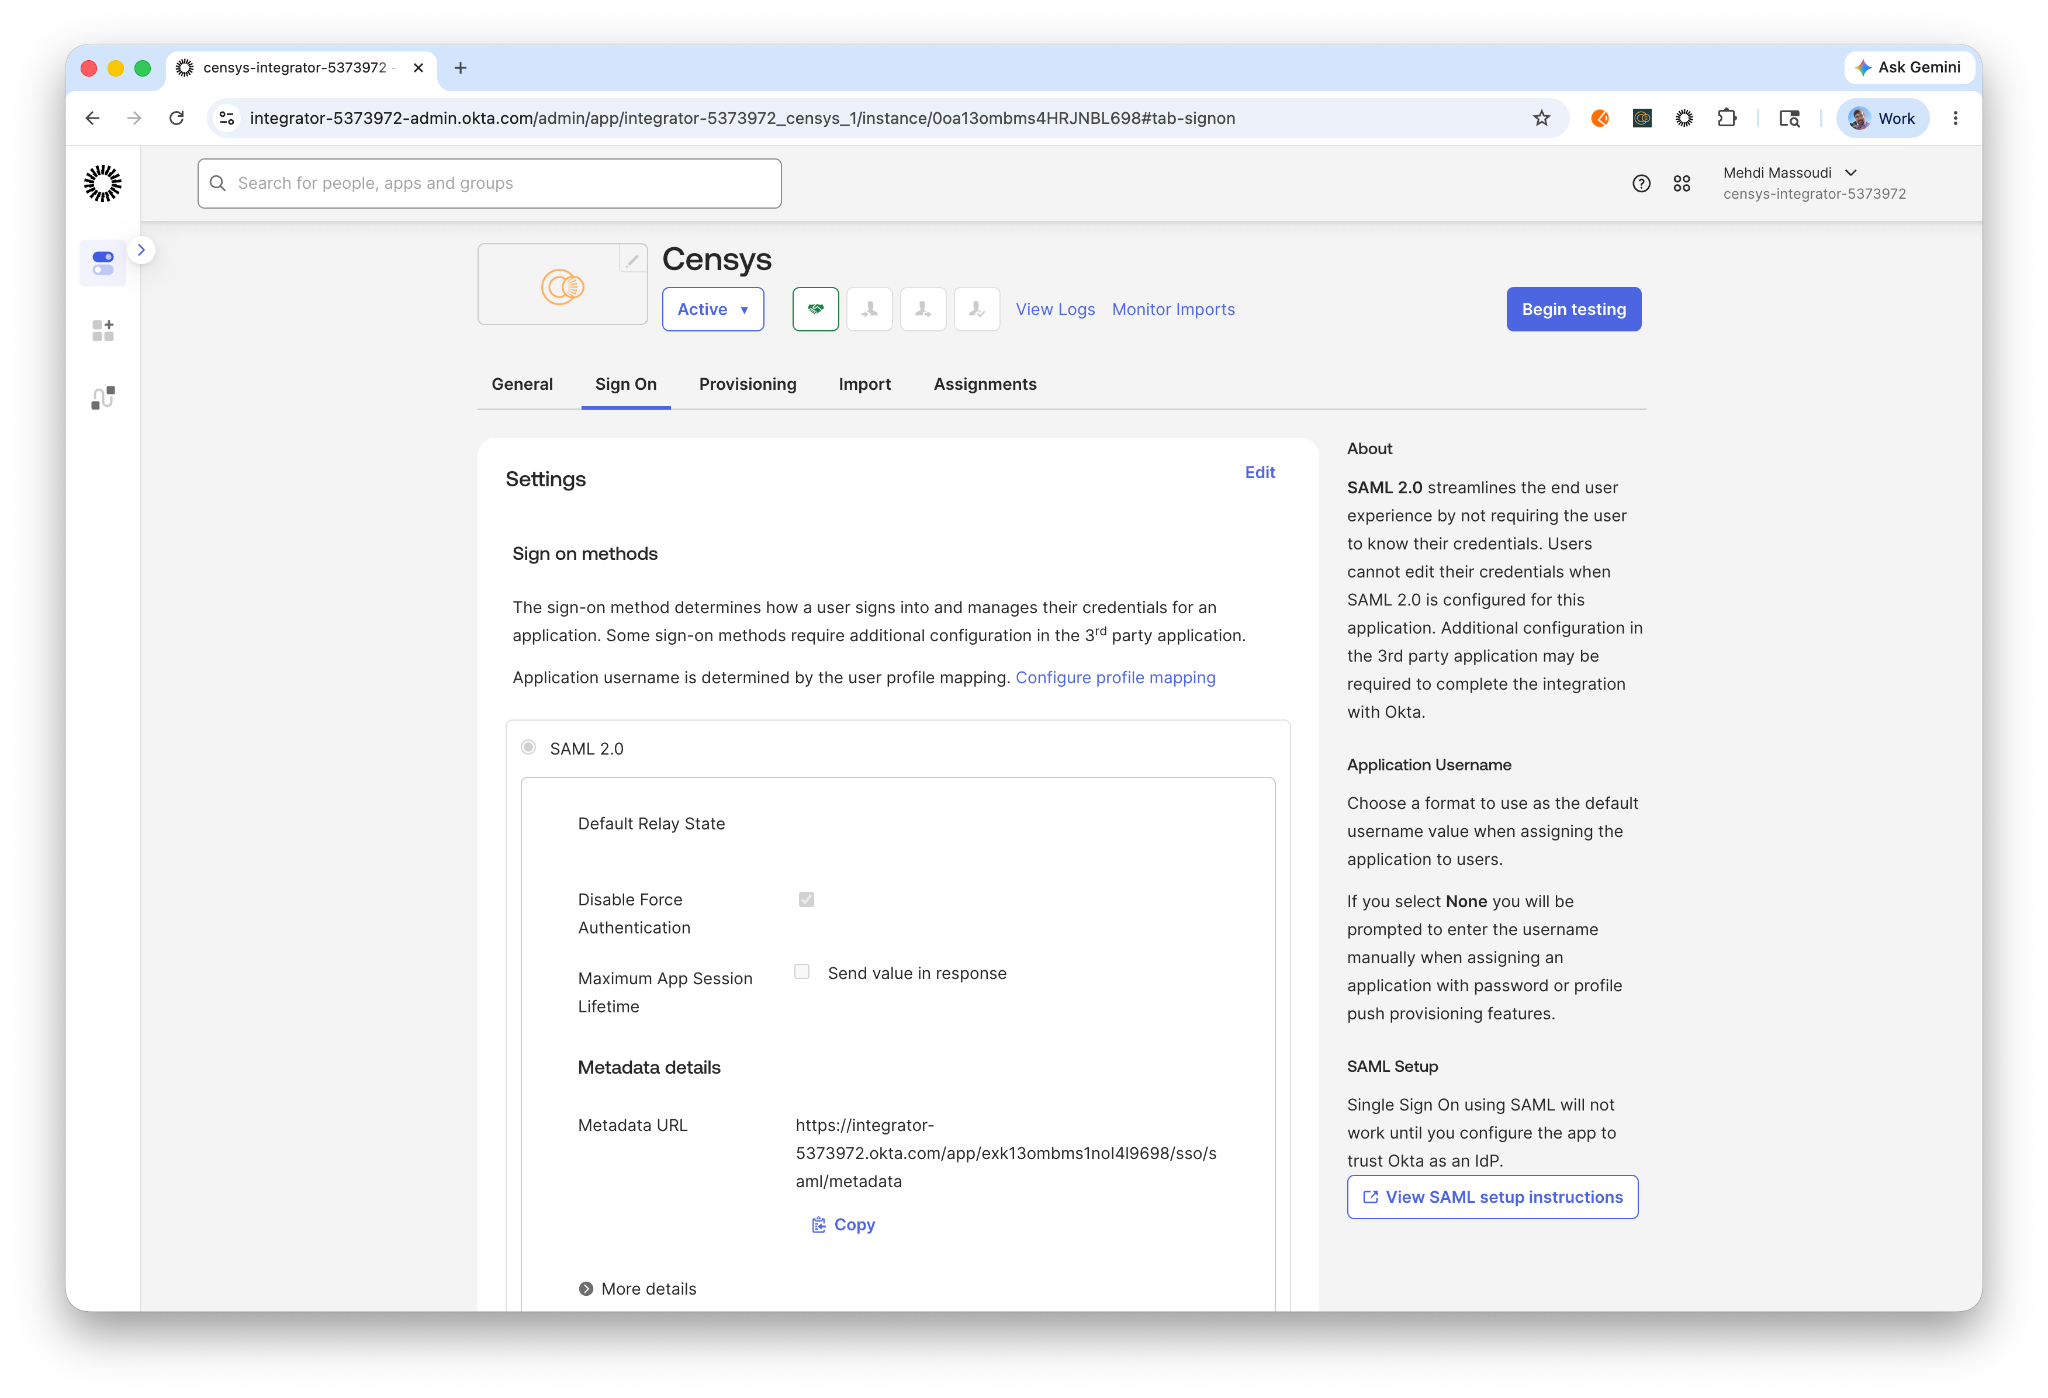
4. Finalize the SAML configuration in Censys
-
Return to the Censys SAML configuration page.
-
Under Identity Provider Information > Use Metadata URL to populate IdP fields, paste the copied Okta Metadata URL into the Metadata URL field.
-
Click Populate.
-
If you want to allow IdP-initiated logins, make sure Allow IdP Initiated Login Endpoint is enabled.
-
Click Save Configuration at the top of the page.
5. Assign users in Okta
In Okta, assign the users (or groups) who should have access to Censys to the Censys application. Only assigned users can authenticate through SAML SSO, and assigned users are provisioned just-in-time when they first sign in.
6. Verify domains and activate
Complete domain verification and activation in Censys as described in the generic sections above. A disabled SAML configuration does not redirect users to log in via Okta.
Set up non-SAML admin
Organizations can set up a non-SAML admin user (a user on a domain not configured for SAML) to avoid getting locked out of the account while testing.
To avoid getting locked out while testing SAML:
- Set up a backup admin account using an email address on a domain not configured for SAML.
- This non-SAML admin account allows you to bypass SAML login if configuration issues occur.
If you are unable to create a backup admin account, you can open an incognito/in-private browser and log in to test the login.
Multiple configurations and domains
You can set up multiple SAML configurations for an organization, but only one SAML configuration can be active for a given domain. Additionally, a SAML configuration can also have multiple domains.
You cannot split users with the same email domain across two different SAML configurations, you can have different SAML configurations for different email domains.
For example, if you want to set up SAML for users across the example domains alpha.io, beta.io, and gamma.io, you could do any of the following:
- Set up one SAML configuration for all three domains.
- Set up three different SAML configurations (one for each domain).
- A combination of the options described above.