Risks
Censys Attack Surface Management (ASM) detects over 400 types of risks that can be associated with your inventory assets.
Risks Instances page
The Risk Instances page lists all instances of risks detected in your attack surface that your team should investigate.
The default view shows all active risk instances across your entire attack surface.
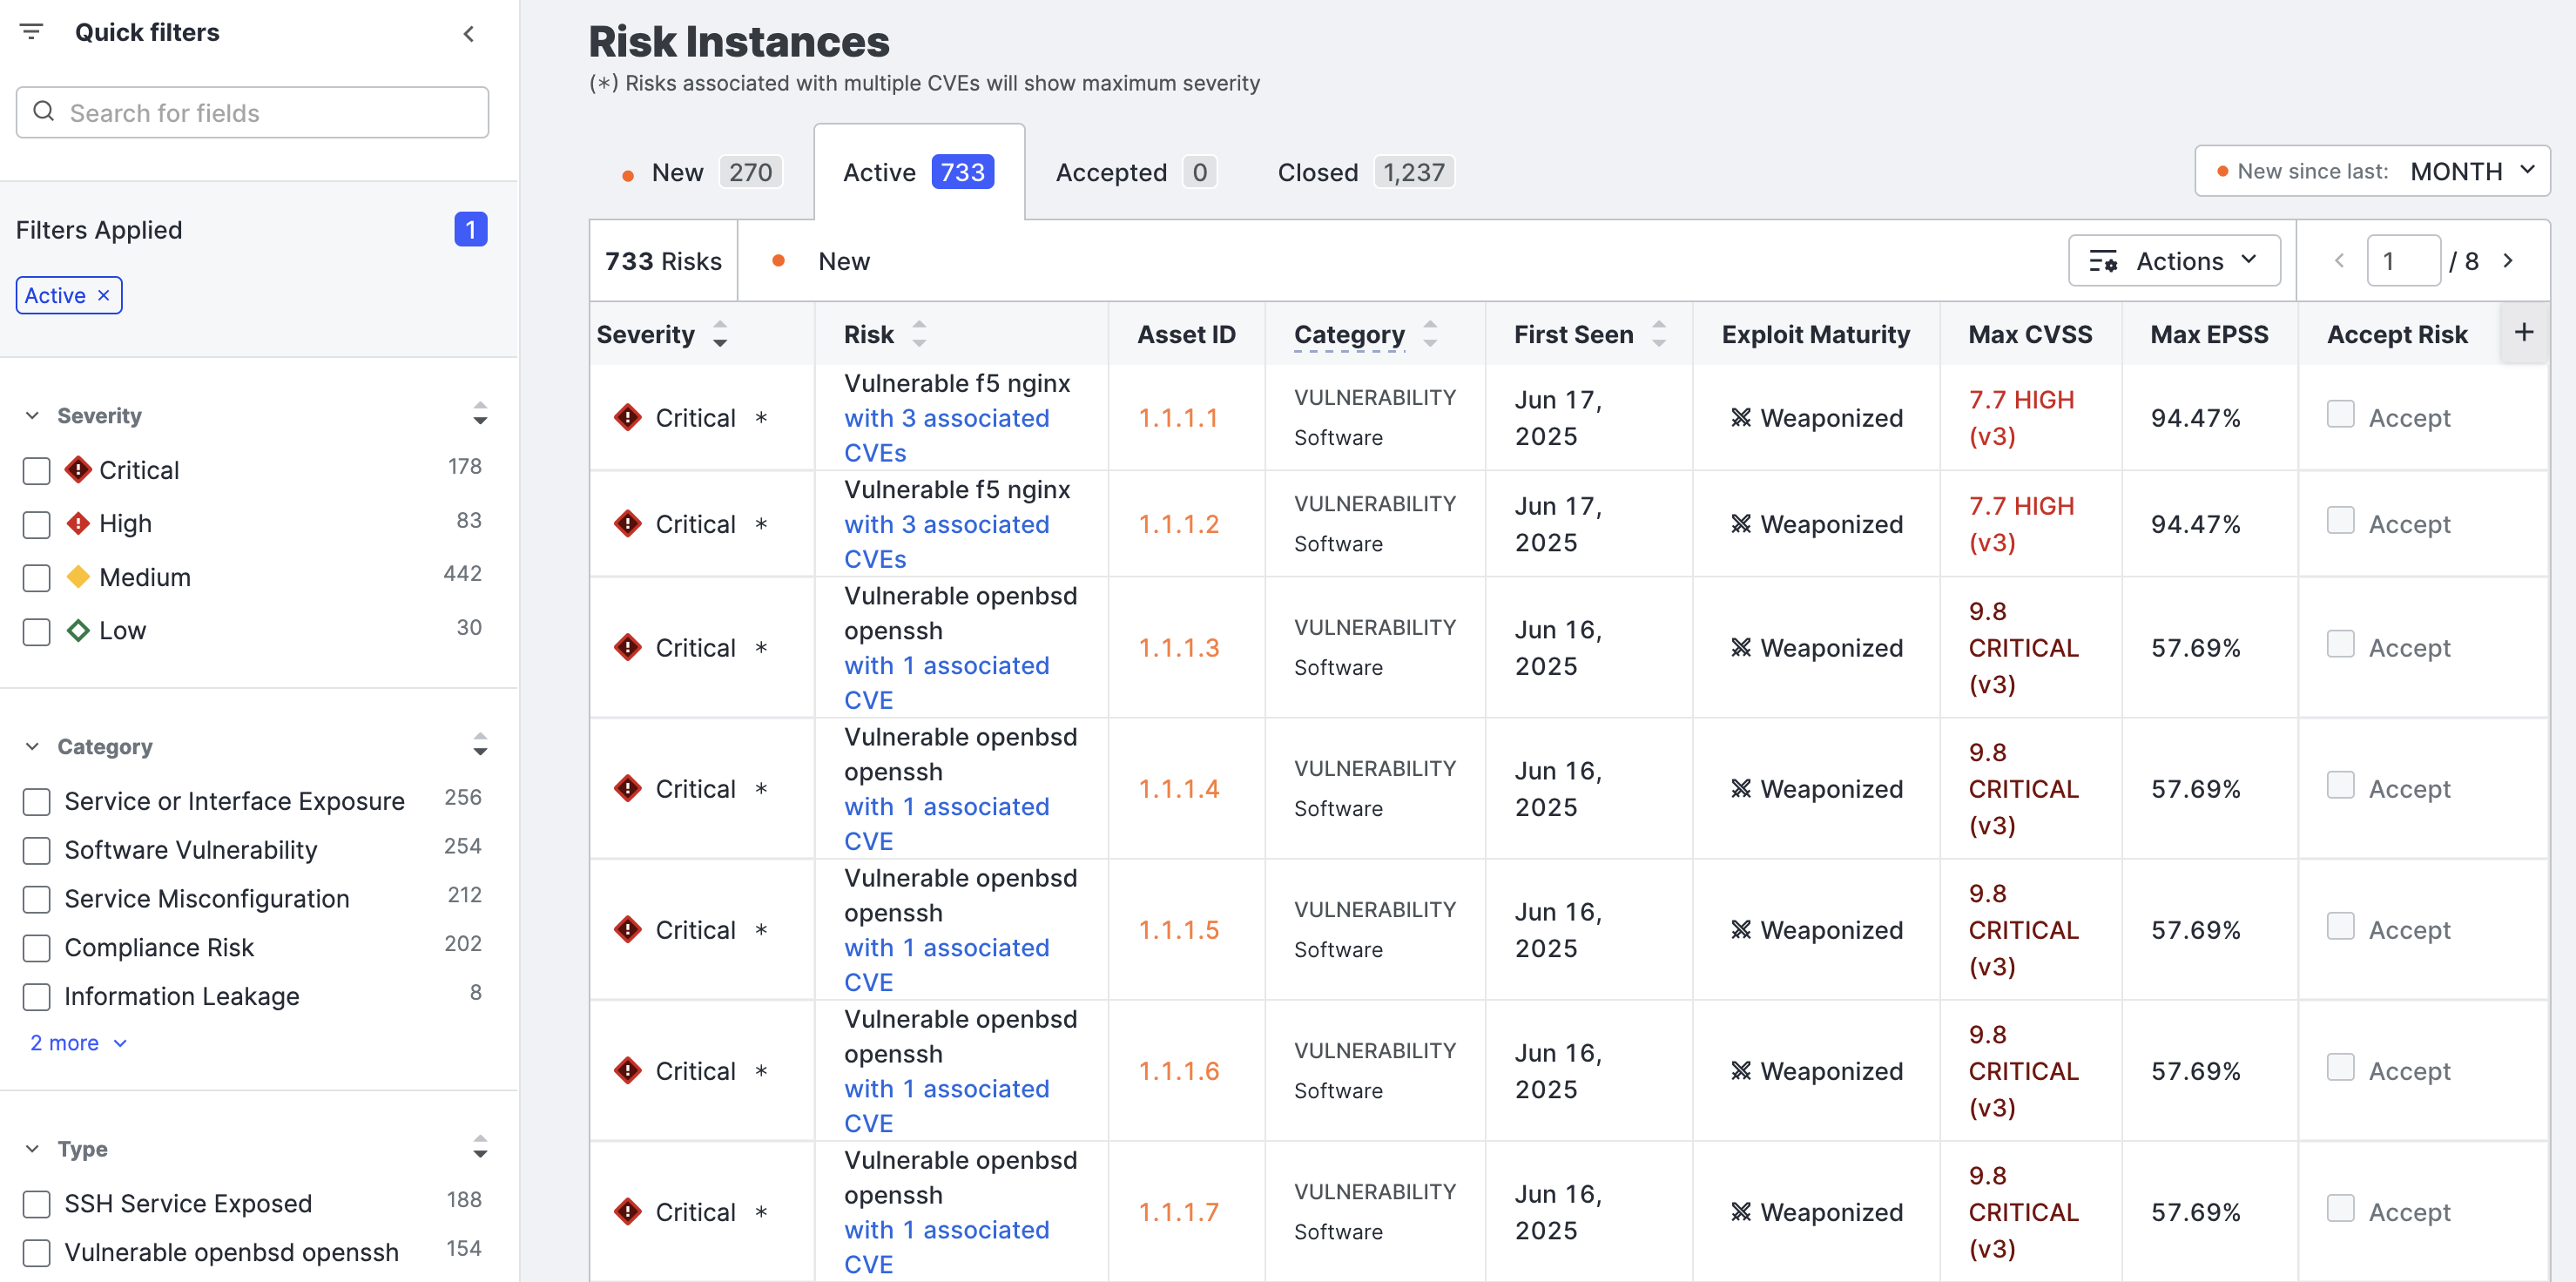
The tabs help you view risks that are accepted by a member of your team or are closed (no longer detected). View new risks with any status (active, accepted, or closed) by opening the left tab. Adjust the definition of new using the New since list above the table on the right.
NoteOn the Risk Instances page, CVE risks use the following naming convention:
Vulnerable [software vendor] [software product] [associated CVE count]. The associated CVE count links to a table in which you can see all of the individual CVEs associated with the software.Risks with the naming format
“Vulnerable [software product] [CVE ID]”, such as“Vulnerable OpenSSH [CVE-2024-6387]”are Rapid Response risks.Rapid Response risks do not include CVSS scores, KEV catalog information, nor attack vector information.
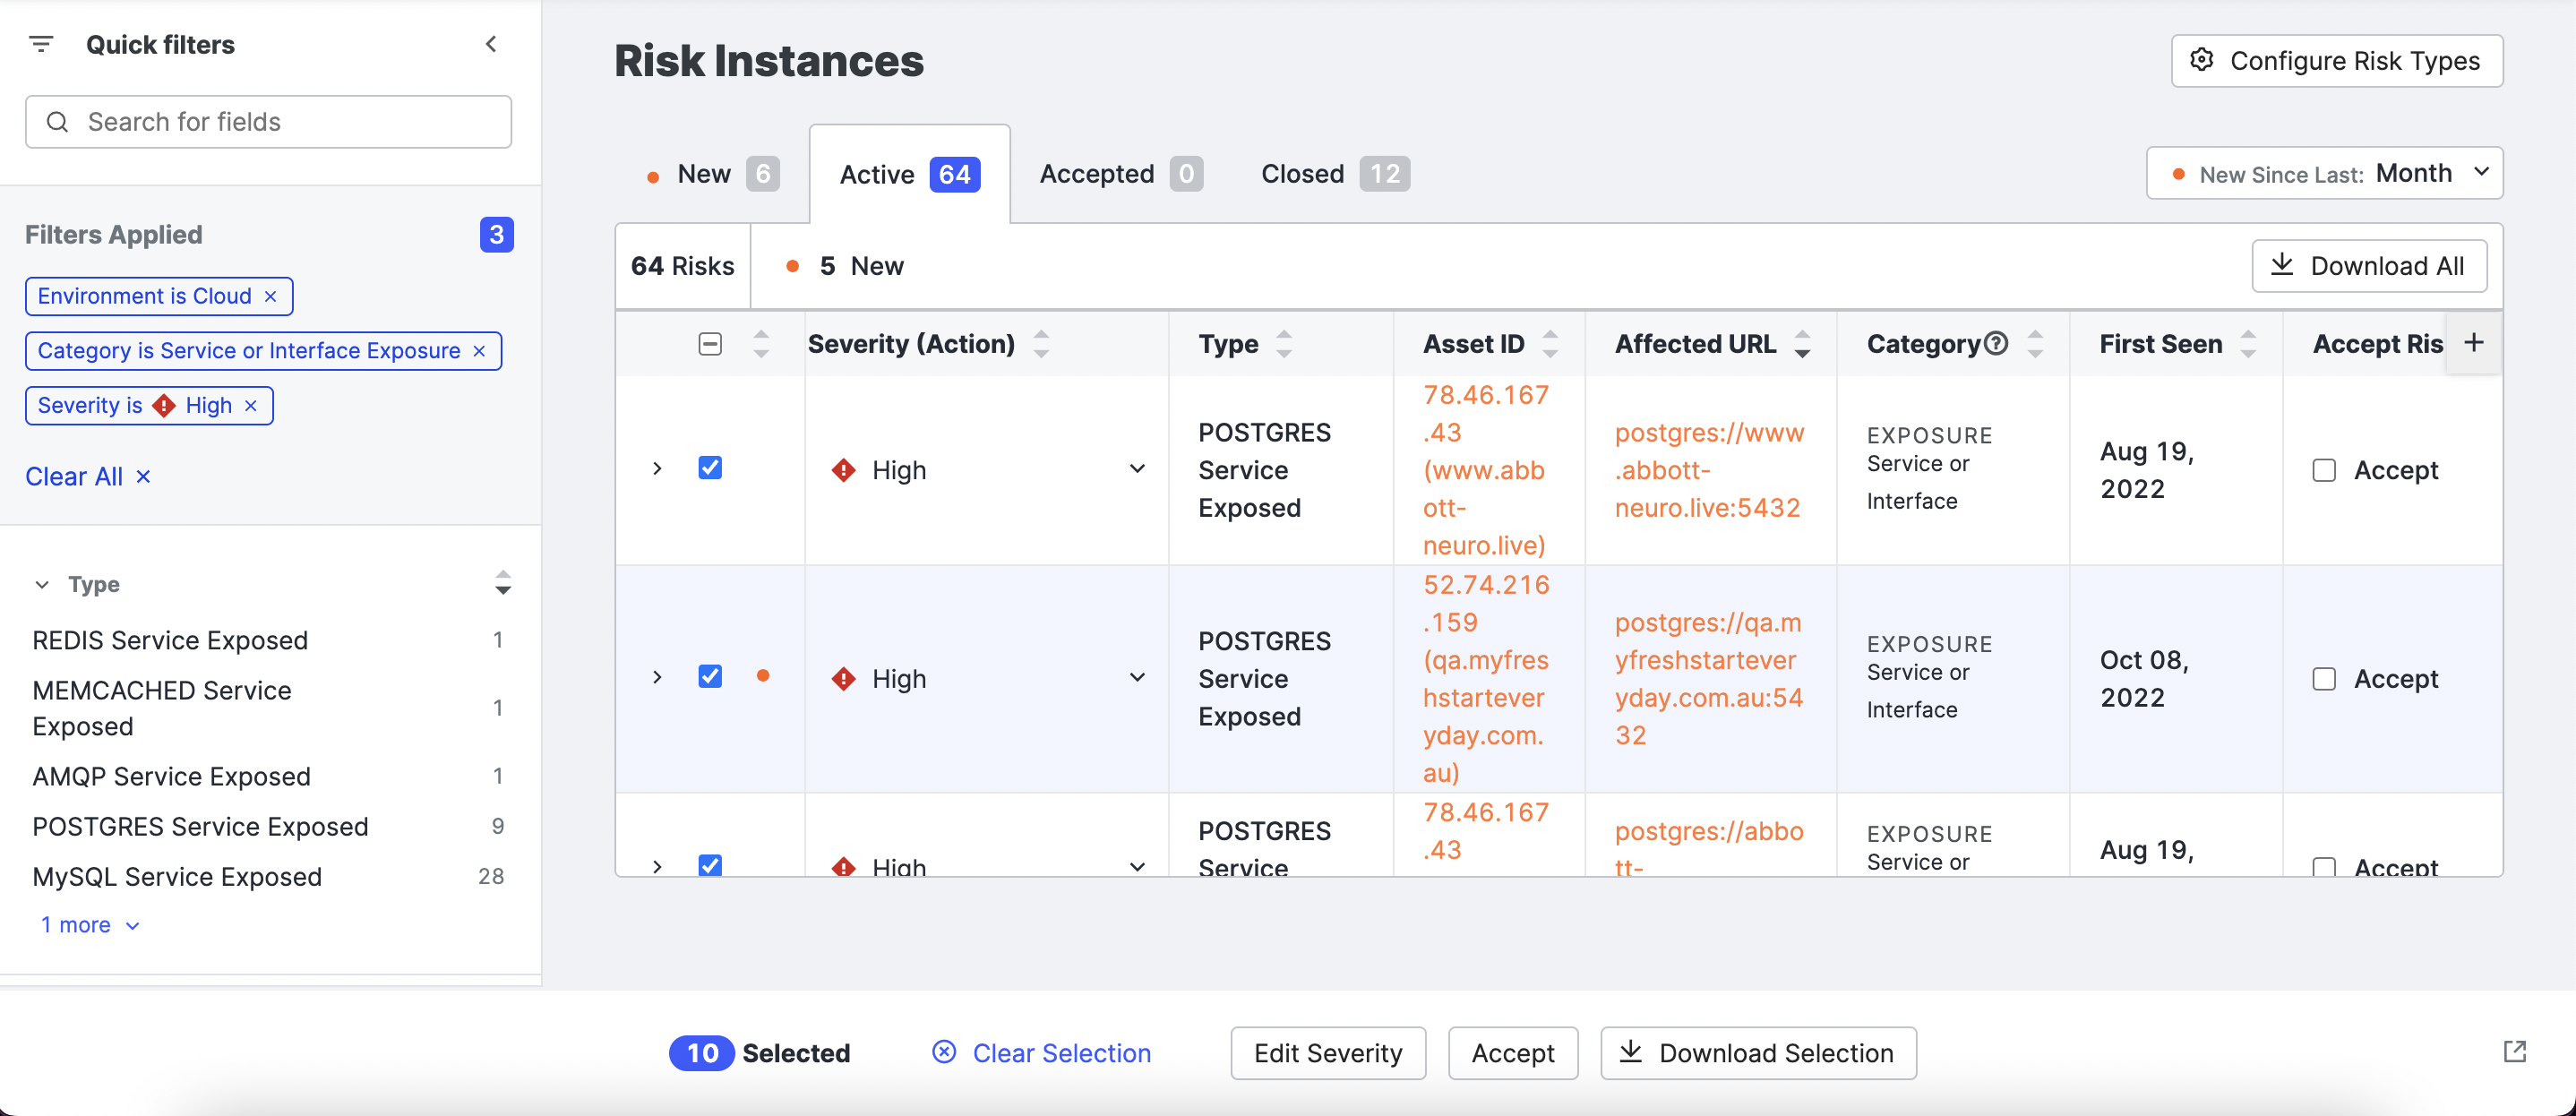
Quick filters
Quick filters provide both insight and filtering options to begin your investigative efforts. Most filters listed in the panel are sorted based on prevalence in your attack surface to help you set priorities.
Quick filters include:
- Severity: Tackle risks based on the potential impact on your organization.
- Category: Triage based on category to target remediation of certain externally facing weaknesses.
- Type: Triage based on specific risk types to group those with similar remediation recommendations.
- Asset Type: Review based on the type of affected asset.
- Environment: Triage based on infrastructure provisioning - cloud and other environments.
Click the linked asset in the Affected Asset column to open the Asset Details page and see more information about the risk.
Risk instances on asset details pages
Click on the asset ID to view the details and remediation recommendations for any risks detected on the asset.
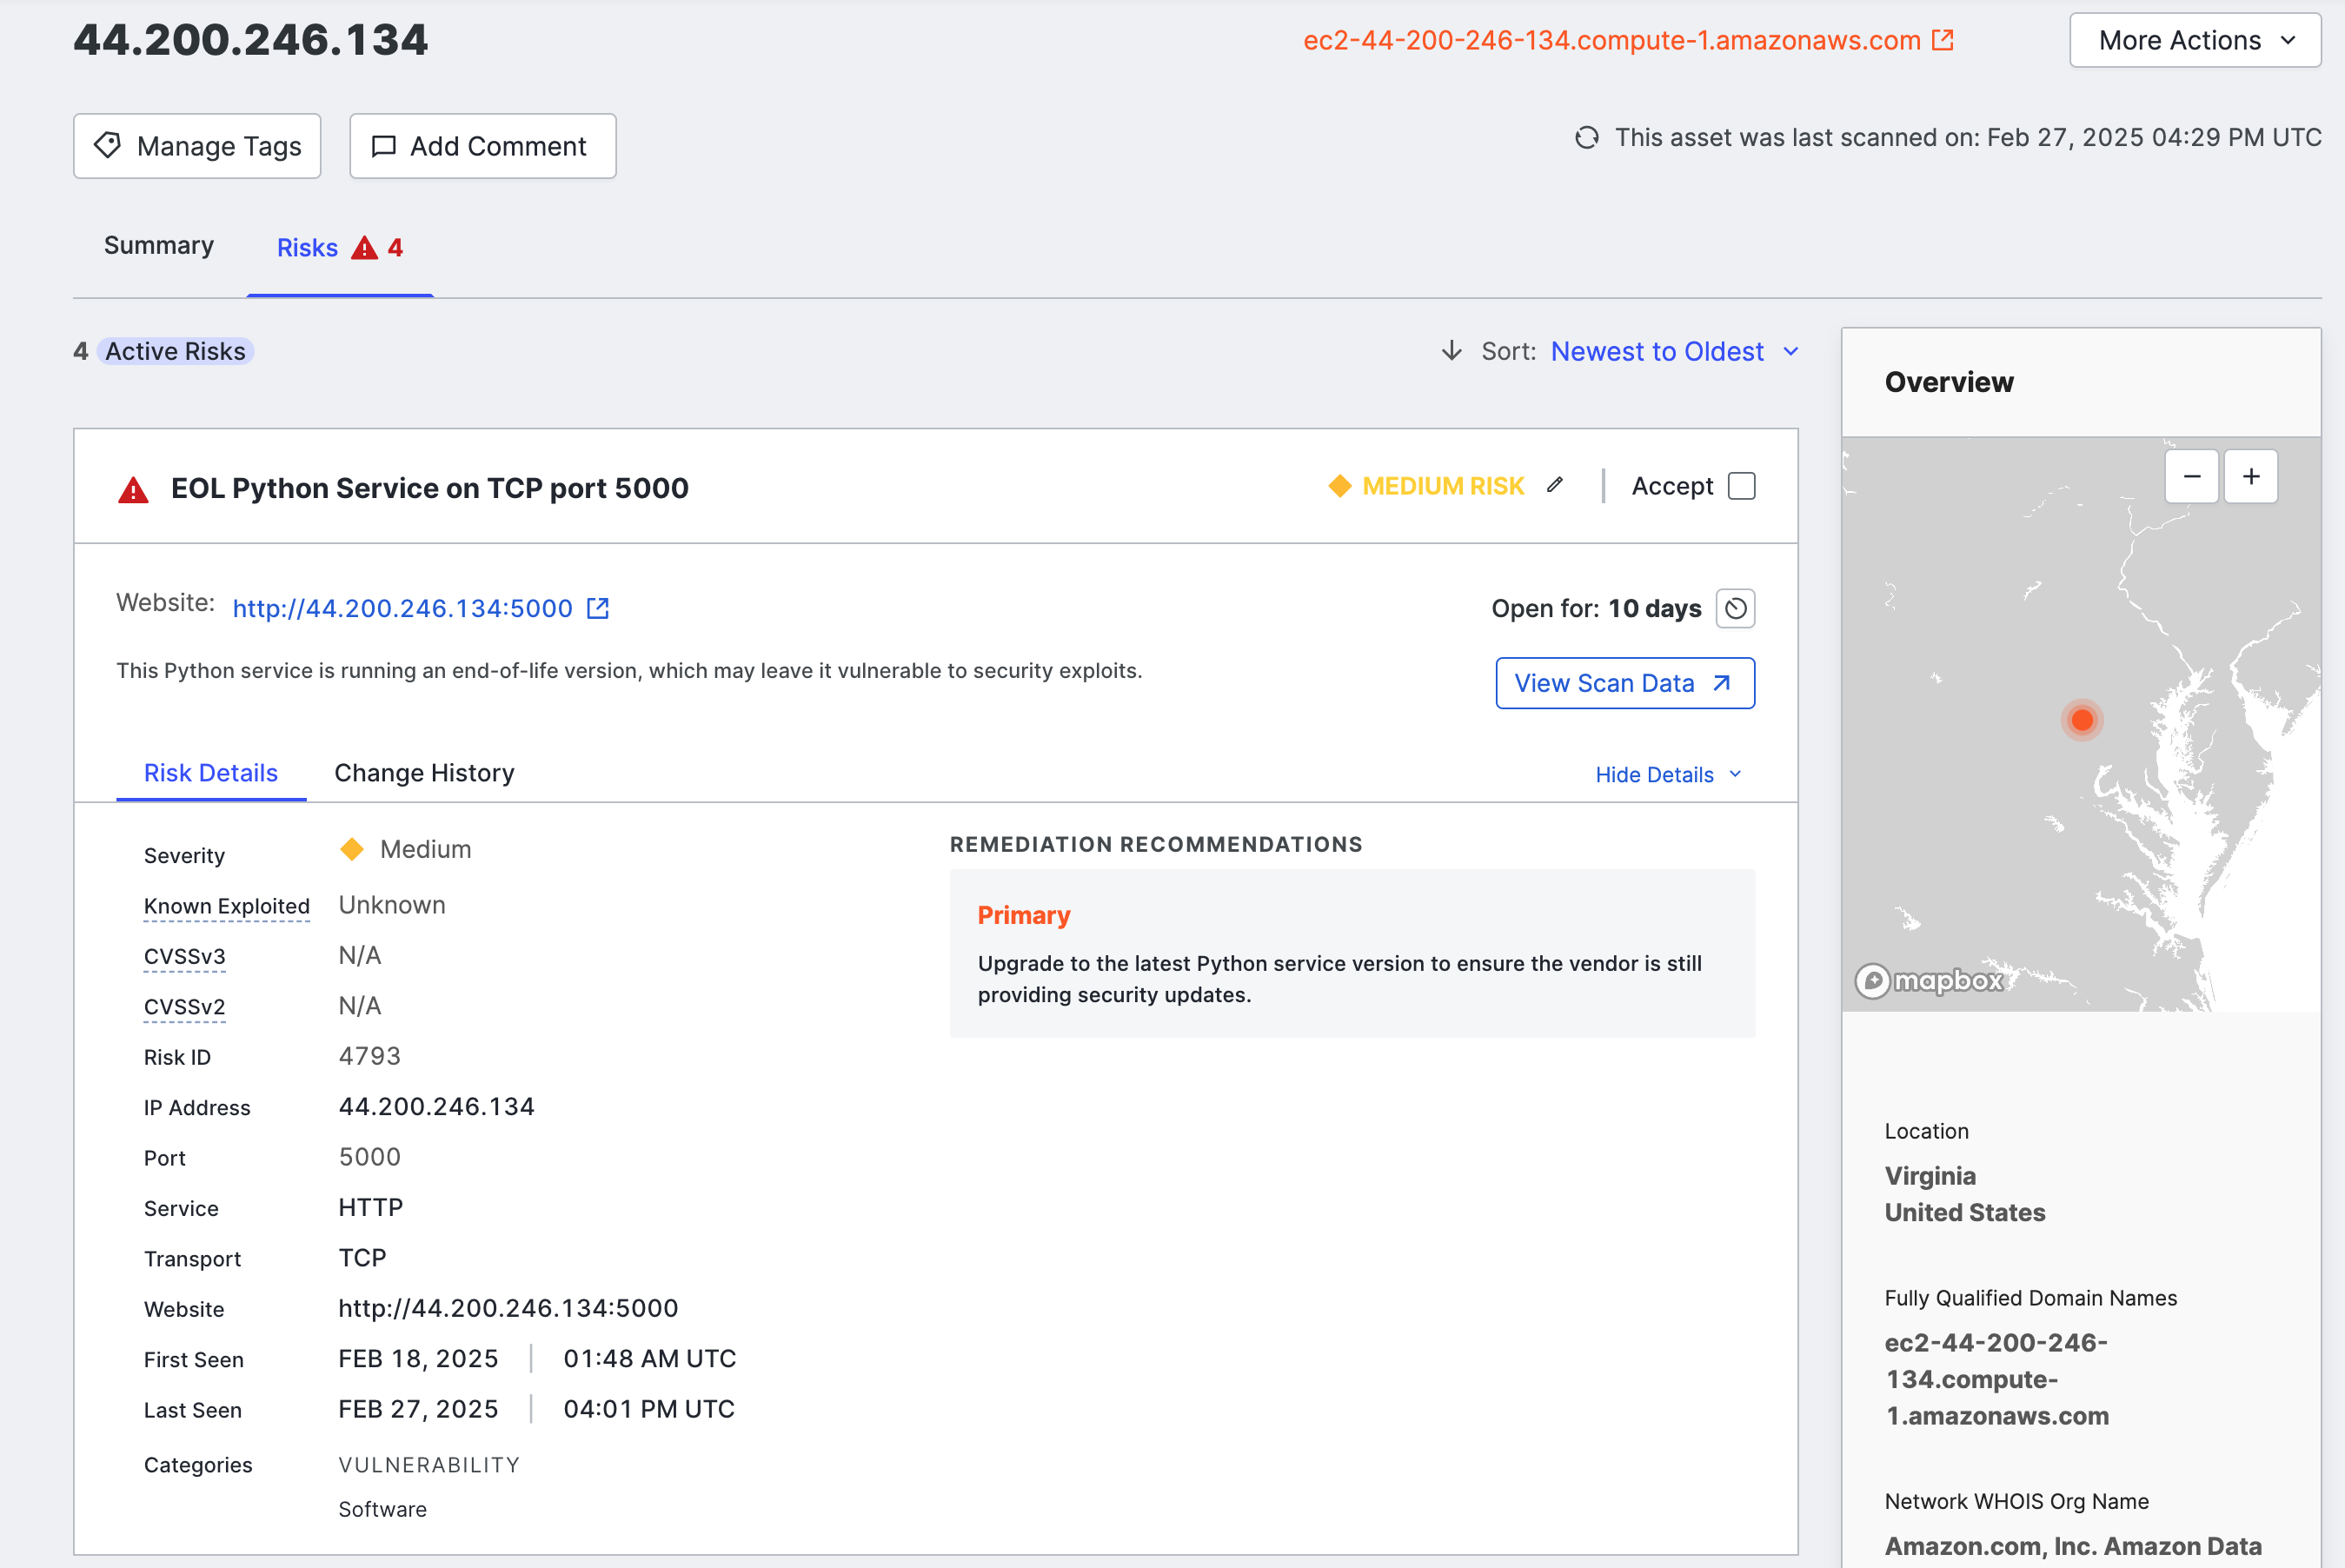
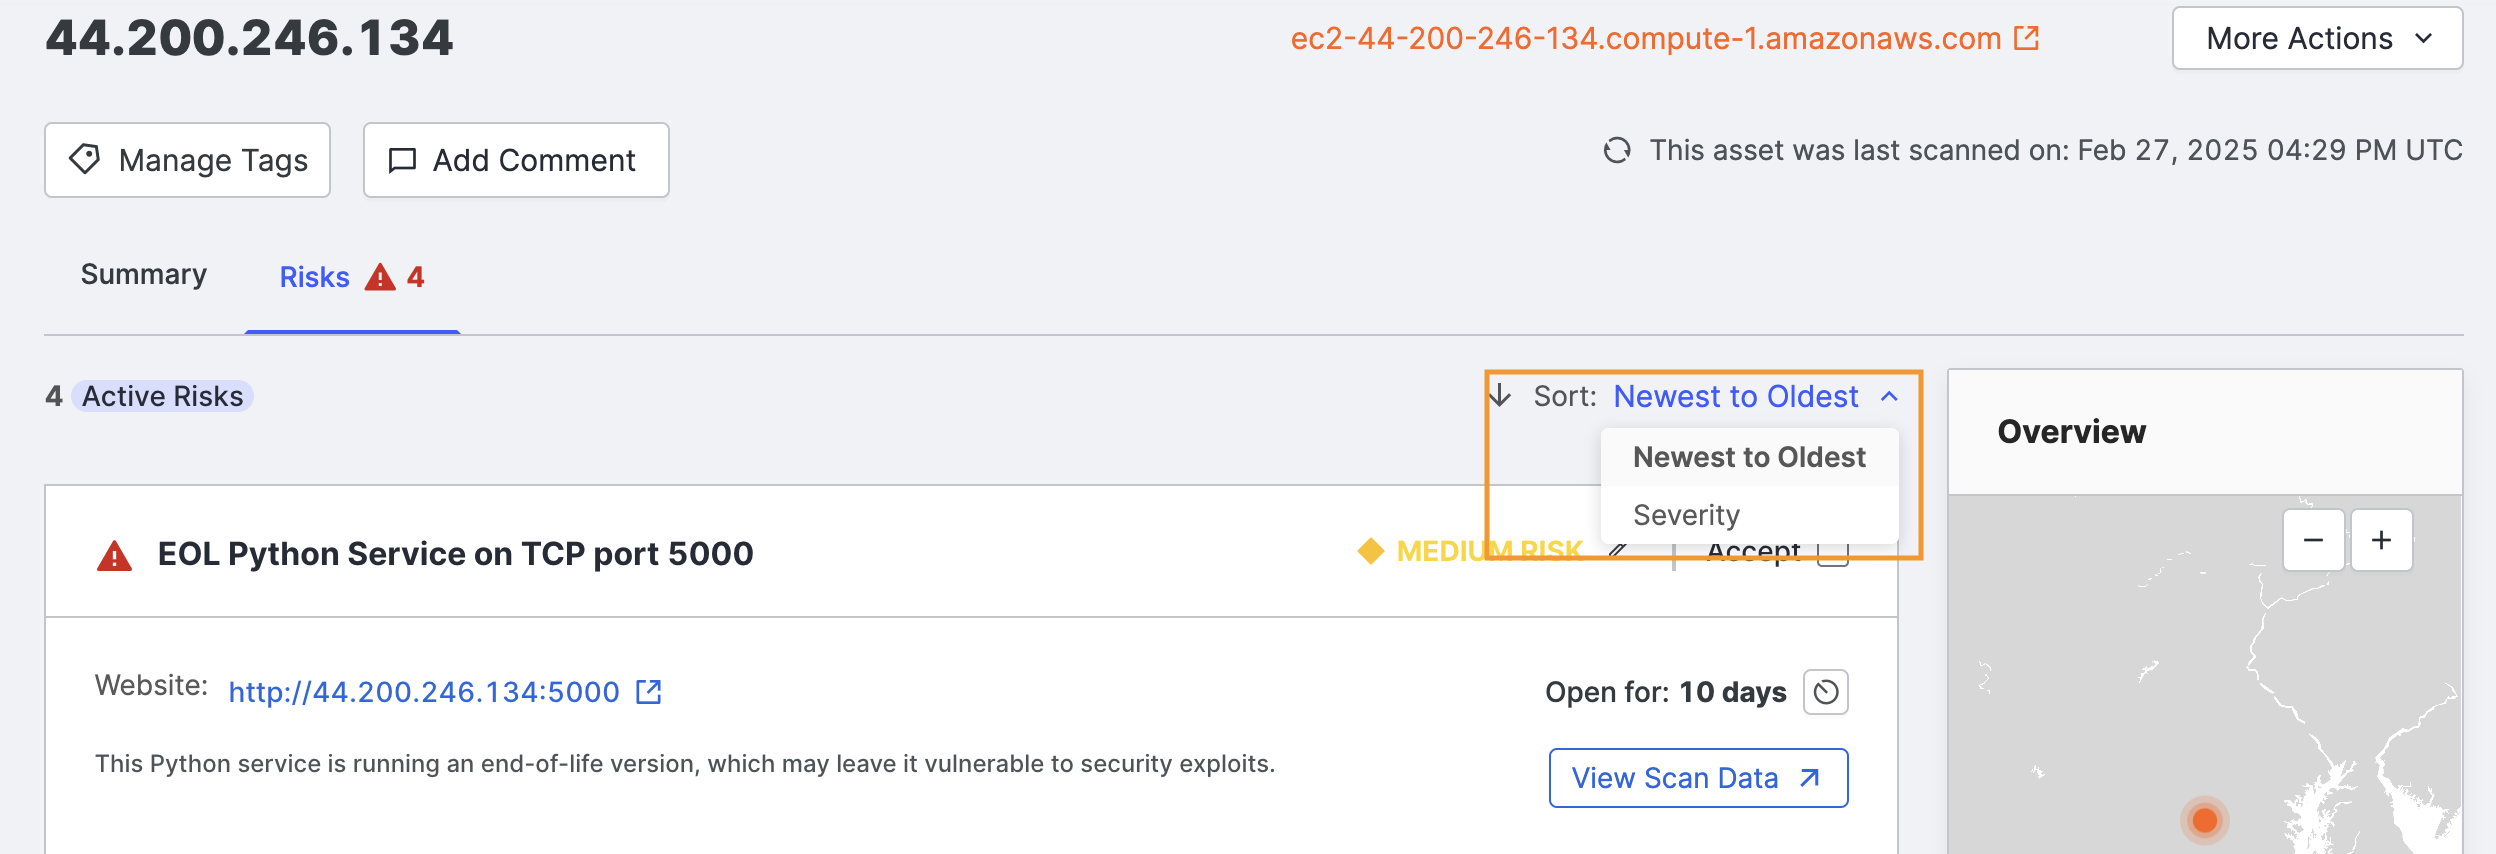
The default sorting order is by detection date, with the most recently detected risks on top. You can also sort by severity, with the most severe on top.
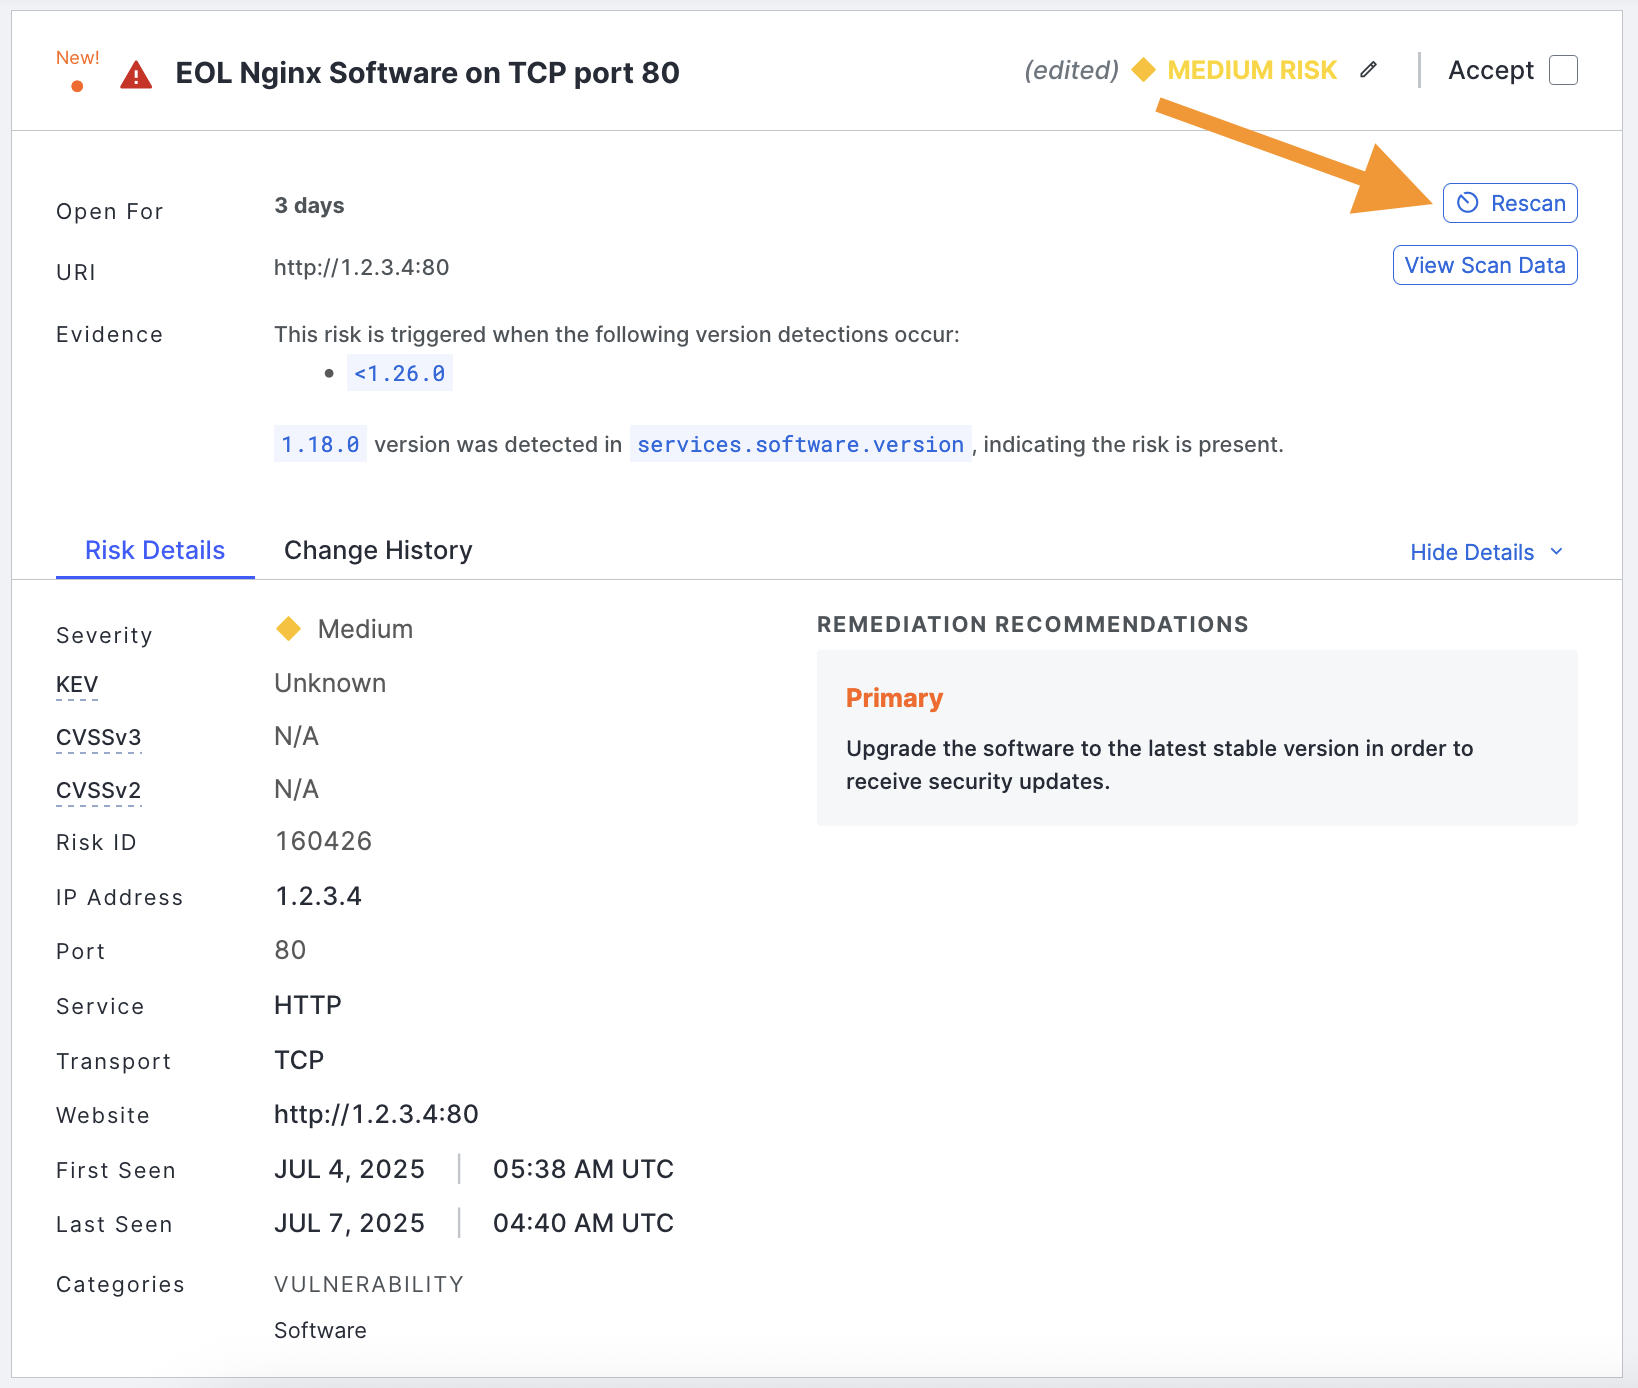
Click View Scan Data to see the scan data related to the detected risk.
Rescan host services
You can rescan a host service associated with a risk by clicking the Rescan button on the risk card in the ASM web console. Use this option to validate your upgrade and remediation workflows.
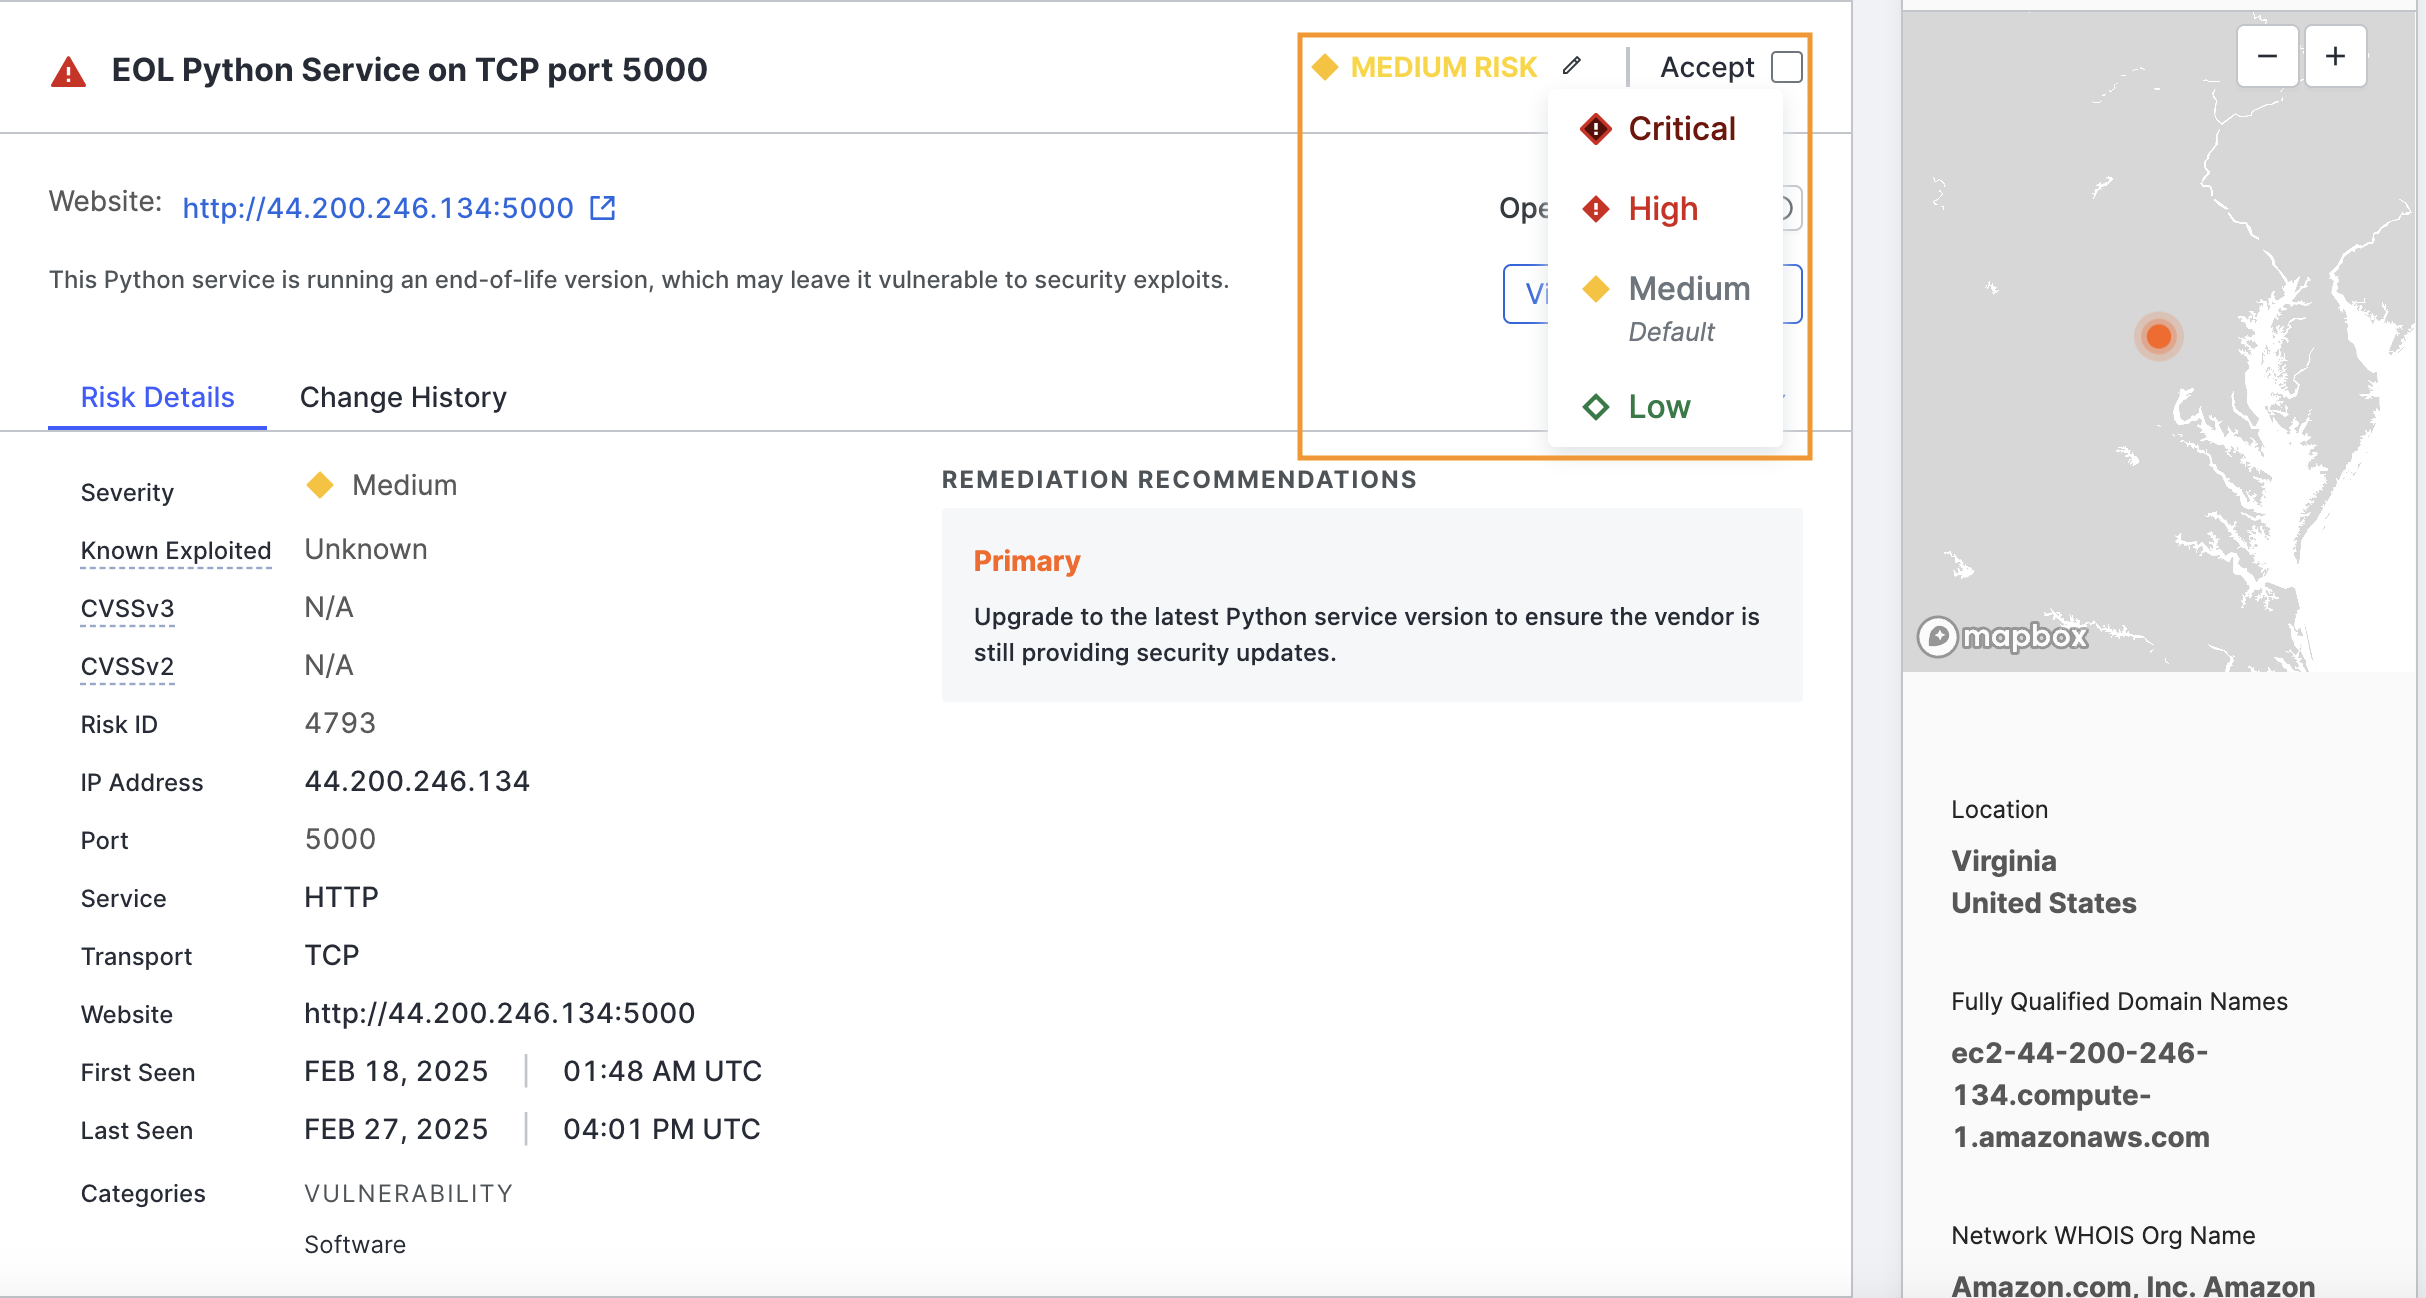
Edit risk instances
You can override the default risk setting by using the edit option on each risk area. This is useful when an individual risk requires a different severity level than the default. A risk may be more or less important in your environment due to its context, business significance, or other factors.
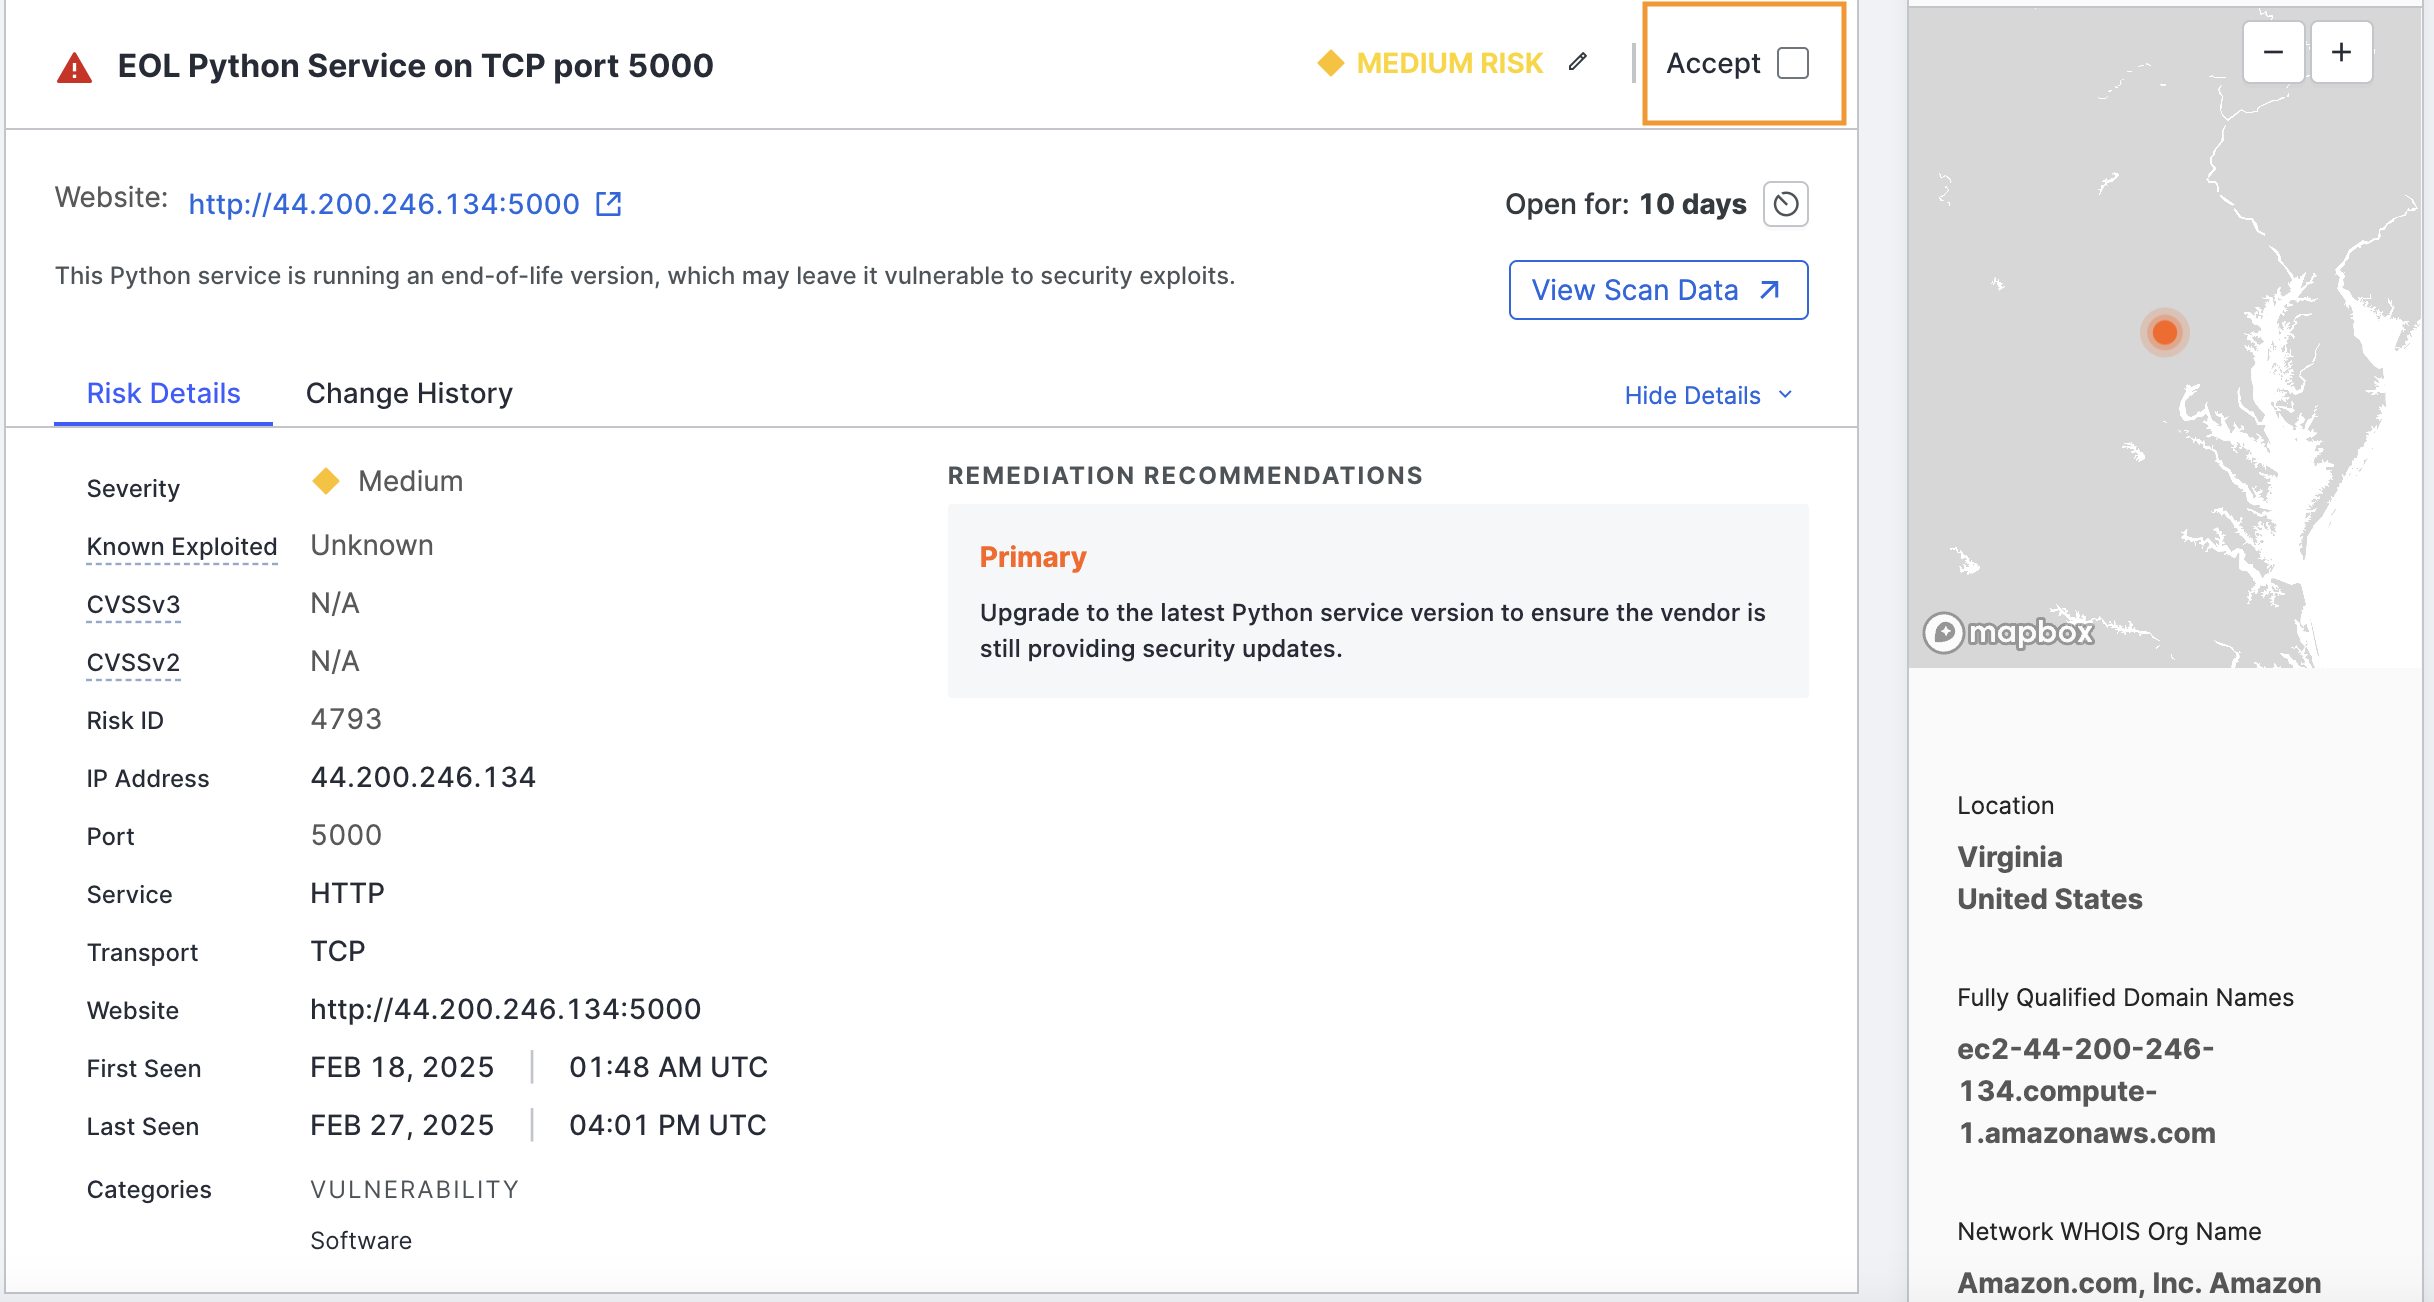
If your organization does not consider a specific risk instance a threat and wants to remove it from risk lists, counts, report metrics, and the logbook, click Accept in the upper right corner of the risk area.
Edit risk instances in bulk
To change the severity of a set of risk instances, use the checkboxes on the Risk table to select the ones you want to work with.
- Click Actions > Edit Severity.
- Select the desired severity and optionally provide a reason for the change.
After accepting a risk, an option to view or hide accepted risks is shown at the top of the list. You can toggle this option to View to keep the stub of the accepted risk instance in the list or select Hide to hide it entirely.
You can undo your acceptance by clearing the Acceptance checkbox.
Risk evidence
Security analysts frequently encounter false positives for security issues in their day-to-day lives. In ASM, many risk instance features explanatory evidence that comprehensively describes how the risk was detected.
Use risk evidence to understand how Censys detected a risk. This will help you determine whether the risk requires further validation before it is prioritized for remediation.
Risk evidence links directly to the scan data that constitutes the evidence for risk. This enables you to accelerate your investigations and use Censys data to find and close risks faster.
View and explore risk evidence
In the ASM web console, view risk evidence for a risk instance by opening the risk details card on an asset.
In the risk overview, the Evidence field provides a plain-language explanation of the data that Censys scans identified that led to the risk classification. Click the evidence link to pivot to the pertinent field-value pair in the asset's raw data table.
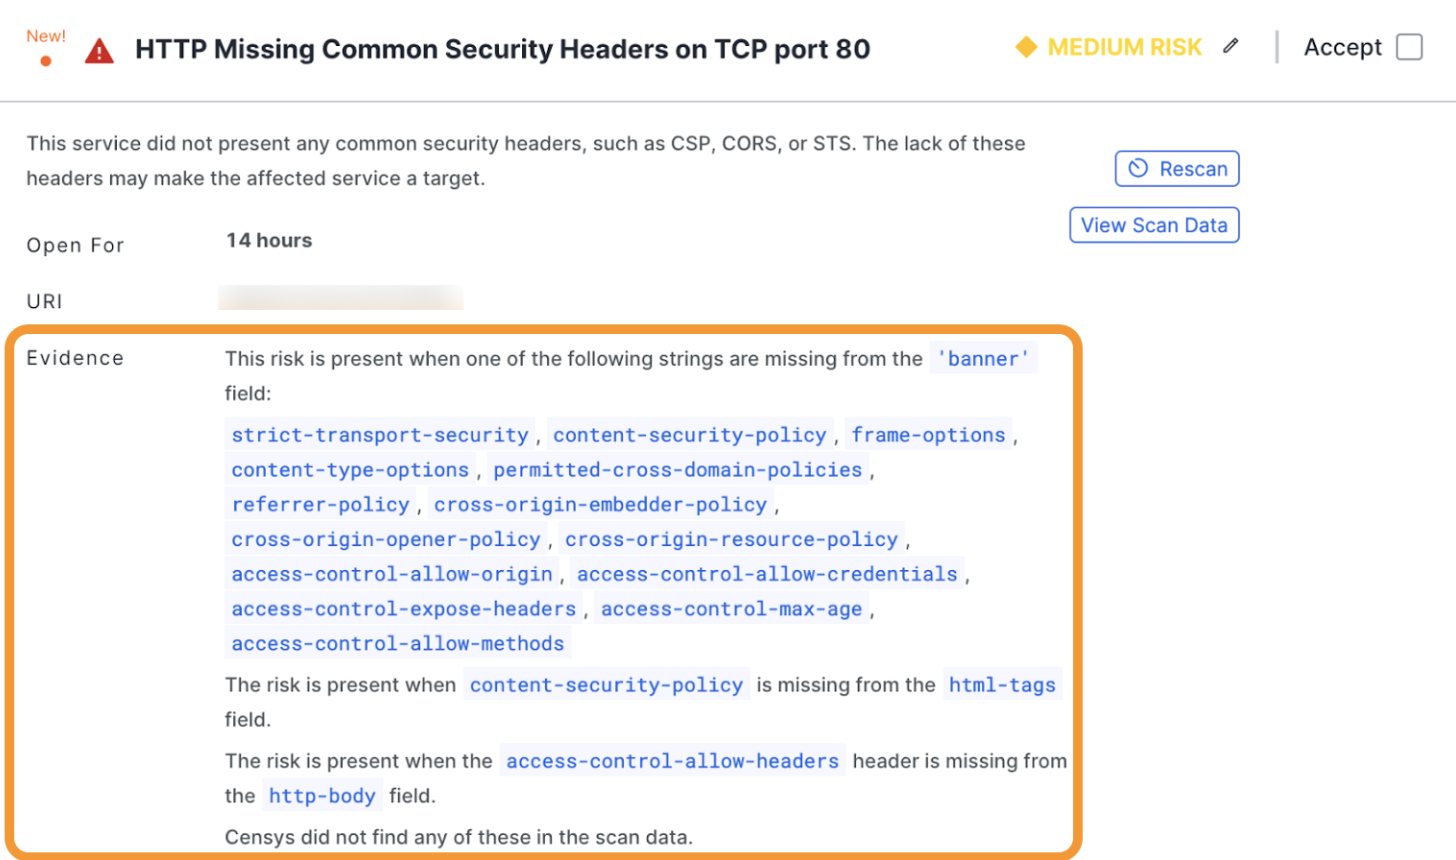
An example risk card with the evidence field in the risk overview highlighted.
Download the risks list as CSV
You can download a CSV of the entire list of risks in a tab by clicking Actions > Download CSV.
NoteIn risk CSV exports, the Last Updated and Last Scanned columns present the same data. The timestamps in these columns denote when something of significance changed on a risk instance. For users interested in identifying when Censys scanners last saw a risk, use the Last Seen column instead.
You can also download a subset of relevant risks. Select the risks to download and click Download Selection.
The risk categories identified by the Censys Attack Surface Management platform are described in Risk Categories.