Cisco Webex Teams
Access Levels: Advanced | Enterprise
The Censys Attack Surface Management (ASM) integration with Cisco Webex Teams sends messages to Teams when ASM observes a new risk on your attack surface. You can use these messages to support triage, prioritization, and remediation.
Prerequisites
- You must have an active Webex subscription that includes messaging for Webex Teams.
- You will need the URL of the Webex space you wish to use with this integration.
- We recommend that you create a dedicated Webex space for these messages.
- Ensure that the space is available to any staff members who need to see messages sent from the Censys ASM integration.
- Optionally, you may want to create a dedicated user and API credentials for this integration. Webex messages from ASM will display the username that makes the Webex connection.
Configure the integration in Censys ASM
-
Go to the Censys ASM web console and click Integrations.
-
Locate Webex and click Set Up.
-
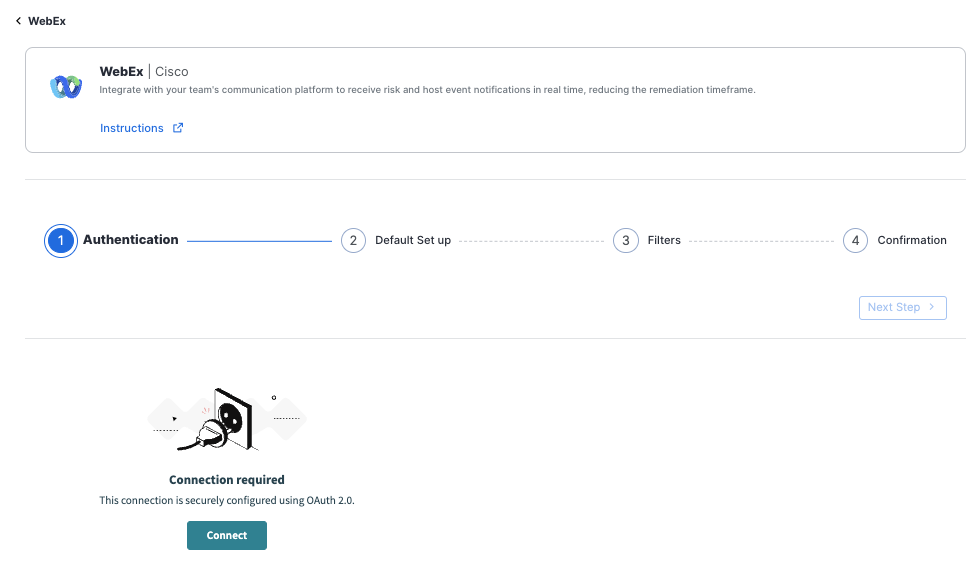
Click Connect. You will be prompted to log in to Webex.
-
After you complete the Webex login, you will be redirected to the Censys ASM integration wizard.
-
Click Next Step.
-
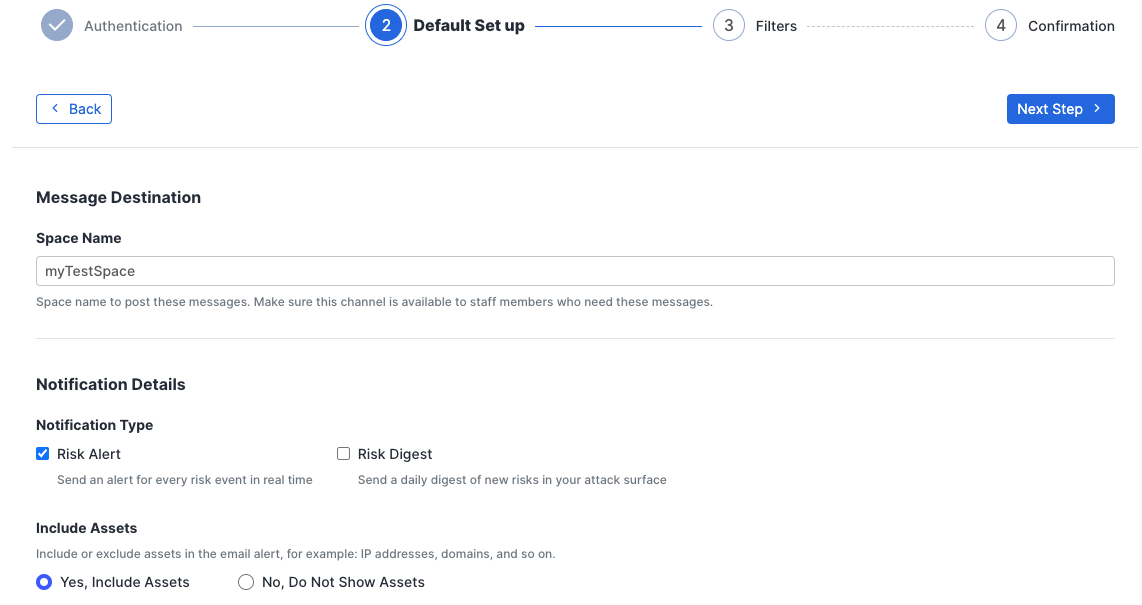
On the Default Set Up page, configure the following:
- Space Name: Enter the Webex space name where you want messages to be sent.
- Notification Type: Select the notification type of the alerts you are sending to your Webex space for this integration.
- Include Assets: Select whether to include assets, such as IP addresses and domains, in the messages sent to your space.
-
Click Next Step.
-
On the Filters page, select which risk severities will send messages to your space.
-
Click Submit, then click Done.
Modify your integration
If you need to make changes to your integration settings or if you need to disconnect the integration:
-
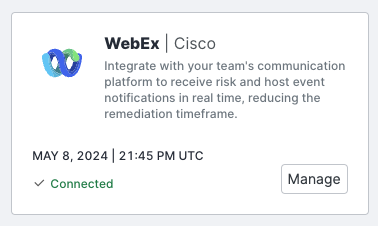
Go to the Censys ASM web console and click Integrations.
-
Locate Webex and click Manage.
-
On the Authentication page, click Edit Setup. Then, at the bottom of the page, click Disconnect.
- You must disconnect the integration in order to make configuration changes.
-
Go through the setup wizard, as described in the section above, and make any necessary changes.