Azure Active Directory SSO
Access Levels: Pro and above
Use this article to enable SSO with Azure Active Directory as your Identity Provider for Censys authentication.
Prerequisite
Before you configure Azure Active Directory, ensure that you have enabled and configured SSO in the Legacy Search web UI. You will need information from the SP Details section of the web UI to complete setup.
Add Censys as an SSO-enabled application
-
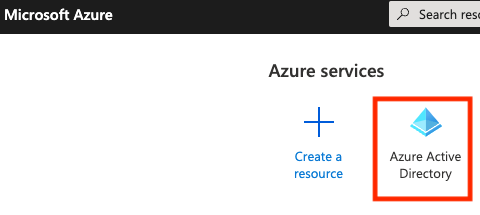
Log into Azure Active Directory and click the Azure Active Directory service.
-
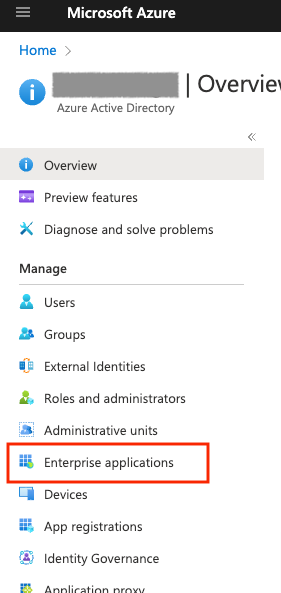
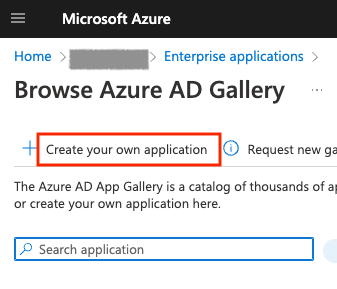
On the left navigation, click Enterprise Applications.
-
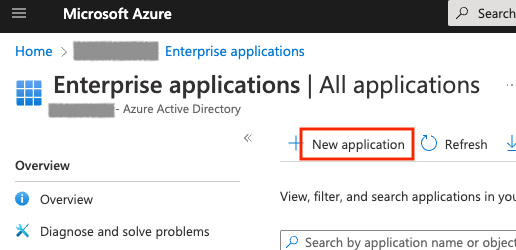
In the menu bar near the top of the page, click New Application.
-
Click Create your own application.
-
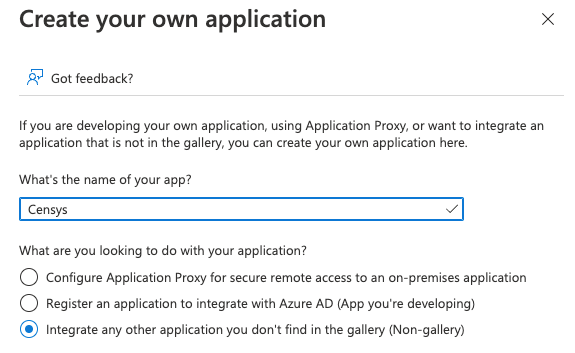
In the dialog box that appears, name the app Censys.
-
Select Integrate another application not found in the gallery (Non-gallery) and click Save.
-
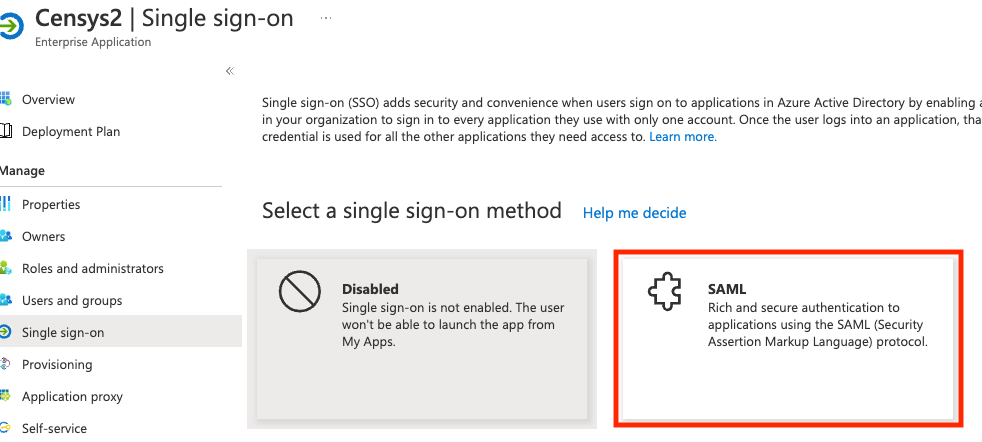
From the Overview page, in the Getting Started section, click the Set up single sign on card.
-
On the next page, select SAML for the single sign-on method.
-
Provide information about the Censys application:
-
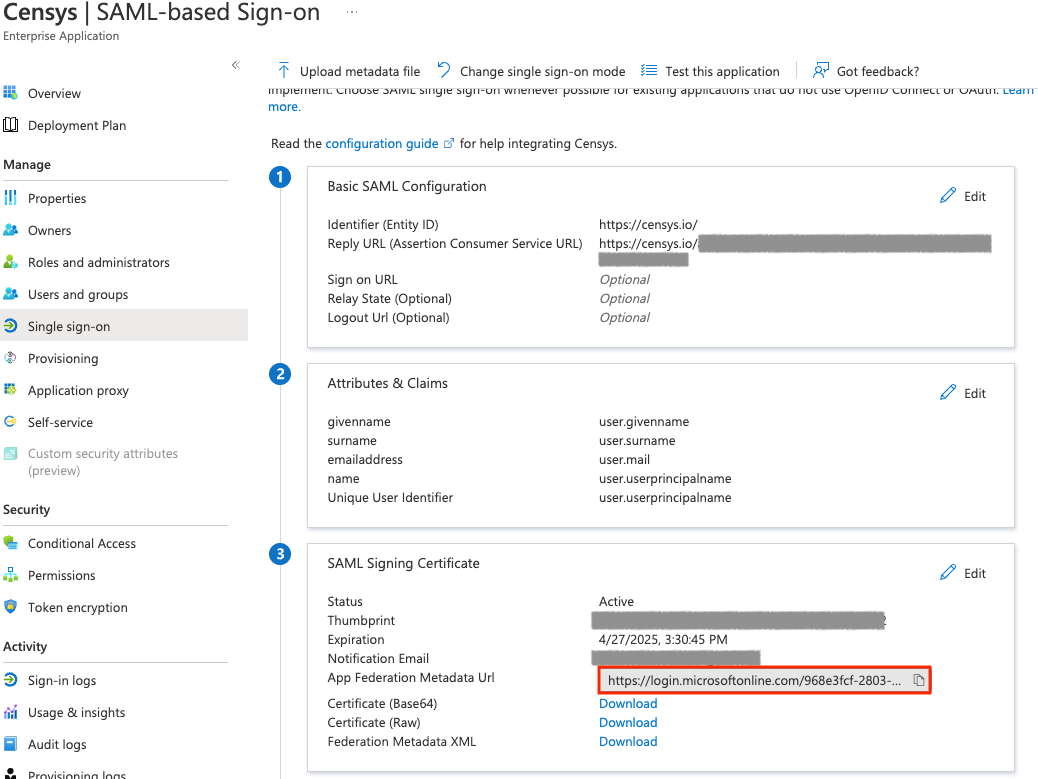
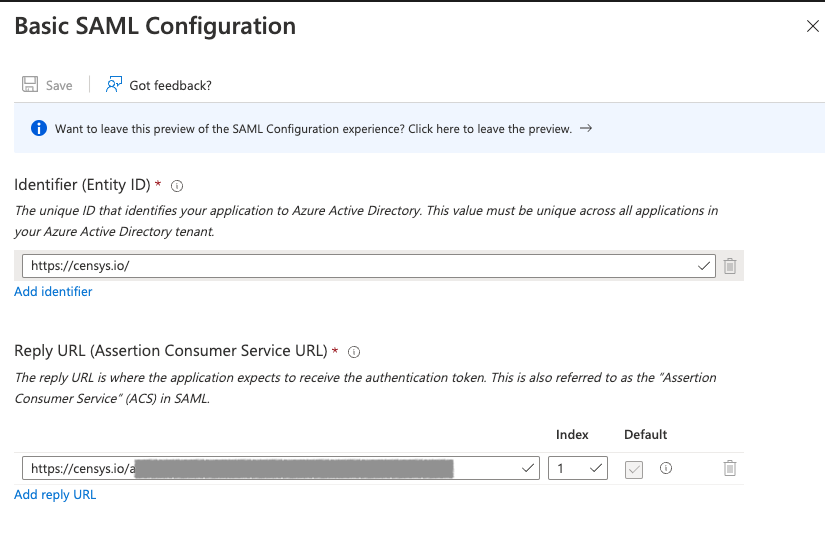
For the Identifier field, copy the Entity ID URL from the SP Details section of the Censys Authentication Page.
-
For the Reply URL field, paste the Assertion Consumer Service URL from the SP Details section of the Censys Authentication Page.
-
Leave the Sign Authentication Requests checkbox selected.
-
-
Click Save.
-
In the Attribute & Claims section, verify the following claims are present and click Save when you're done:
- Required Claim:
- Name:
nameidentifier - Name identifier format: Email Address
- Source: Attribute
- Source attribute:
user.userprincipalname
- Name:
- Additional Claims
-
Name: givenname
-
Namespace:
[http://schemas.xmlsoap.org/ws/2005/05/identity/claims](http://schemas.xmlsoap.org/ws/2005/05/identity/claims) -
Source: Attribute
-
Source attribute:
user.givenname -
Name: surname
-
Namespace:
[http://schemas.xmlsoap.org/ws/2005/05/identity/claims](http://schemas.xmlsoap.org/ws/2005/05/identity/claims) -
Source: Attribute
-
Source attribute:
user.surname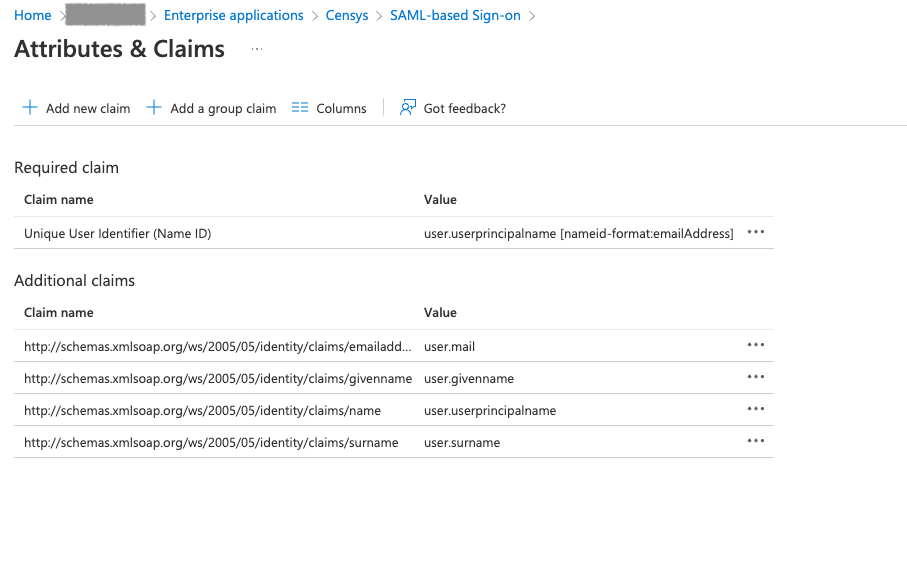
-
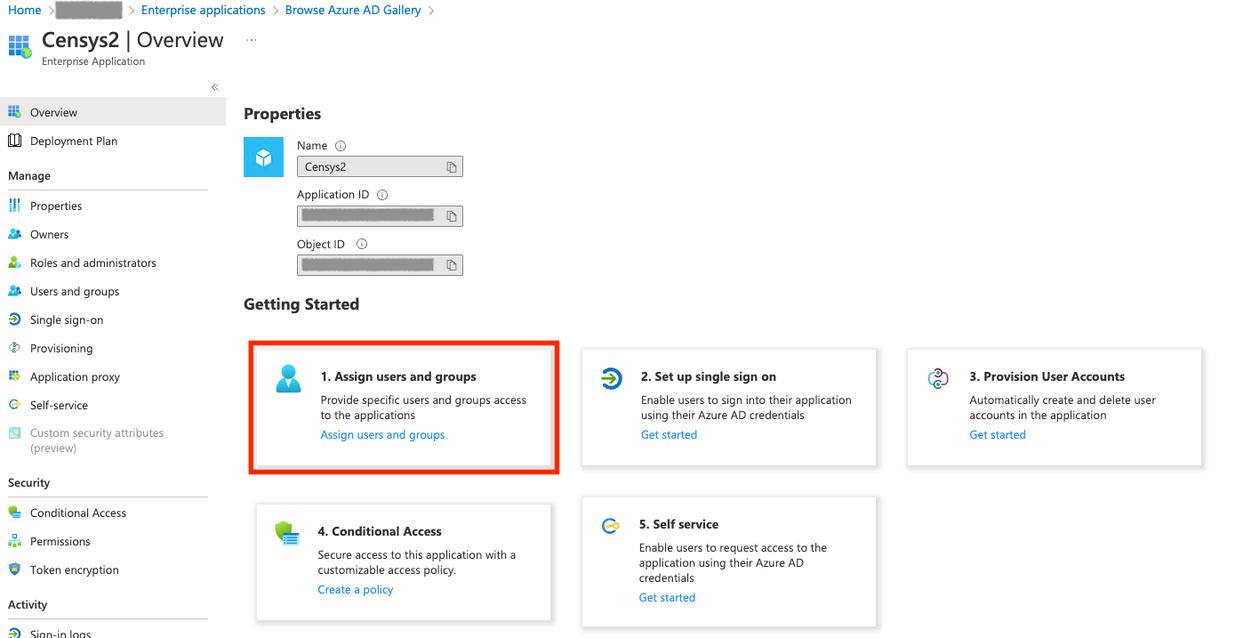
Assign users
-
From the Overview page, click Assign users and groups.
-
Select the people or groups who need access to Censys.
Next steps
With Azure configured to authenticate Censys users, you're ready to set up Censys for SAML authentication
Copy the App Federation Metadata URL on the SAML Signing Certificate card in the Single Sign On settings of your newly configured enterprise application to set it up with one click on the Censys side.