Okta SSO
Access Levels: Pro and above
Use this article to enable SSO with Okta as your Identity Provider for Censys authentication.
Prerequisite
Before you configure Okta, ensure that you have enabled and configured SSO in the Legacy Search web UI. You will need information from the SP Details section of the web UI to complete setup.
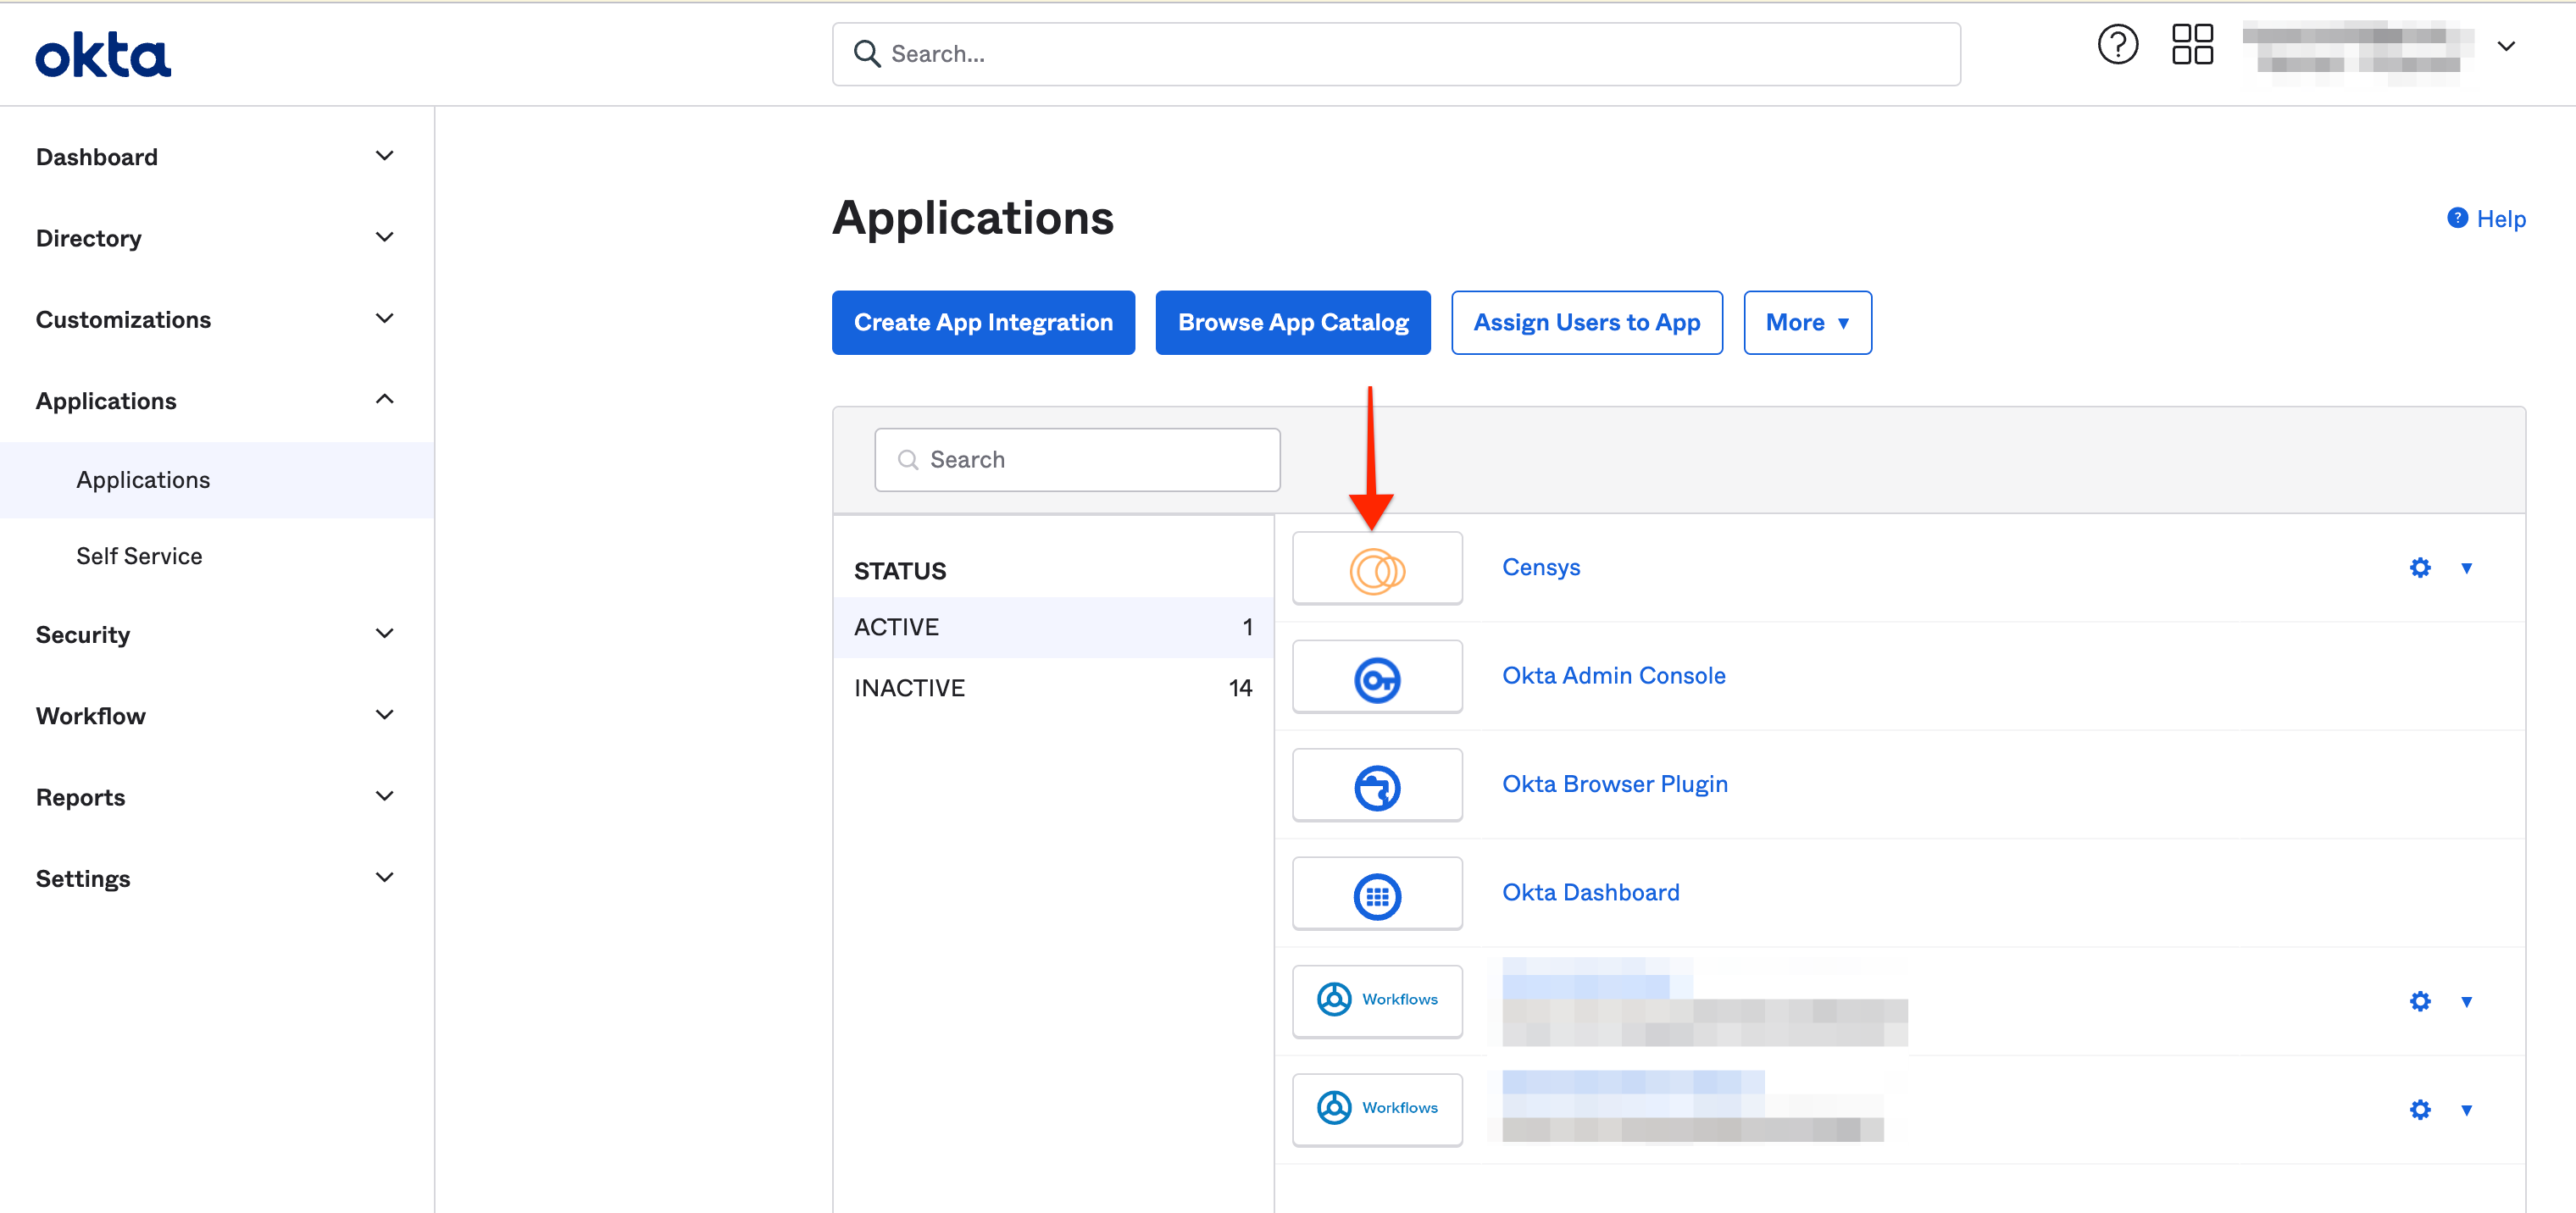
Add Censys as an SSO-enabled application
-
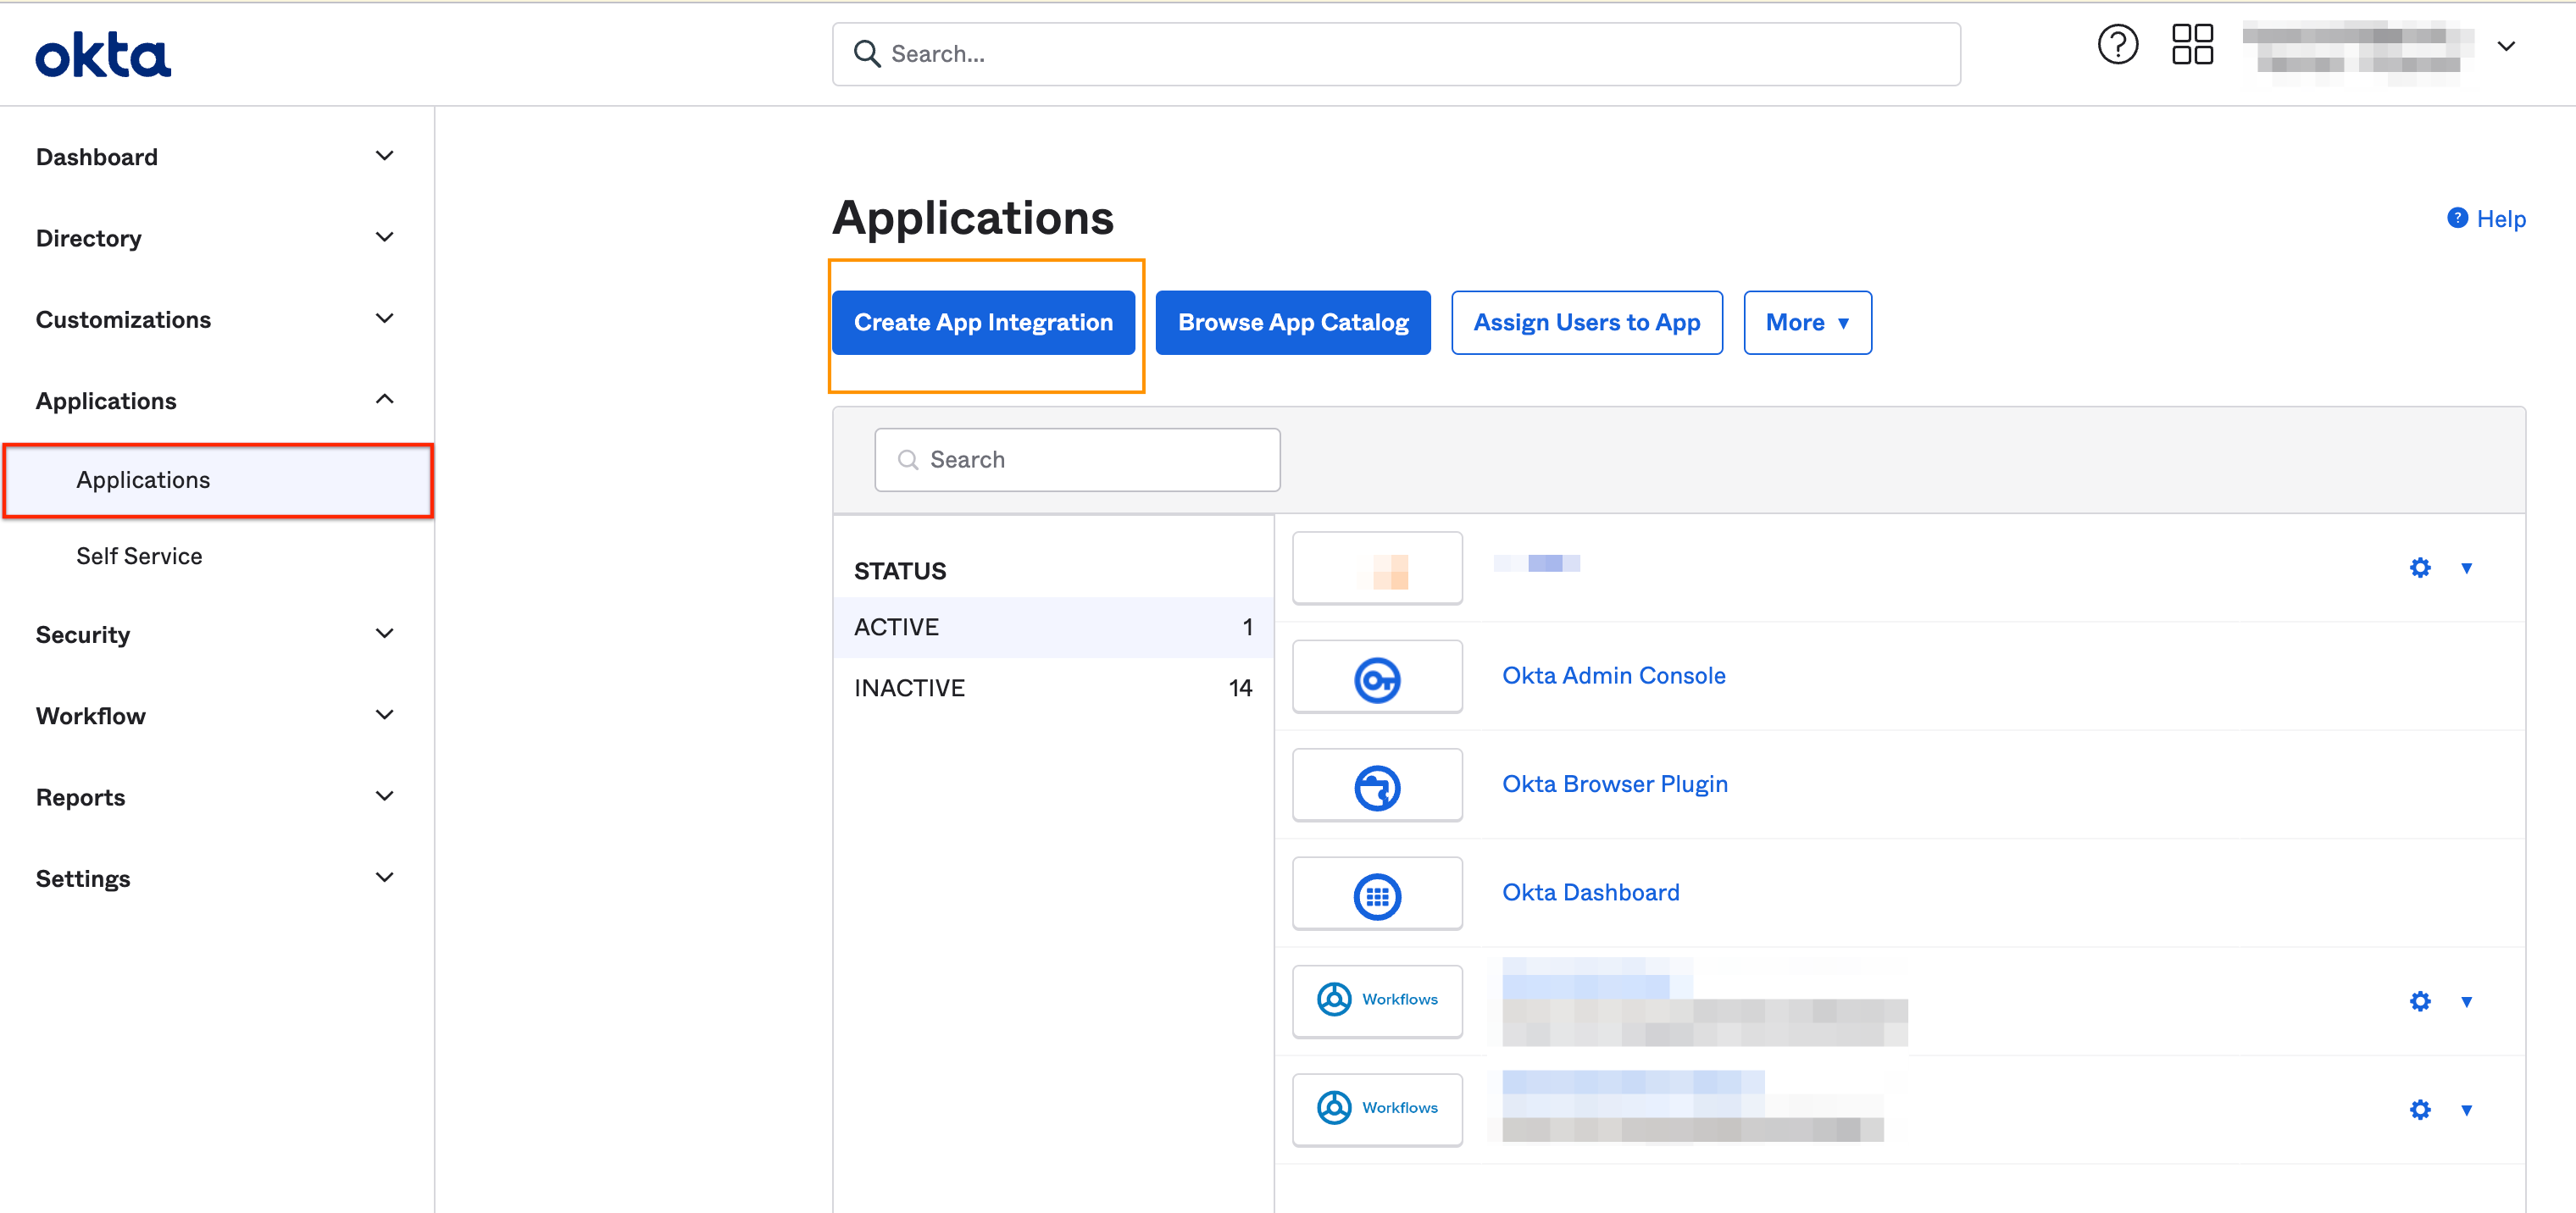
On the Okta dashboard, click the Applications nav item in the left navigation panel and select Applications.
-
Click Create App Integration.
-
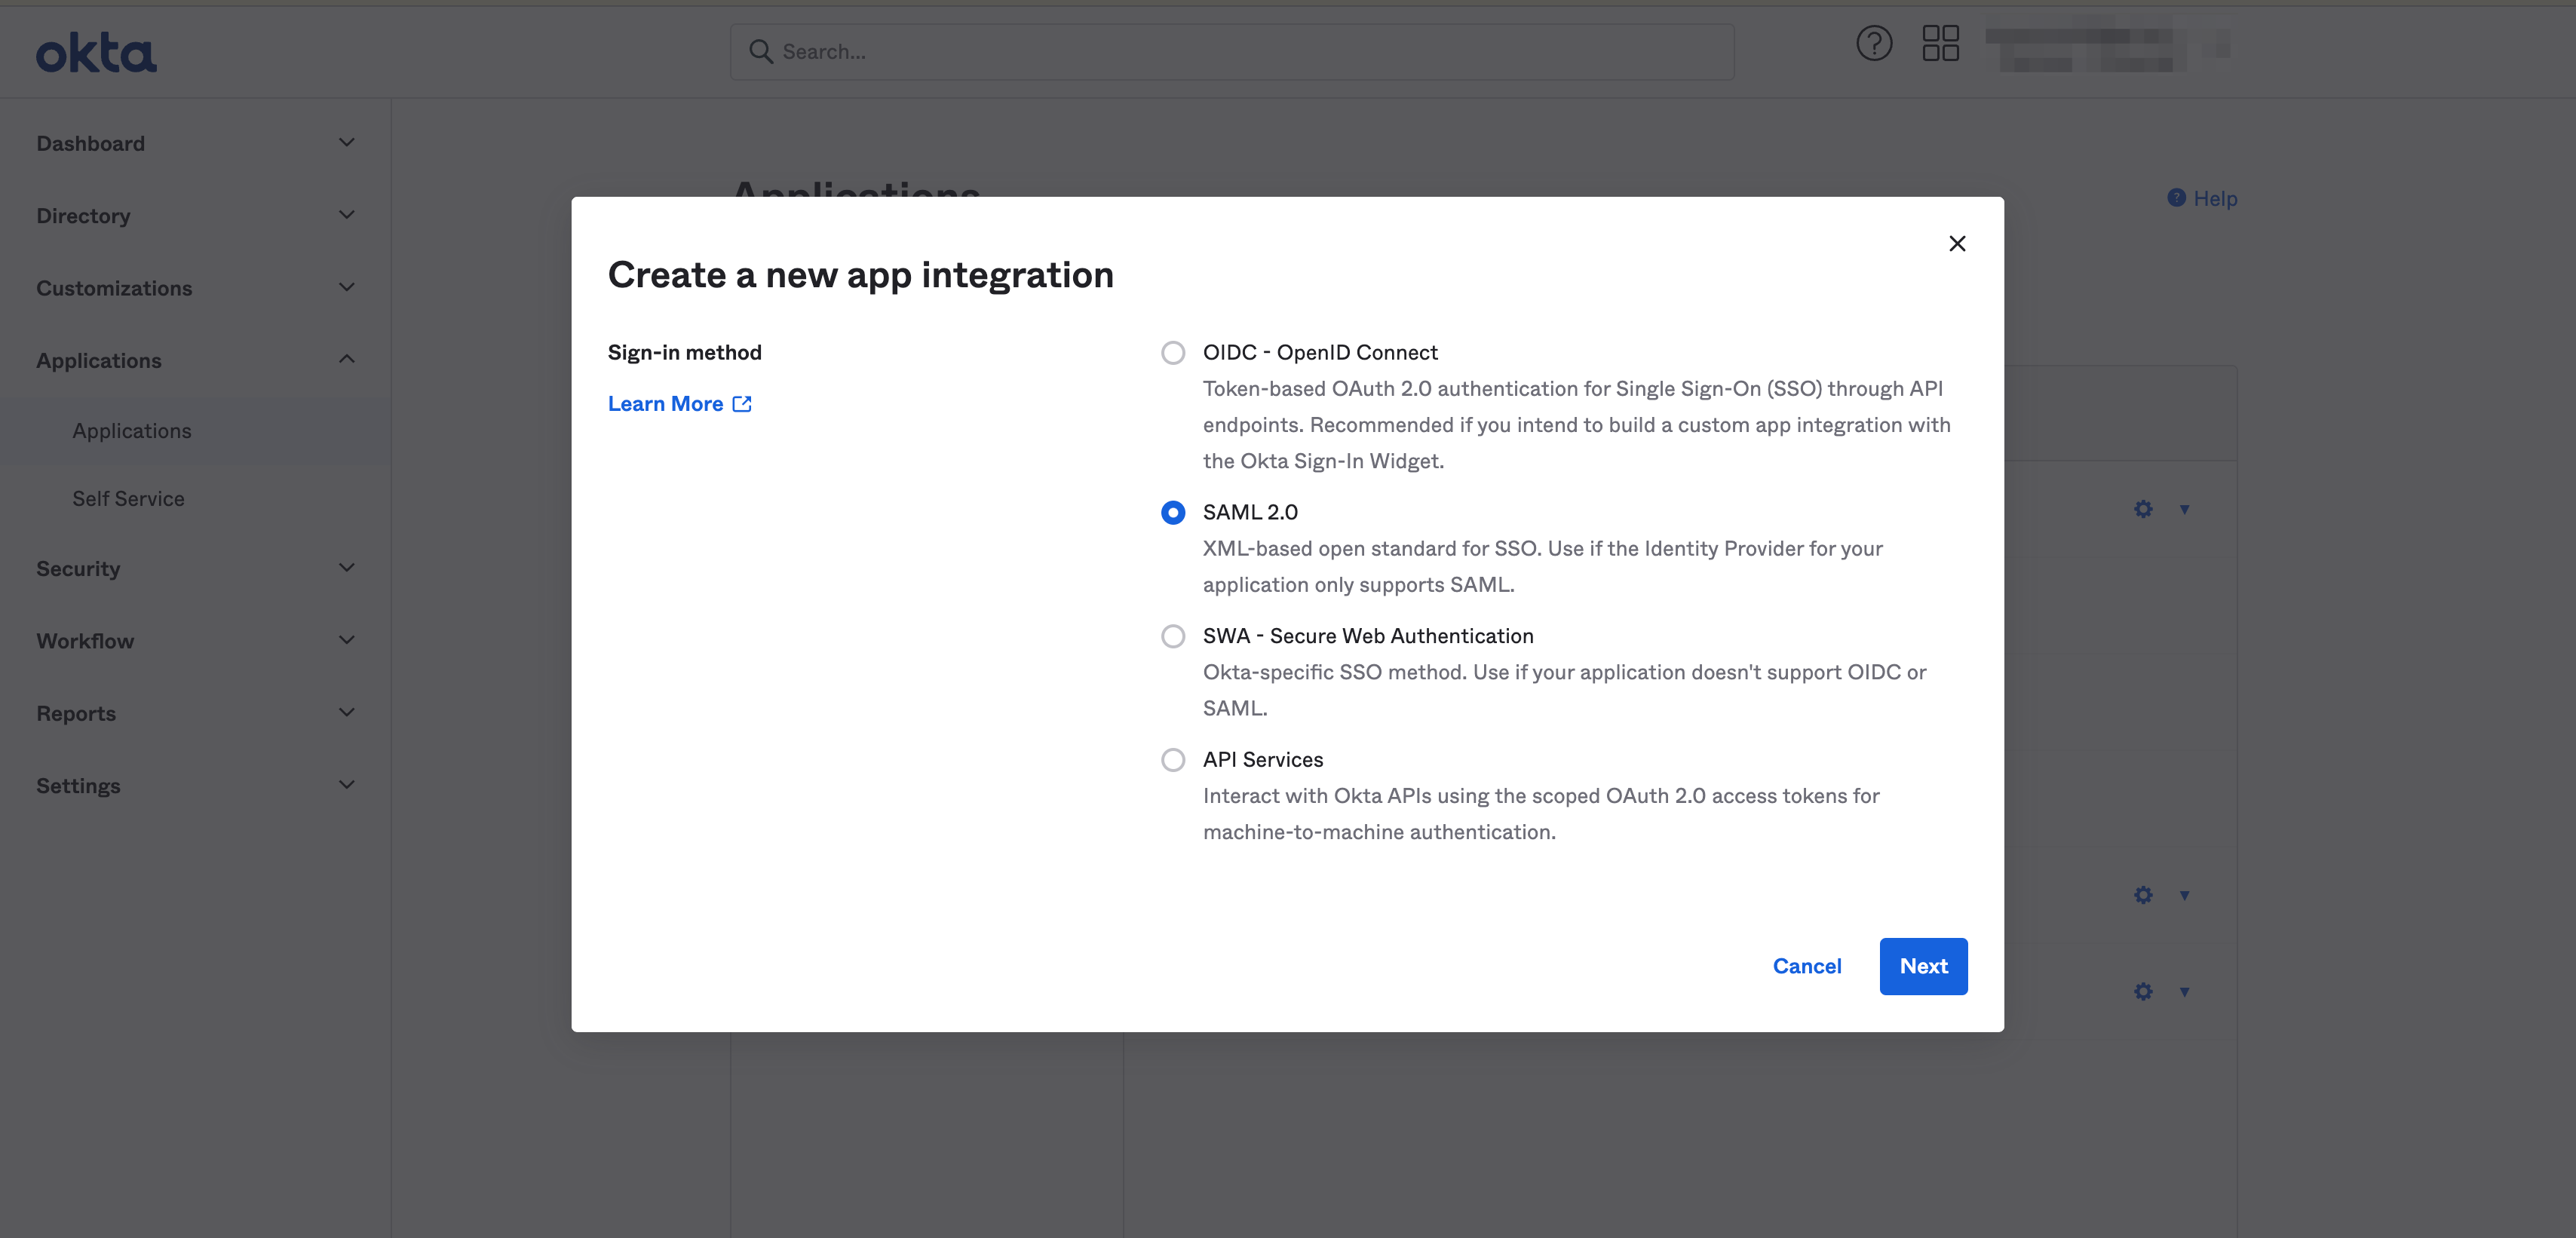
From the dialog box select SAML 2.0 for the Sign-in method. Click Next.
Configure General Settings for Censys
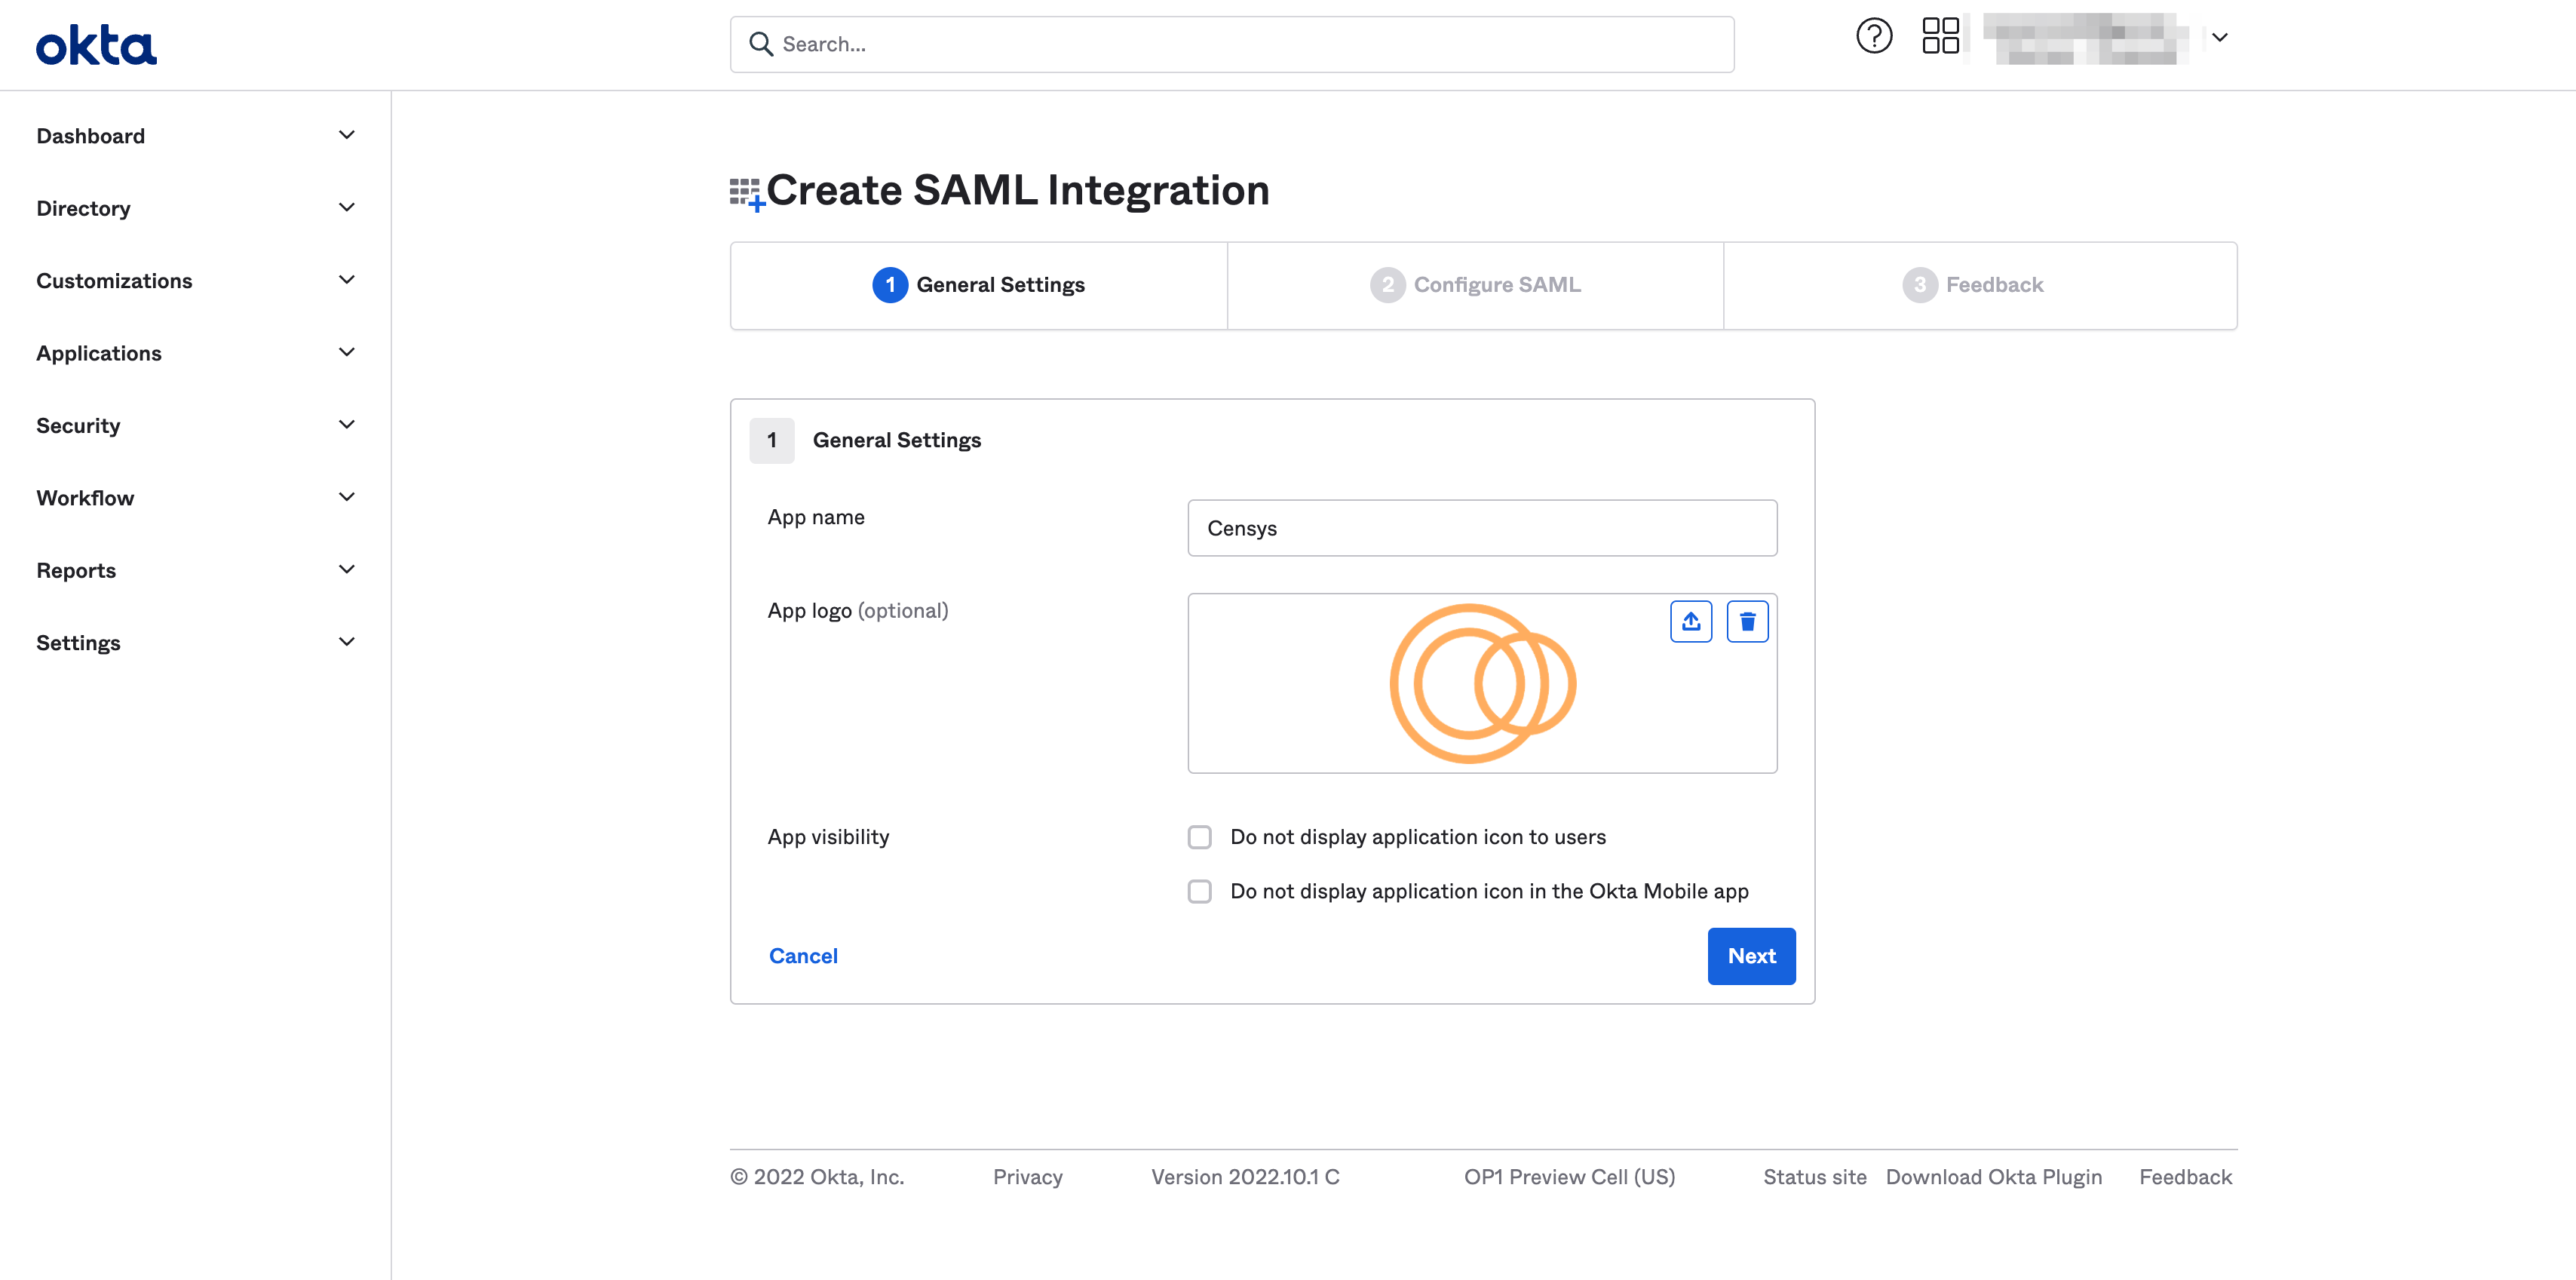
- In General Settings, provide general application details, including:
-
An App Name of Censys.
-
The Application logo.
-
App visibility settings aligned to your preference for IdP-initiated login from your SSO portal.
-
Click Next.
-
Configure SAML Settings for Censys
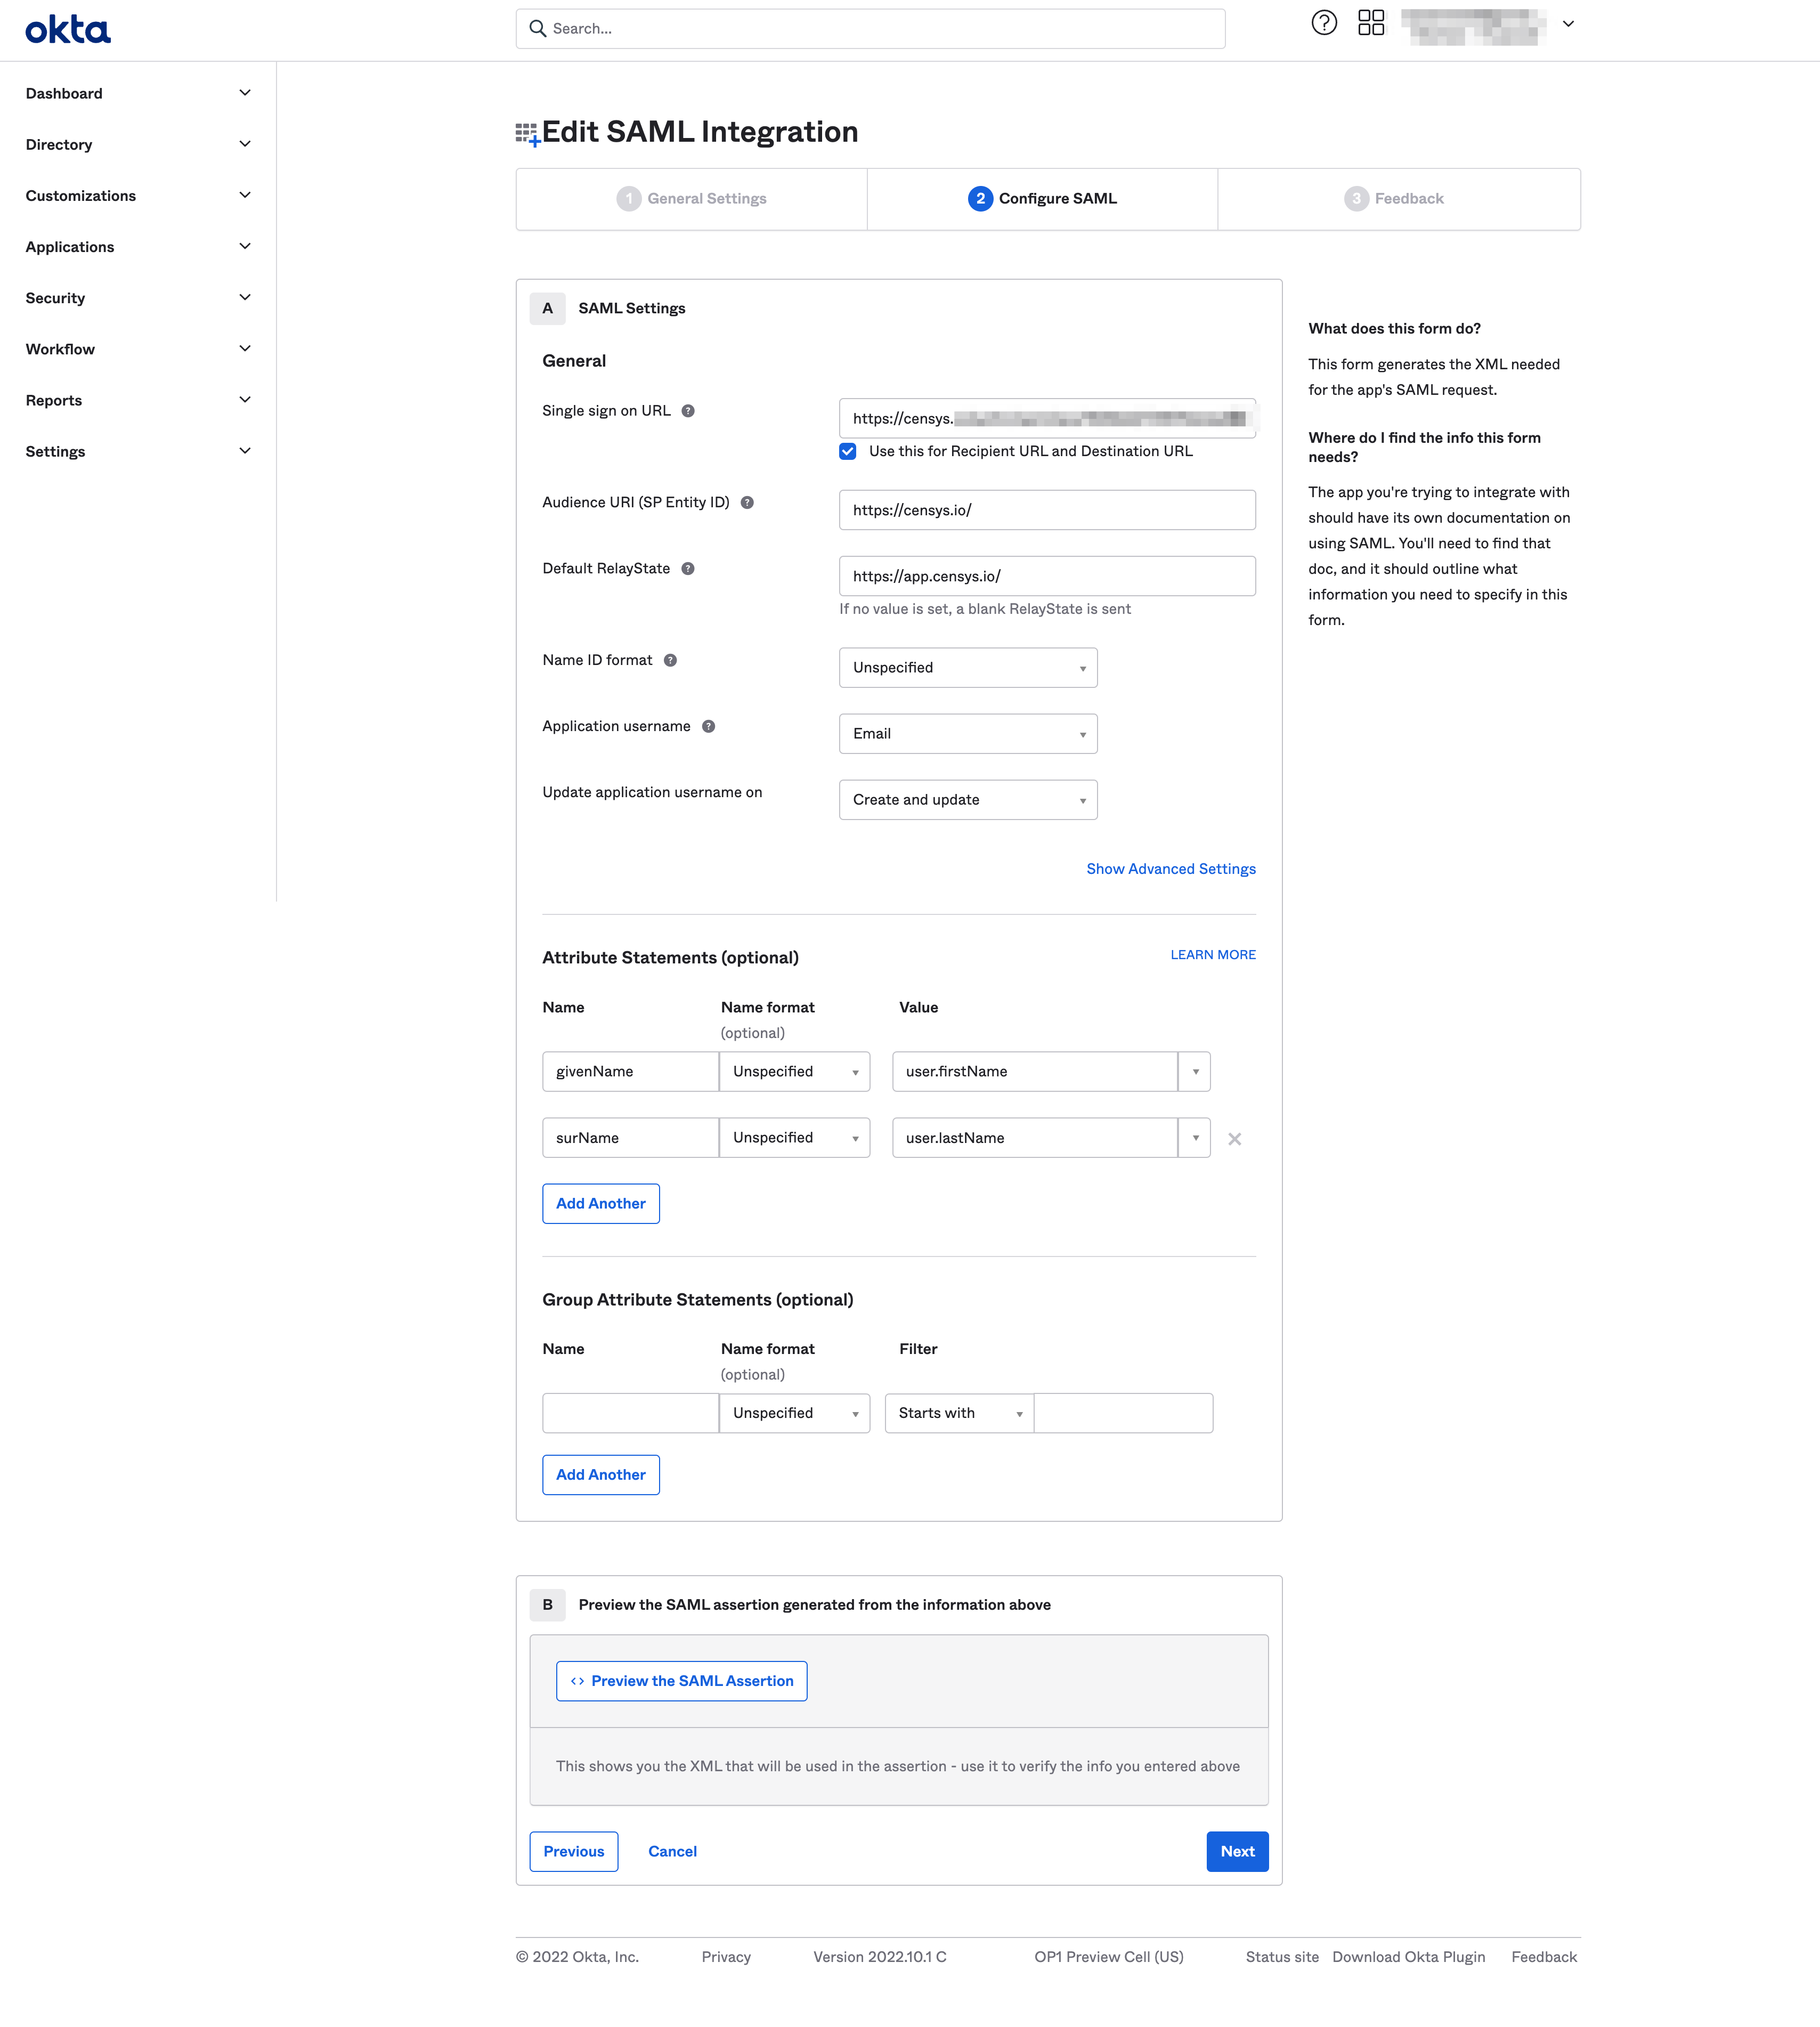
- In Configure SAML, provide information about the Censys application:
-
For the Single sign on URL field, paste the Assertion Consumer Service URL from the SP Details section of the Censys Authentication page.
-
For the Audience URI field, copy the Entity ID URL from the SP Details section of the Censys Authentication page.
-
To initiate an IdP login, provide the Censys Search or Censys Attack Surface Management URL for the Default Relay State.
- For Censys Attack Surface Management, enter
https://app.censys.io/. - For Censys Legacy Search, enter
https://search.censys.io/.
- For Censys Attack Surface Management, enter
-
For the Name ID format field, select Unspecified.
-
For the Application username field, select Email.
-
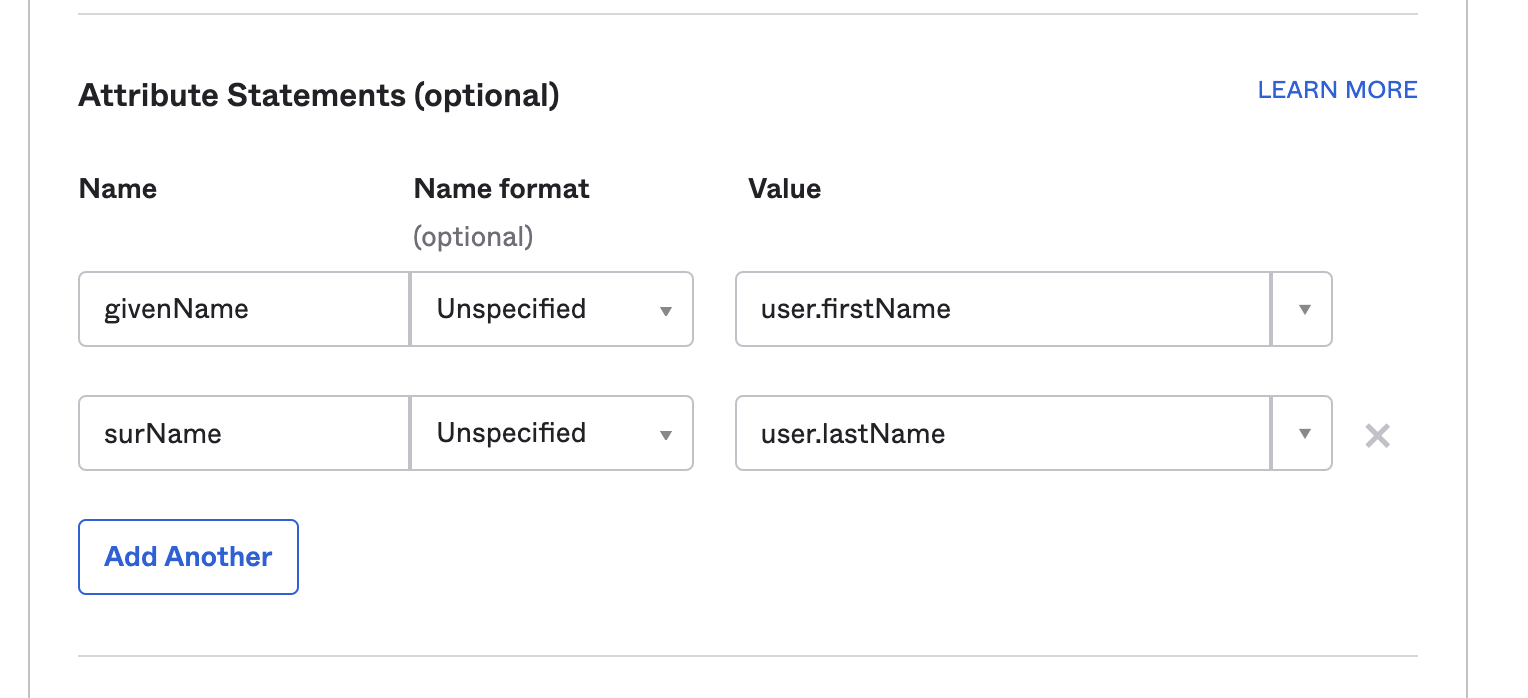
- In the Attribute Statements section, map Okta Names to the Values that Censys Search expects. The name format should be unspecified for all.
-
Map the Okta givenName to the Censys Value user.firstName.
-
Map the Okta surName to the Censys Value user.lastName.
-
Click Next.
-
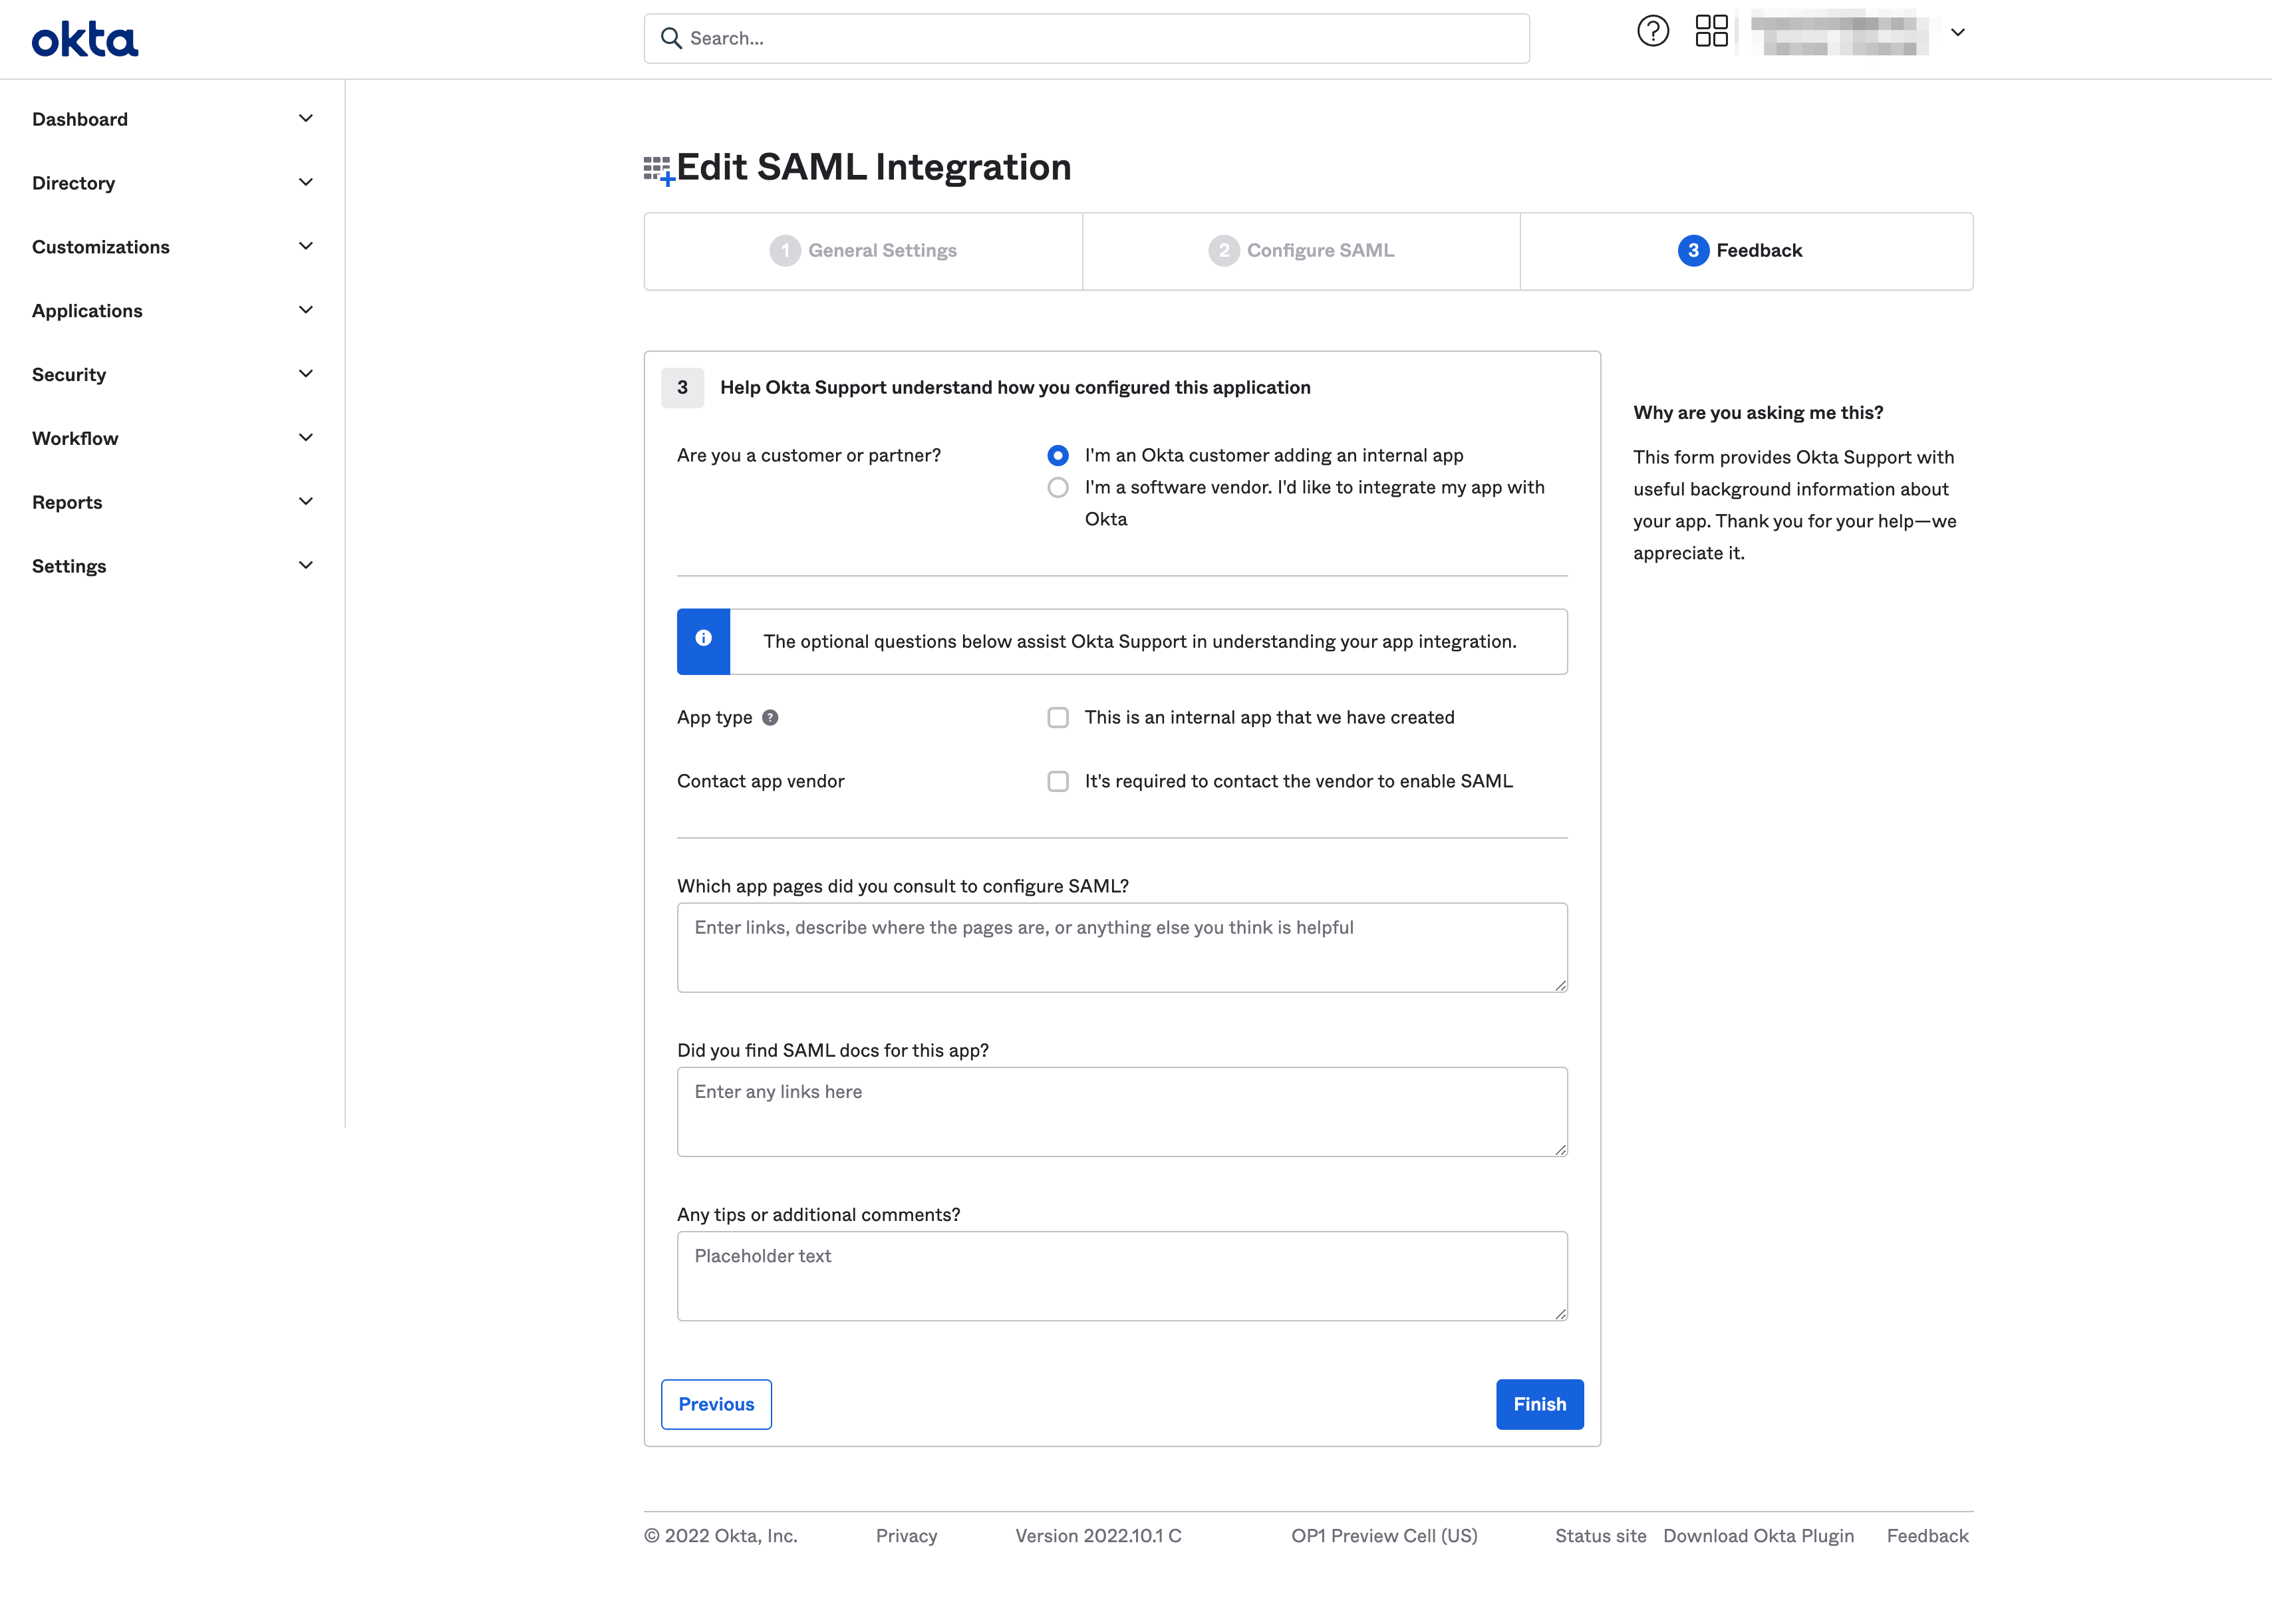
Complete the Okta Setup for Censys
-
On Feedback, select I’m an Okta customer adding an internal app, and then click Finish.
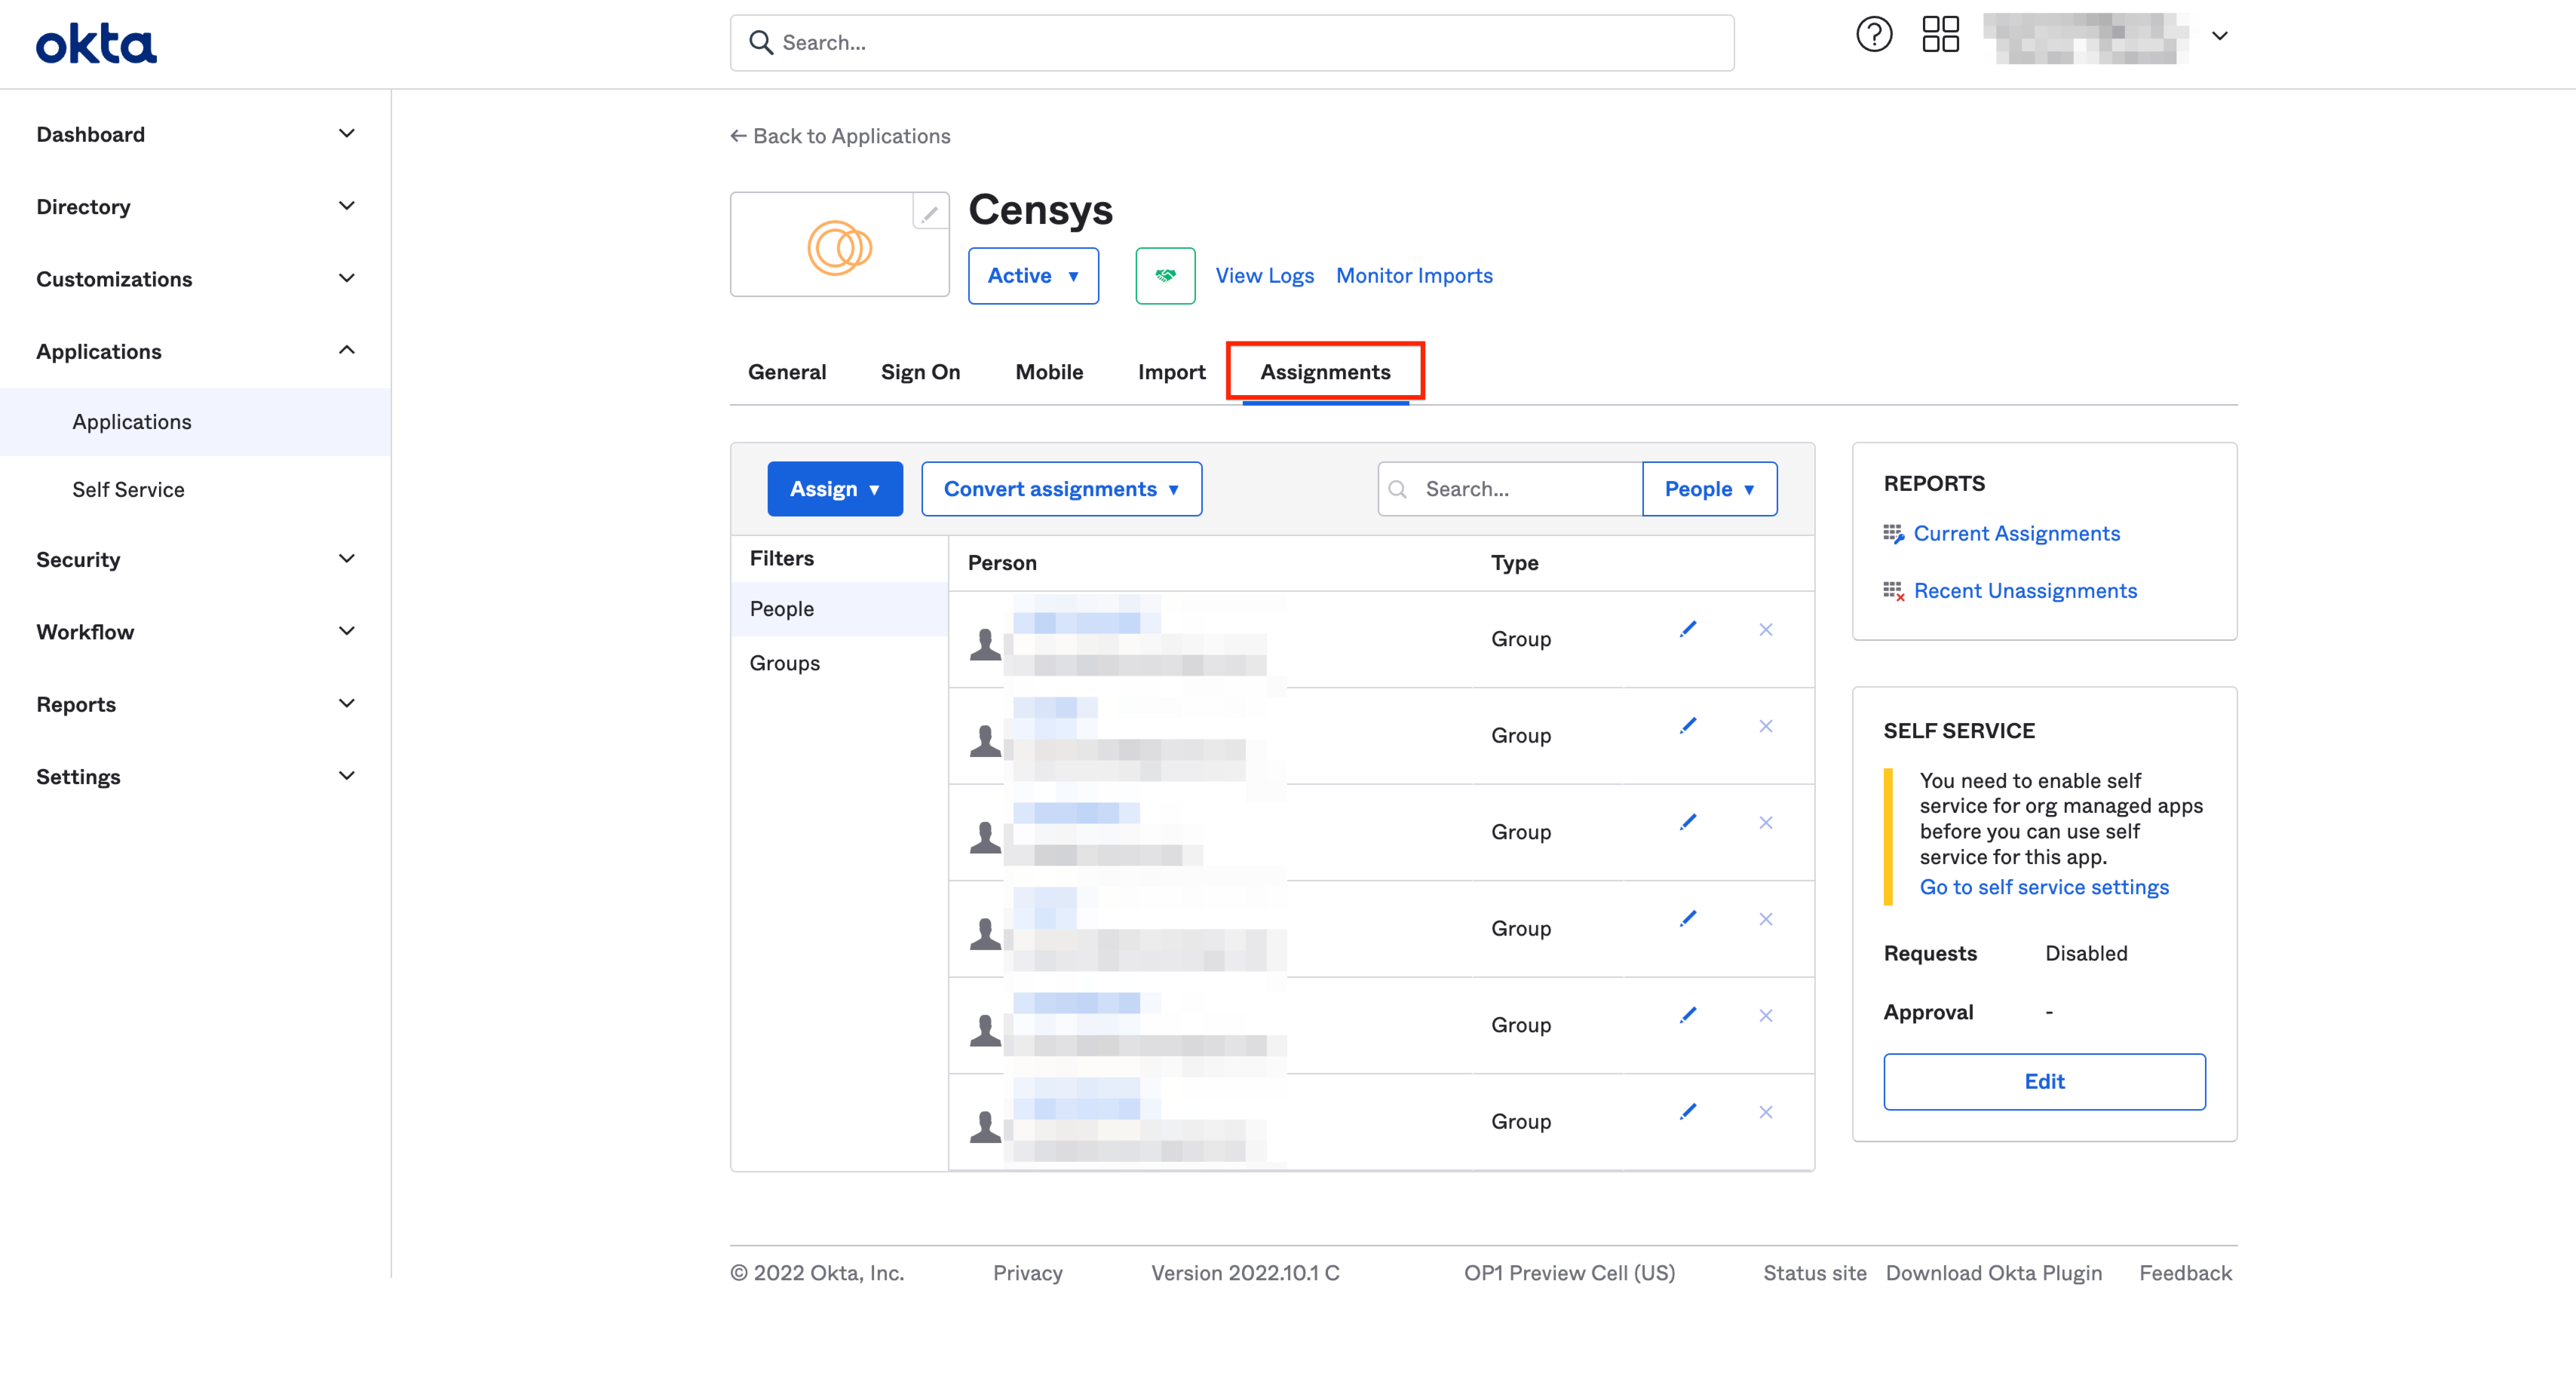
Assign Users to the Censys Application
-
Open the Censys Search application from the Applications page in the Okta app.
-
Navigate to the Assignments tab. Select the people or groups to have access to Censys Search.
Next steps
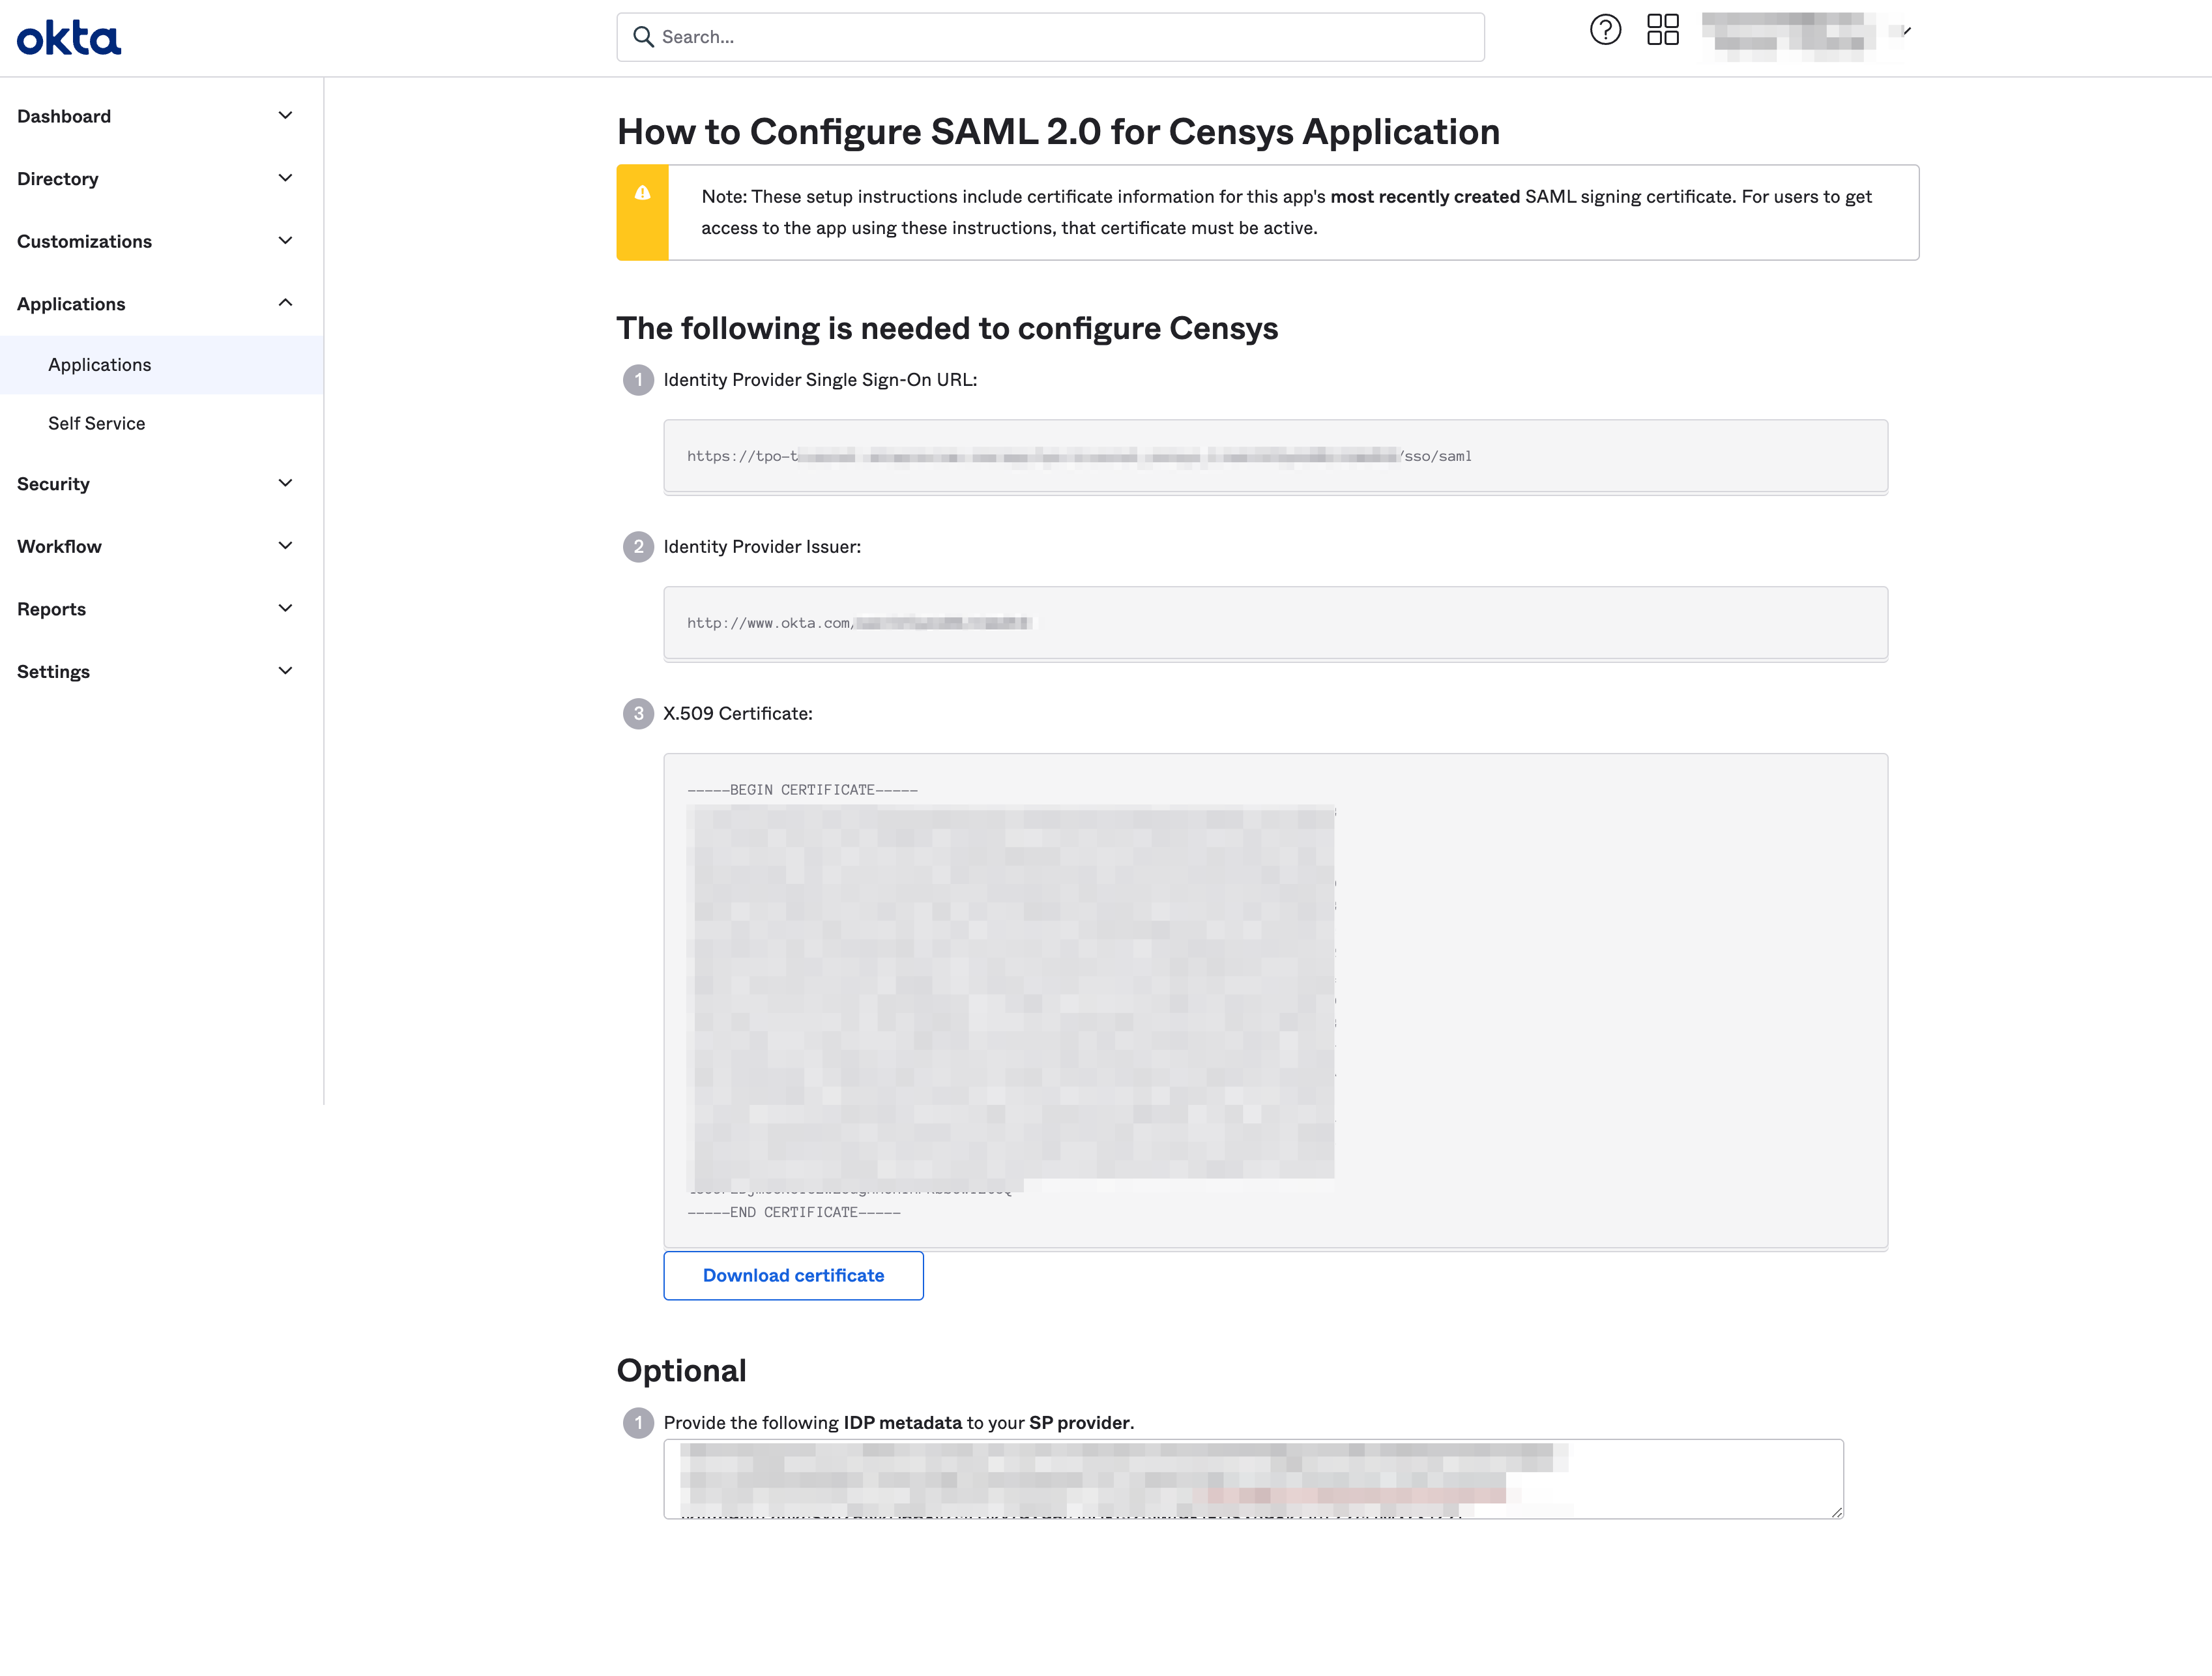
With Okta configured to authenticate Censys Search users, it’s time to configure Censys for SAML authentication.
Use the information provided on the Sign On tab of the Censys Search application halfway down the page. Click View SAML Setup Instructions in the right navigation panel.
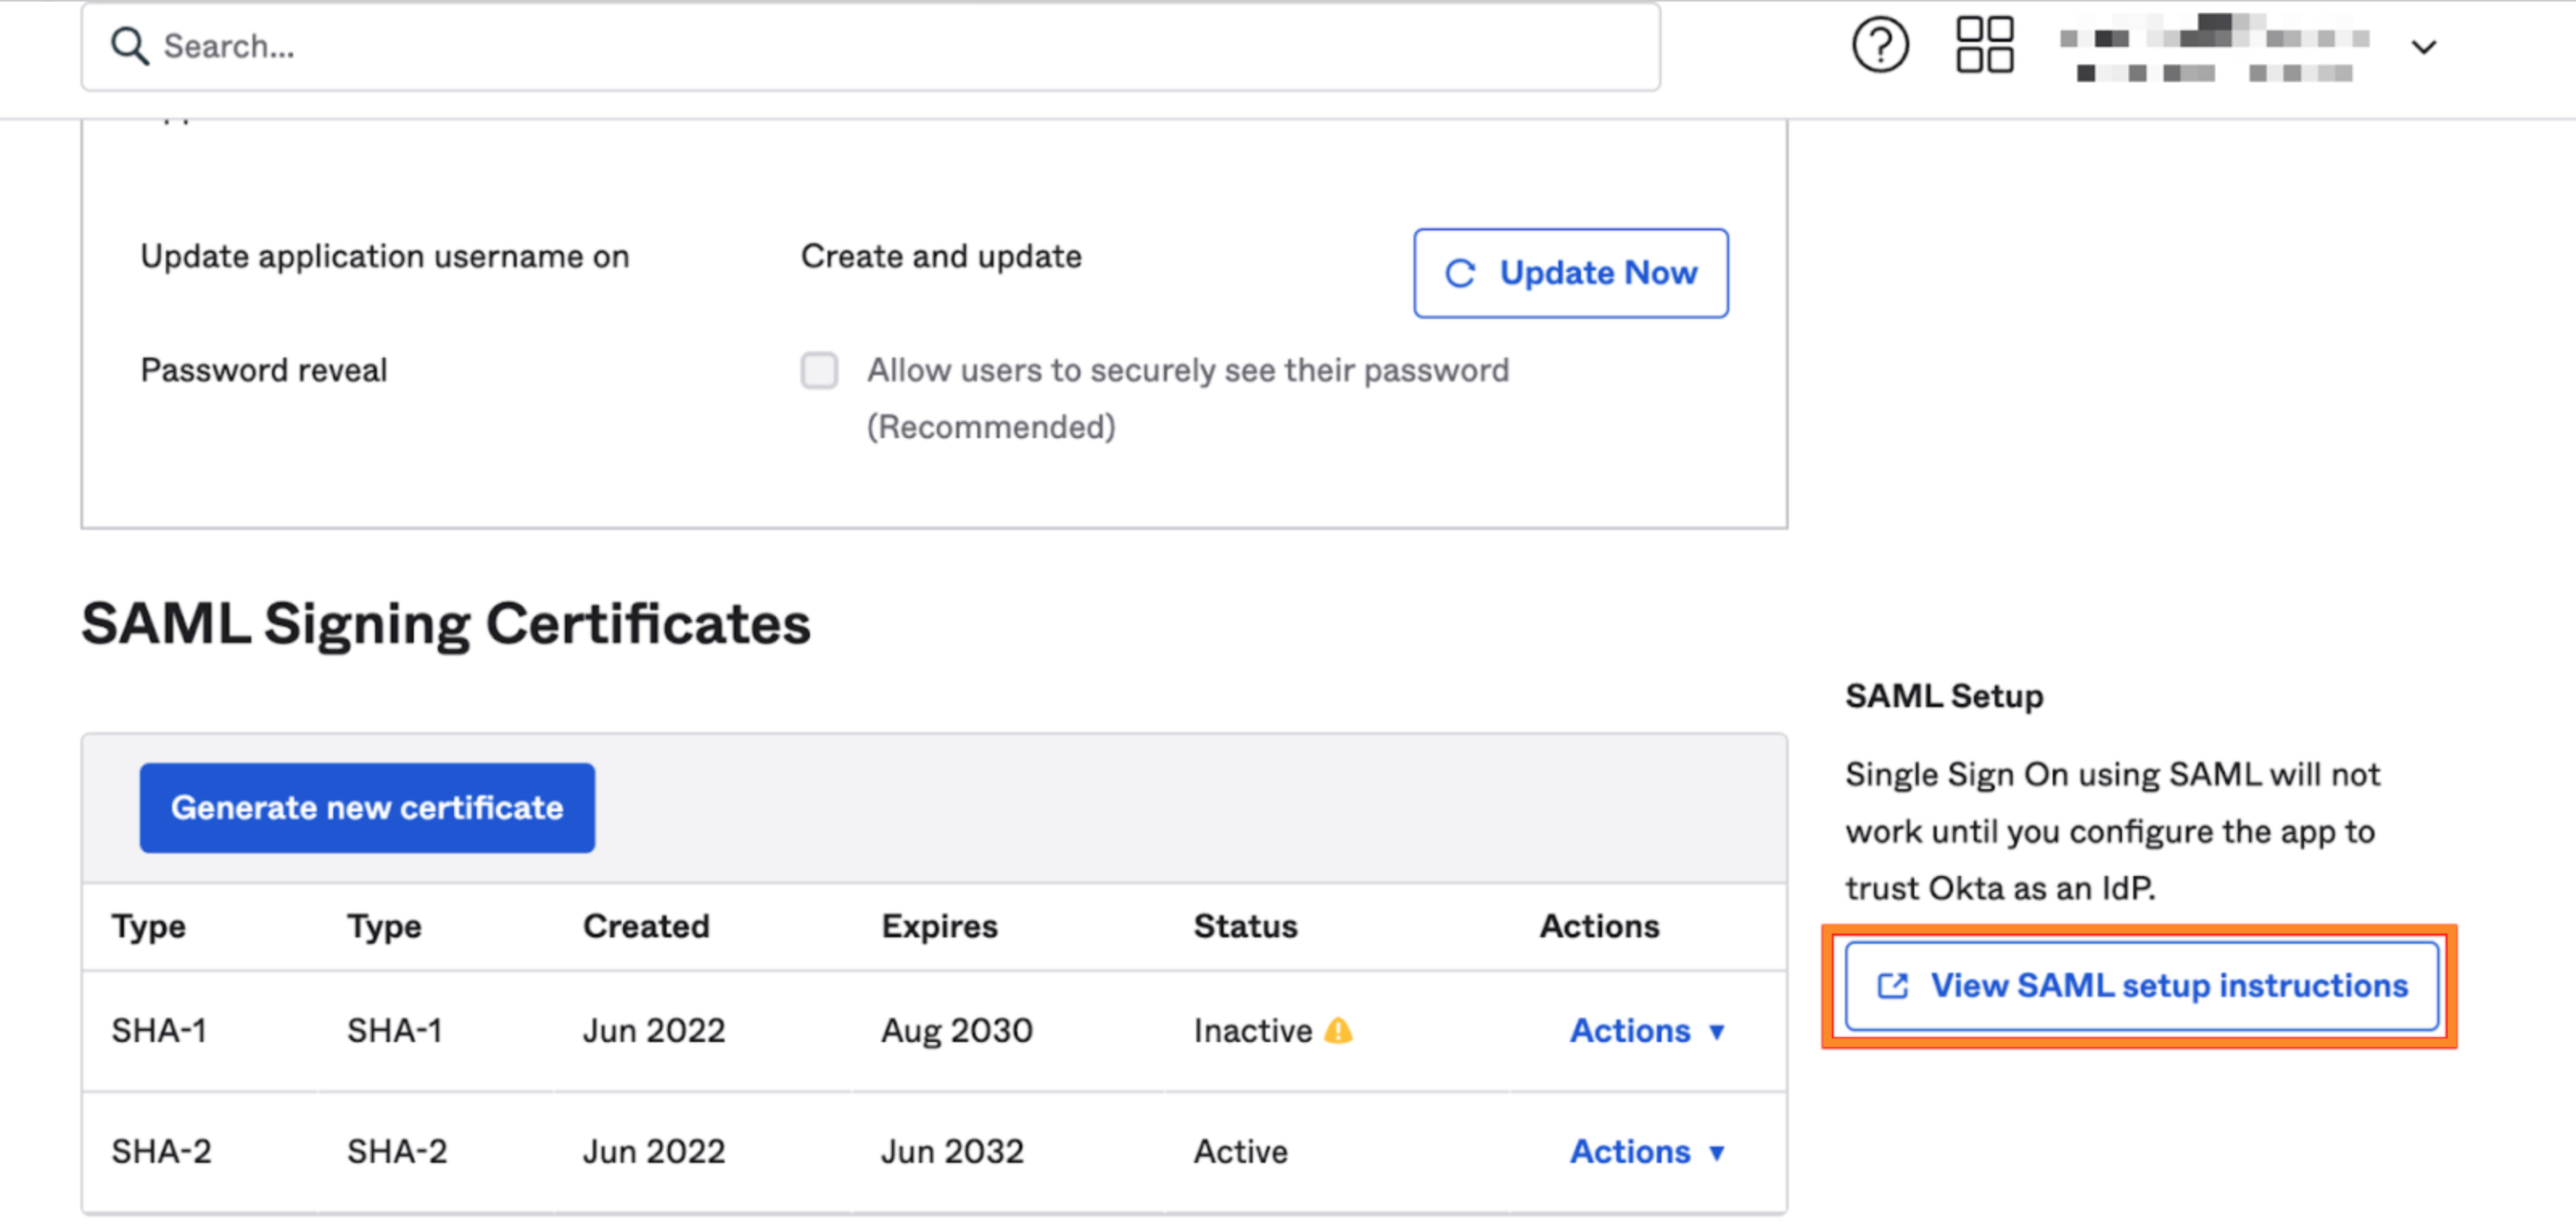
A page opens with information that must be configured in Censys Search.